This excellent content from the Hackaday writing crew highlights recurring topics and popular series like Linux-Fu, 3D-Printering, Hackaday Links, This Week in Security, Inputs of Interest, Profiles in Science, Retrotechtacular, Ask Hackaday, Teardowns, Reviews, and many more.
Quadcopters are useful little flying machines. They can be used in all sorts of applications, from mapping, to inspecting long pipelines, to border surveillance, or simply for fun. They all have one thing in common, however – a relatively short battery life. Because quadcopters use brute force to churn through the air, they require a lot of energy. More energy for longer flights means more batteries. More batteries means more weight to carry, which requires even more energy. If you want longer flight times, something has to change. Or does it?
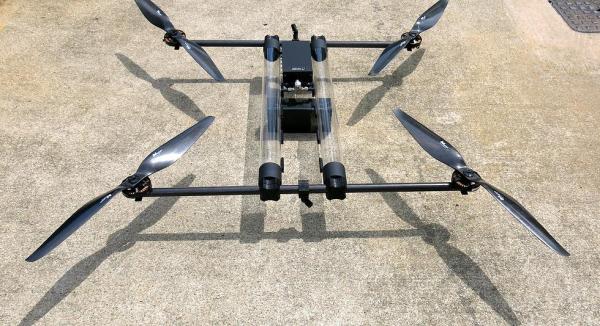
A small start-up company called Horizon Unmanned Systems based out of Singapore claims their quadcopter can fly for up to four hours on a single charge, or up to two and a half hours carrying a 2.2 pound load. They claim to be able to pull this off with a novel approach. First, they fill the hollow frame of the quadcopter with hydrogen gas. They use that gas to power a cute little miniaturized fuel cell LiPo battery hybrid gizmo. And that’s about it. The rest is just standard quadcopter stuff.
The secret to all of this is the miniaturized fuel cell, and how it works. Unfortunately, this is as close as we’re going to get (pdf) for a datasheet. Fuel cells are nifty devices that take hydrogen and oxygen and convert them into water, along with electricity. While that sounds simple, making one is not. And making a miniature one light enough for a quadcopter is down right hard.
How would you increase the flight time of quadcopters? Fuel cells are a great idea, but is this technology within the reach of the modern hacker? We’ve seen people make them from scraps out of a junkyard, but how would you miniaturize it and make it light enough to be used as a practical power supply for a quadcopter?
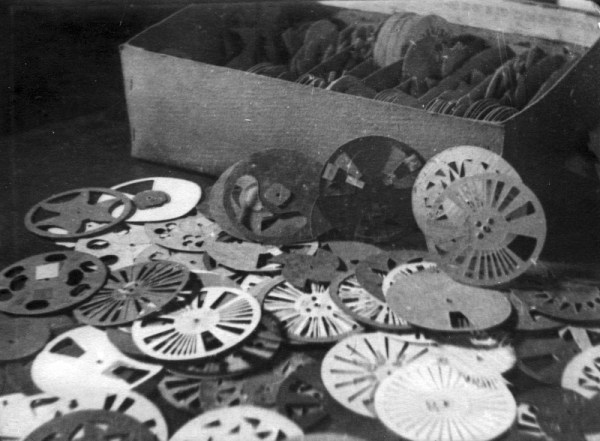
A few of them experimented with the optical film soundtrack itself, drawing waveforms directly upon it. [Evgeny Sholpo] created an optical synthesizer he called the Variophone. It used cardboard disks with intricate cutout patterns that resembled spinning, sonic snowflakes.
During the early 1930s, an artist named [Nikolai Voinov] created short animated films that incorporated the cut paper sound technique. [Voinov]’s soundtrack looked like combs of varying fineness. For his animated figures, [Voinov] cut and pieced together characters from paper and made them move in time to his handmade paper soundtrack.
In [Voinov]’s “Dance of the Crow”, an animated crow struts his stuff from right to left and back again while working his beak in sync with the music. The overall effect is like a chiptunes concertina issuing forth from a crow-shaped pair of bellows. It’s really not to be missed.
Logic analyzers historically have been the heavy artillery in an engineer’s arsenal. For many of us, the name invokes mental images of large HP and Tektronix iron with real CRT screens. Logic connections were made through pods, with hundreds of leads weaving their way back to the test equipment. The logic analyzer came out when all else failed, when even a four channel scope wasn’t enough to figure out your problems. Setting them up was a pain – if you were lucky, the analyzer had a PC keyboard interface. If not, you were stuck typing your signal names into the front panel keyboard. Once setup though, logic analyzers were great at finding bugs. You can see things you’d never see with another tool – like a data bus slowly settling out after the read or write strobe.
There have been a number of USB based logic analyzers introduced in recent years, but they didn’t really catch on until Saleae released their “Logic” line of devices. Low cost, high-speed, and easy to use – these devices were perfect. They also inspired an army of clone devices based upon the same Cypress Semiconductor parts. DSLogic designed by DreamSource Labs, can be thought of as an open source evolution of the original Saleae device.
DSLogic appeared in 2013 as a Kickstarter campaign for an open source logic analyzer with an optional oscilloscope extension. I think it’s safe to say that they did well, raising $111,497 USD, more than 10 times their initial goal of $10,000 USD. These days both the DSLogic and the oscilloscope extension are available at The Hackaday Store. In this review we’re focusing on the logic analyzer portion of the tool.
Remember this Android app that will tell you the value of resistors by reading their color code. Another option for the iOS crowd was presented at Maker Faire last weekend. It’s called ResistorVision, and it’s perfect for the colorblind people out there. An Android version of ResistorVision will be released sometime in the near future.
A few folks at Langly Research Center have a very cool job. They built a hybrid electric tilt wing plane with eight motors on the wing and two on the tail. It’s ultimately powered by two 8 hp diesel engines that charge Liion batteries. When it comes to hydrocarbon-powered hovering behemoths, our heart is with Goliath.
A bottom-of-the-line avionics panel for a small private plane costs about $10,000. How do you reduce the cost? Getting rid of FAA certification? Yeah. And by putting a Raspberry Pi in it. It was expoed last month at the Sun ‘N Fun in Florida, and it’s exactly what the pilots out there would expect: a flight system running on a Raspberry Pi. It was installed in a Zenith 750, a 2-seat LSA, registered as an experimental. You can put just about anything in the cabin of one of these, and the FAA is okay with it. If it’ll ever be certified is anyone’s guess.
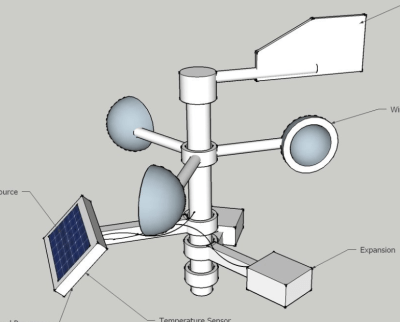
Throughout history, mankind has been at the mercy of the weather. Planning a major outdoor event like a wedding or a naval battle? Better hope for clear skies! Man doesn’t have the ability to change mother nature at will quite yet, but hackers are working on it! Until then, we can measure the current conditions and predict the weather in the near future. A bit of help from cloud based computer models and global sensing even allows us to model and predict weather patterns days in advance. It’s no surprise that makers, engineers, and hackers love weather projects. We’ve found there are two basic project groups (with a some overlap between them): Sensing projects and display projects. This week’s hacklet focuses on some of the best weather sensing projects on Hackaday.io!
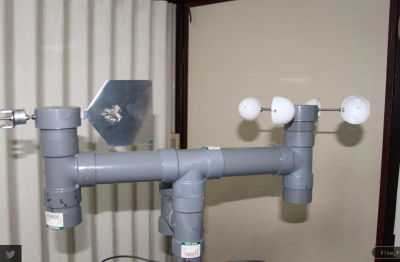
We start with [diysciborg] and Modular Weather Station. This 2014 Hackaday Prize entrant is a DIY outdoor weather station. [diysciborg] went with easily available PVC pipe and sheet metal for most of his mechanical build. His anemometer alone is a work of art. Mounting 8 magnetic reed switches in slots cut in a PCB allows for a thin device which can easily sense the speed of the wind. Other sensors include a TLS230R light to frequency converter for sunlight measurement, CO, wind direction, and more. An Arduino Pro Mini is at the center of it all.
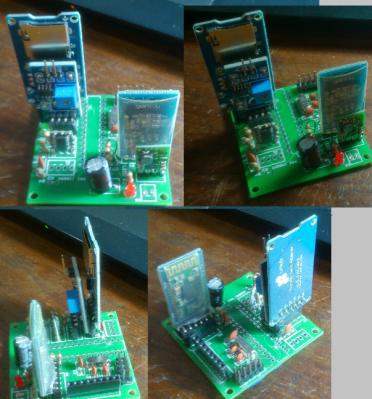
[Clovis Fritzen] is saving the planet from global warming with his project FacilTempo. FacilTempo is a weather station, and an entry in the 2015 Hackaday Prize. The idea is to make a simple and low-cost setup which can be built in bulk and placed anywhere on the Earth. [Clovis] plans to measure temperature, humidity, atmospheric pressure, sunlight, and rain. He also hopes to add a Sparkfun sensor to monitor wind speed and direction. All the data will be transmitted via a radio link. [Clovis] is adding the ability for FacilTemp to communicate via 433 MHz, WiFi, or Bluetooth. The entire sensor suite and its on-board ATmega328 will be powered by a LiPo battery. The battery will be charged by solar or wind power, depending upon what is available on site. With 8 project logs already in the can, FacilTempo is well on its way to beating back global warming!
[Ulf Winberg] is building the Low Cost Weather Station, his entry in the 2015 Hackaday Prize. Low Cost Weather Station aims to be a $50 sensor suite for local weather conditions. [Ulf] plans to power the entire device using wind and solar energy. He’s hoping to avoid batteries by storing his power in a supercapacitor. Power calculations have been taking up quite a bit of his design time so far. The $50 bill of materials limit is one that [Ulf] is serious about. He’s keeping careful eye on his component selections to keep that goal attainable. The system will transmit wind speed, wind direction, sun, and other data through a Laird BL600 Bluetooth low energy transceiver.
Finally we have [Greg Miller] taking it back to basics with Weather Station Zeta. Zeta is [Greg’s] first big project. He’s only just recently learned to solder, but he’s already squeezing a lot of performance out of a little Arduino. The idea is to create a two station system. The outdoor station will monitor the weather, including temperature, humidity, and barometric pressure. Data will be transmitted to an indoor station with a similar set of sensors. The indoor station will also include a 20 line x 4 column character LCD to display the data. [Greg] has the indoor section of the system just about done, and he’s working on learning the ins and outs of XBee data radios. He’s also going to include an Adafriut CC3000 breakout board to Web enable the weather station. We love seeing ambitious early projects like this one!
[Dan Royer] is hard at work building his own personal robot army. Robots mean motors, and motors mean gearboxes. In [Dan]’s case, gearboxes mean $3000 wasted on a prototype that doesn’t work. Why doesn’t it work? He doesn’t know, and we don’t either.
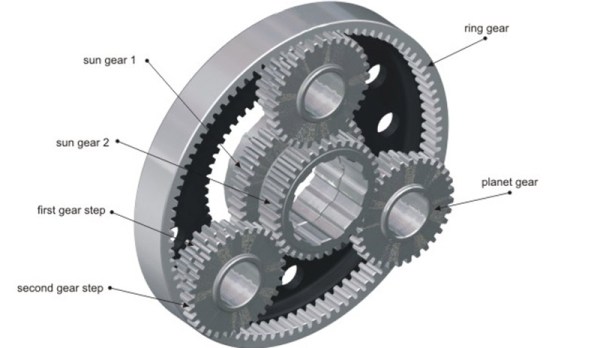
[Dan] would like to use small but fast DC motors for his robots coupled to a gearbox to step down the speed and increase the torque. The most common way of doing this is with a planetary gear set, but there’s a problem with the design of planetary gears – there is inherent backlash and play between the gears. This makes programming challenging, and the robot imprecise.
A much better way to gear down a small DC motor is a hypocycloid gear. If you’ve ever seen the inside of a Wankel engine, this sort of gearing will look very familiar: a single gear is placed slightly off-axis inside a ring gear. On paper, it works. In reality, not so much.
[Dan] spent $3000 on a prototype hypocycloid gearbox that doesn’t turn without binding or jamming. The gear was made with incredible tolerances and top quality machining, but [Dan] has a very expensive paper weight sitting on his desk right now.
If anyone out there has ever designed or machined a hypocycloid gearbox that works, your input is needed. The brightest minds [Dan] met at the Bring A Hack event at Maker Faire last weekend could only come up with. ‘add more lasers’, but we know there’s a genius machinist out there that knows exactly how to make this work.
Hackaday Fail is a column which runs every now and again. Help keep the fun rolling by writing about your past failures and sending us a link to the story — or sending in links to fail write ups you find in your Internet travels.
Of course Maker Faire was loaded up with 3D printers, but we’re no longer in the era of a 3D printer in every single booth. Filament-based printers are passé, but that doesn’t mean there’s no new technology to demonstrate. This year, it was stereolithography and other resin-based printers. Here’s the roundup of each and every one displayed at the faire, and the reason it’s still not prime time for resin-based printers.
Formlabs
Of course the Formlabs Form 1+ was presented at the Bay Area Maker Faire. They were one of the first SLA printers on the market, and they’ve jumped through enough legal hoops to be able to call themselves the current kings of low-cost laser and resin printing. There were a few new companies and products at the Faire vying for the top spot, and this is where things get interesting.
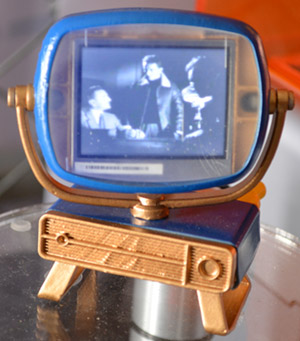
The folks at Formlabs displayed the only functional print of all the resin-based 3D printing companies – a tiny, tiny Philco Predicta stuffed with an LCD displaying composite video. The display is covered by a 3D printed lens/window. That’s the closest you’re going to get to an optically clear 3D printed part at the Faire.
XYZPrinting Nobel
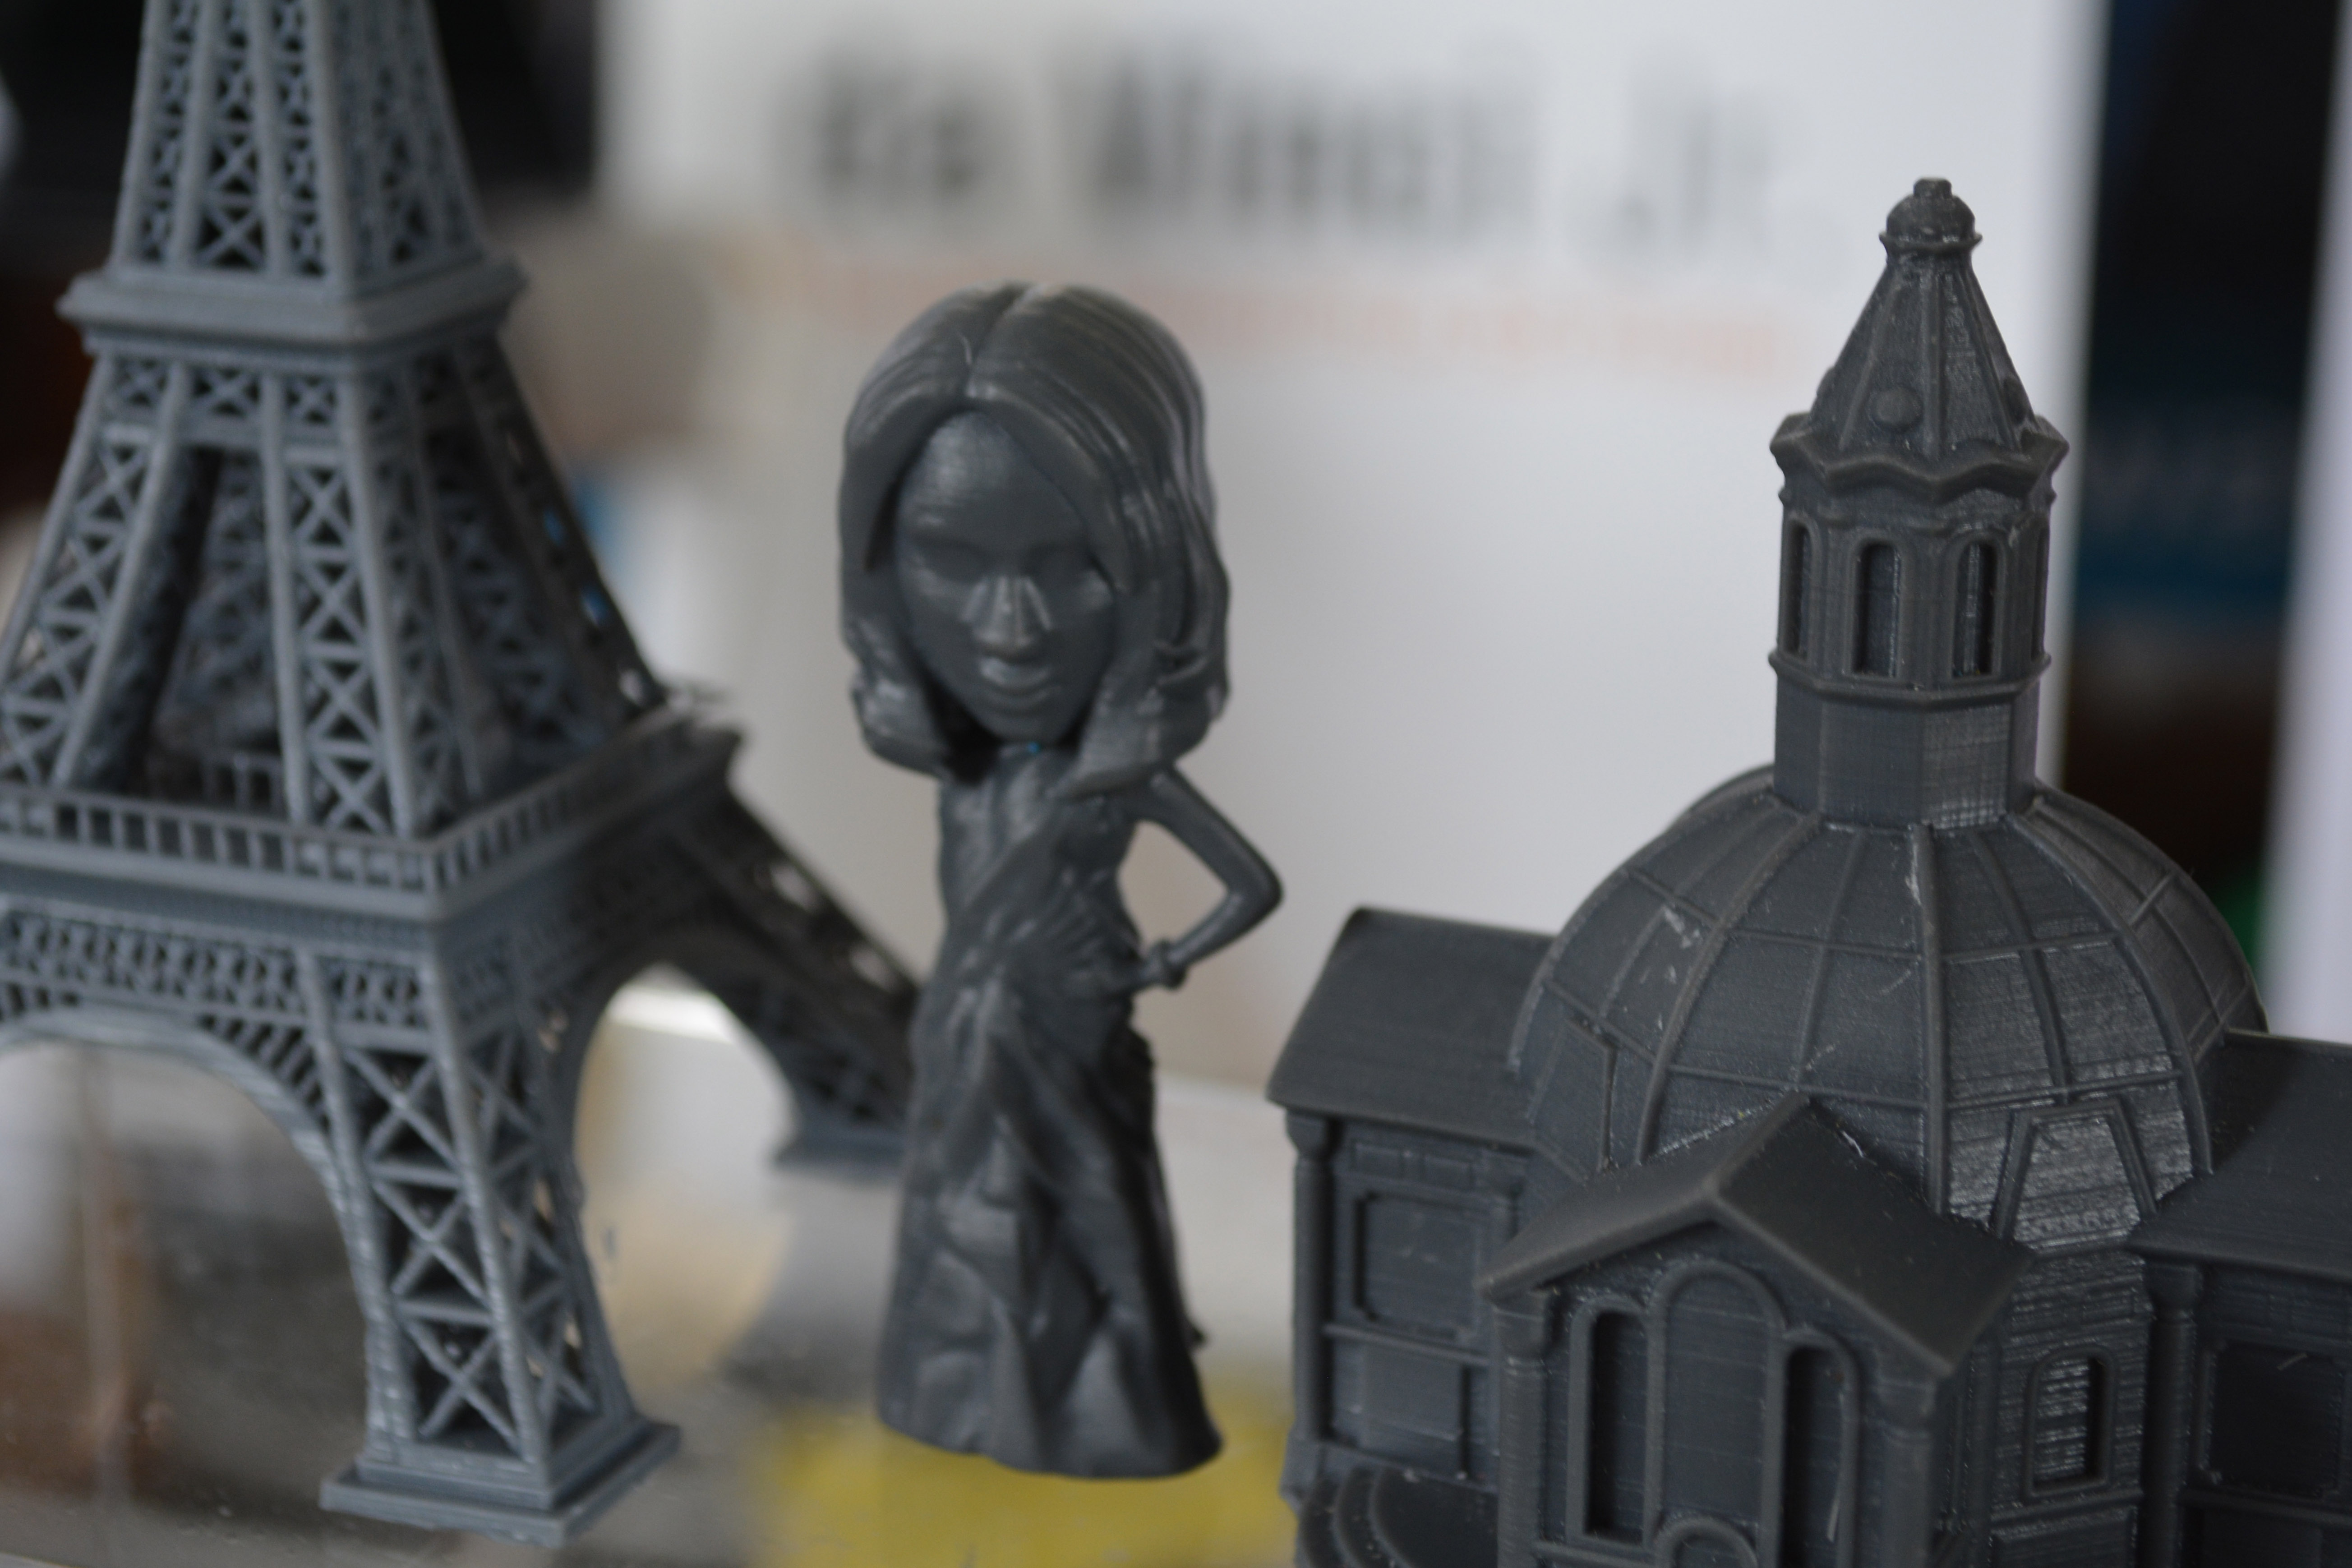
The Eiffel tower, an architectural model, and a Bratz doll, all printed on the XYZPrinting Nobel
XYZPrinting, the company famous for the $500 printer that follows the Gillette model: sell the printer cheap, sell expensive replacement filament cartridges, and laugh all the way to the bank. Resetting the DRM on the XYZPrinting Da Vinci printer is easy, the proprietary host software is done away with, and bricked devices are not. Time for a new market, huh?
Enter the XYZPrinting Nobel, a resin printer that uses lasers to solidify parts 25 microns at a time. The build volume is 125x125x200mm (5x5x7.9″), with an X and Y resolution of 300 microns. Everything prints out just as you would expect. As far as laser resin printers go, it’s incredibly cheap: $1500. It does, however, use XYZware, the proprietary toolchain forced upon Da Vinci users, although the Nobel is a stand-alone printer that can pull a .STL file from a USB drive and turn it into an object without a computer. There was no mention of how – or if – this printer is locked down.
DWS Lab XFAB
This Shrek is the highest resolution 3D printed object I’ve ever seen.
You’ve seen the cheapest, now check out the most expensive. It’s the DWS Lab XFAB, an enormous and impressive machine that has incredible resolution, a huge build area, and when you take into account other resin printers, a price approaching insanity.
First, the price: $5000 officially, although I heard rumors of $6500 around the 3D printing tent. No, it’s not for sale yet – they’re still in beta testing. Compare that to the Formlabs Form 1+ at $3300, or the XYZPrinting Nobel at $1500, and you would expect this printer to be incredible. You would be right.
The minimum feature size of the XFAB is 80 microns, and can slice down to 10 microns. Compare that to the 300 micron feature size of the Form 1+ and Nobel, and even on paper, you can tell they really have something here. Looking at the sample prints, they do. These are simply the highest resolution 3D printed objects I’ve ever seen. The quality of the prints compares to the finest resin cast objects, machined plastic, or any other manufacturing process. If you’re looking for a printer for very, very high quality work, this is what you need.
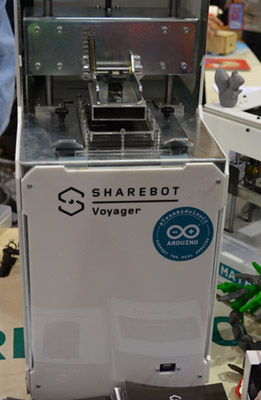
Sharebot Voyager
Also on display – but not in the 3D printing booth, for some reason – was the Sharebot Voyager. Unlike all the printers described above, this is a DLP printer; instead of lasers and galvos, the Voyager uses an off-the-shelf 3D DLP projector to harden layers of resin.
Strangely, the Sharebot Voyager was stuck in either the Atmel or the Arduino.cc (the [Massimo] one) booth. The printing area is a bit small – 56x96x100mm, but the resolution – on paper, mind you – goes beyond what the most expensive laser and galvo printers can manage: 50 microns in the X and Y axes, 20 to 100 microns in the Z. Compare that figure to the XFAB’s 80 micron minimum feature size, and you begin to see the genius of using a DLP projector.
The Sharebot Voyager is fully controllable over the web thanks to a 1.5GHz quad core, 1GB RAM computer that I believe is running 32 bit Windows. Yes, the spec sheet said OS: 32 bit Windows.
There were no sample prints, no price, and no expected release date. It is, for all intents and purposes, vaporware. I’ve seen it, I’ve taken pictures of it, but I’ve done that for a lot of products that never made it to market.
The Problem With Resin Printers
Taking a gander over all the resin-based 3D printers, you start to pick up on a few common themes. All the software is proprietary, and there is no open source solution for either moving galvos, lasers, or displaying images on a DLP projector correctly to run a resin-based machine. Yes, you heard it here first: it’s the first time in history Open Source hardware folk are ahead of the Open Source software folk. Honestly, open source resin printer hosts is something that should have been done years ago.
This will change in just a few months. A scary, tattooed little bird told me there will soon be an open source solution to printing in resin by the Detroit Maker Faire. Then, finally, the deluge of resin.