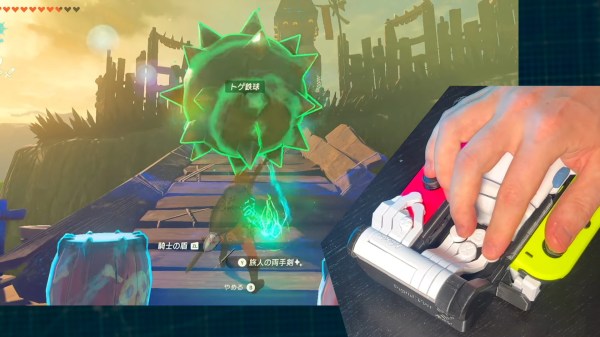
While we’re always happy to see accessibility aids come into fruition, most of them focus on daily tasks, not that there’s anything wrong with that. But what about having some fun? That’s the idea behind [Akaki Kuumeri]’s accessibly-awesome Joy-Con controller, the Squid-Con, which provides access to every button with just one hand. It even has tripod and AMPS mounts.
 The joysticks themselves are controlled with the thumb and pinky, although some of [Akaki]’s beta testers changed it up a bit. That’s okay, because it’s designed to be comfortable in a variety of positions for either hand. As for the ABXY buttons, those are actuated using 3D-printed arms that connect to a central piece which [Akaki] calls the turbine.
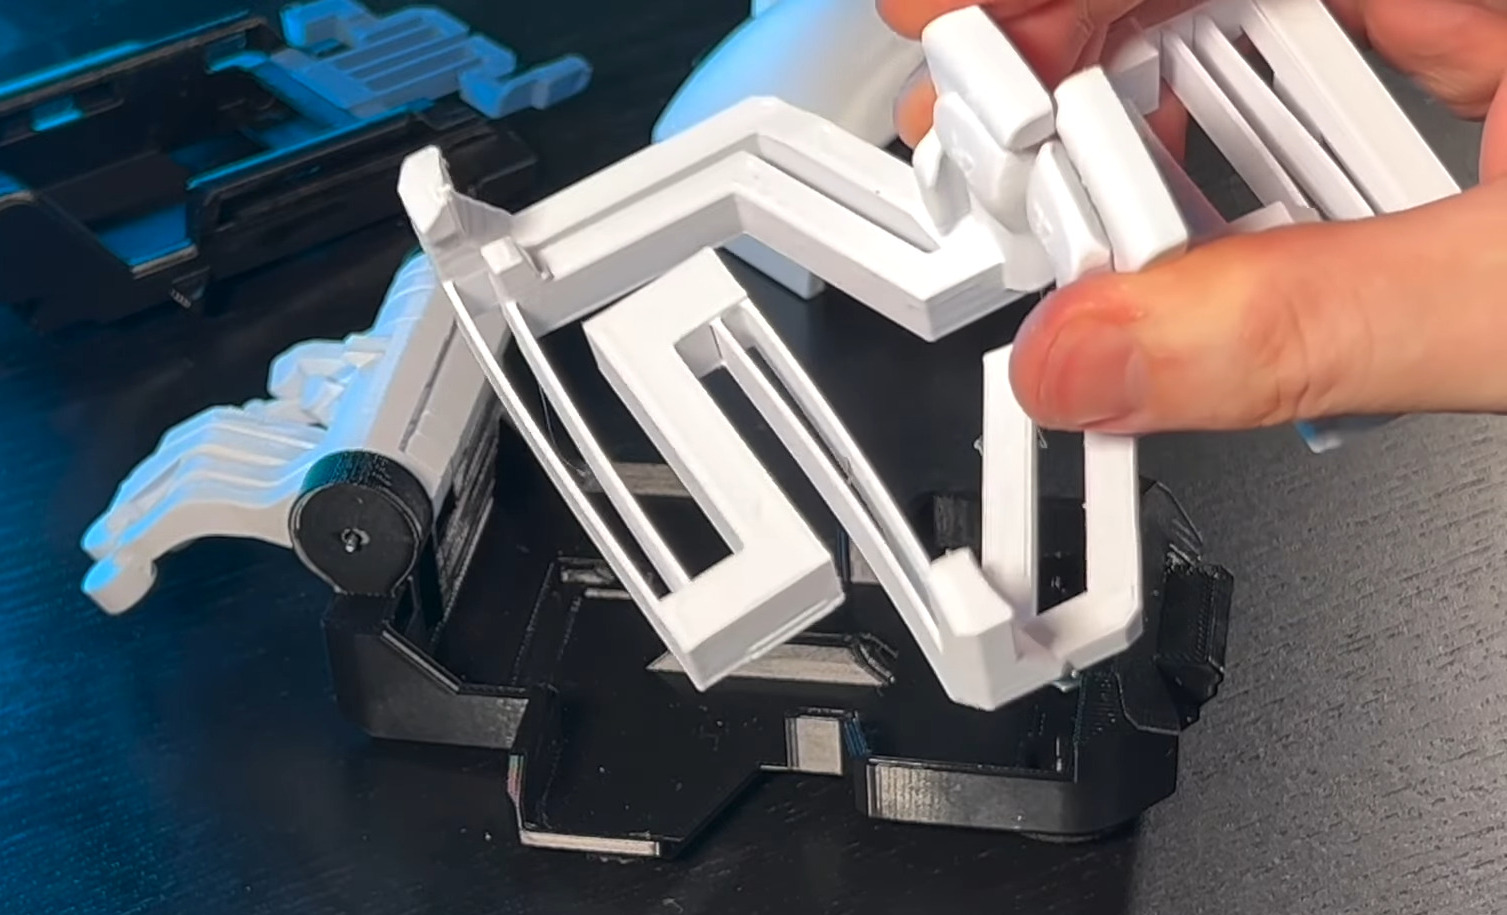
But perhaps the coolest part of this project is the flexures that actuate the shoulder buttons (L, R, zL, and zR) on the controllers. It’s a series of four arms that are actuated by bringing the fingers back toward the palm. If all of this sounds confusing, just check out the video after the break.
We love flexures around here, and we’ve seen them in everything from cat feeding calendars to 6-DOF positioners to completely new kinds of joysticks.