Tiny Game System Is An Experiment In Minimalism

Many people assumed the smartphone revolution would kill the dedicated handheld game system, and really, it’s not hard to see why. What’s the point of buying the latest Nintendo or Sony handheld when the phone you’re already carrying around with you is capable of high-definition 3D graphics and online connectivity? Software developers got the hint quickly, and as predicted, mobile gaming has absolutely exploded over the last few years.

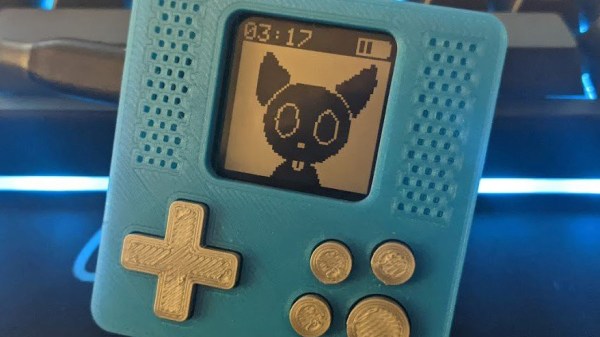
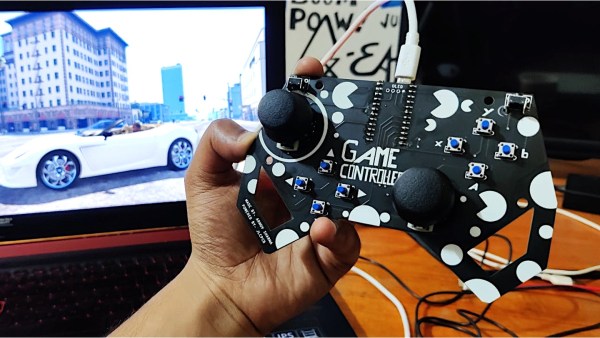
But at the same time, we’ve noticed something of a return to the simplistic handheld systems of yore. Perhaps it’s little more than nostalgia, but small bare-bones systems like the one [Mislav Breka] has entered into the 2019 Hackaday Prize show that not everyone is satisfied with the direction modern gaming has gone in. His system is specifically designed as an experiment to build the most minimal gaming system possible.

In terms of the overall design, this ATMega328 powered system is similar to a scaled-down Arduboy. But while the visual similarities are obvious, the BOM that [Mislav] has provided seems to indicate a considerably more spartan device. Currently there doesn’t seem to be any provision for audio, nor is there a battery and the associated circuitry to charge it. As promised, there’s little here other than the bare essentials.

Unfortunately, the project is off to something of a rocky start. As [Mislav] explains in his writeup on Hackaday.io, there’s a mistake somewhere in either the board design or the component selection that’s keeping the device from accepting a firmware. He won’t have the equipment to debug the device until he returns to school, and is actively looking for volunteers who might be interested in helping him get the kinks worked out on the design.

3D Printed Snap Gun For Automatic Lock Picking

At a far flung, wind blown, outpost of Hackaday, we were watching a spy film with a bottle of suitably cheap Russian vodka when suddenly a blonde triple agent presented a fascinating looking gadget to a lock and proceeded to unpick it automatically. We all know very well that we should not believe everything we see on TV, but this one stuck.

Now, for us at least, fantasy became a reality as [Peterthinks] makes public his 3D printed lock picker – perfect for the budding CIA agent. Of course, the Russians have probably been using these kind of gadgets for much longer and their YouTube videos are much better, but to build one’s own machine takes it one step to the left of center.

The device works by manually flicking the spring (rubber band) loaded side switch which then toggles the picking tang up and down whilst simultaneously using another tang to gently prime the opening rotator.

The size of the device makes it perfect to carry around in a back pocket, waiting for the chance to become a hero in the local supermarket car park when somebody inevitably locks their keys in their car, or even use it in your day job as a secret agent. Just make sure you have your CIA, MI6 or KGB credentials to hand in case you get searched by the cops or they might think you were just a casual burglar. Diplomatic immunity, or a ‘license to pick’ would also be useful, if you can get one.

As mentioned earlier, [Peter’s] video is not the best one to explain lock picking, but he definitely gets the prize for stealth. His videos are below the break.

In the meantime, all we need now are some 3D printed tangs.

Continue reading “3D Printed Snap Gun For Automatic Lock Picking”

E-Book Reader Gets Page Turn Buttons, Is None The Wiser

Most e-book readers don’t have physical page turn buttons. Why? They just don’t. Virtual page turns are accomplished with a tap at a screen edge. Determined to reduce the awkwardness of one-handed use, [Sagar Vaze] modified a Kobo e-reader with two physical page turn buttons as a weekend project.

[Sagar] points out that since the underlying OS of the Kobo device is Linux, it is possible to fake touches to the screen (and therefore trigger page turns) by recording then replaying the appropriate input event. However, there was a more direct solution available to those willing to tamper slightly with the hardware. Touch sensing on the screen is done via an infrared break-beam system. Along two edges of the screen are IR emitters, and opposite the emitters are receivers. Broadly speaking, when a fingertip touches the display a minimum of two IR beams are broken, and the physical location of the fingertip can therefore be determined by analyzing exactly how the IR pattern has been changed.

To spoof page turns, [Sagar] briefly shorts two IR emitters: one on each axis. The sudden winking out of the IR is interpreted by the device as a crisp tap, and the device obediently turns the page. The only hitch is that both IR emitters must be shorted at the same time. If one is shorted before the other, the device ignores it. Double-pole switches would probably do the trick, but with the part bin coming up empty in that respect, [Sagar] instead used a few transistors to accomplish the same thing. A 3D printed enclosure rounds out the whole mod, and a brief video is embedded below.

Continue reading “E-Book Reader Gets Page Turn Buttons, Is None The Wiser”

The ArduBoy Community Rolled Their Own Cartridge

The Arduboy, as you might have guessed from the name, was designed as a love letter to the Nintendo Game Boy that many a hacker spent their formative years squinting at. While the open source handheld is far smaller than the classic DMG-01, it retains the same general form factor, monochromatic display, and even the iconic red LED to the left of the screen. But one thing it didn’t inherit from the original was the concept of removable game cartridges. That is, until now.

Over the last year, [Mr.Blinky] and a group of dedicated Arduboy owners have been working on adding a removable cartridge to the diminutive handheld. On paper it seemed easy enough, just hang an external SPI flash chip off of the test pads that were already present on the Arduboy PCB, but to turn that idea into a practical cartridge required an immense amount of work and discussion. The thread on the Arduboy community forums covers everything from the ergonomics of the physical cartridge design to the development of a new bootloader that could handle loading multiple games.

Early cartridge prototypes.

The first problem the group had to address was how small the Arduboy is: there’s simply no room in the back to add in a cartridge slot. So a large amount of time is spent proposing different ways of actually getting the theoretical cartridge attached to the system. There was some talk of entirely redesigning the case so it could take the cartridge internally (like the real Game Boy), but this eventually lost out for a less invasive approach that simply replaced the rear of the Arduboy with a 3D printed plate that gave the modders enough room to add a male header along the top edge of the system.

As an added bonus, the cartridge connector doubles as an expansion port for the Arduboy. While perfecting the design, various forum users have chimed in with different gadgets that make use of the new port, from WS2812B LEDs to additional input devices like joysticks or a full QWERTY keyboard. Even if you aren’t interested in expanding the storage space on your Arduboy, being able to plug in new hardware modules certainly opens up some interesting possibilities.

In fact, the project so impressed Arduboy creator [Kevin Bates] that he chimed in on the topic last month to announce he would start looking into integrating the community’s cartridge modification into the production hardware. If all goes well, pretty soon there might be an official upgrade path for those who want to expand what this tiny nostalgia machine is capable of.

Continue reading “The ArduBoy Community Rolled Their Own Cartridge”

One Arduino Handheld To Rule Them All

There’s nothing quite as annoying as duplicated effort. Having to jump through the same hoops over and over again is a perfect way to burn yourself out, and might even keep you from tackling the project that’s been floating around in the back of your mind. [Alain Mauer] found that he’d build enough Arduino gadgets that were similar enough he could save himself some time by creating a standardized piece of hardware that he can load his code du jour on.

He’s come to call this device the Arduino Nano QP (which stands for Quick Project), and now it’s part of the 2019 Hackaday Prize. [Alain] doesn’t promise that it’s the perfect fit for everything, but estimates around 85% of the simple Arduino projects that he’s come up with could be realized on QP. This is thanks to the screw terminals on the bottom of the device which let you easily hook up any hardware that’s not already on the board.

The QP board itself has the ubiquitous 16×2 character LCD display (complete with contrast control trimmer), seven tactile buttons arranged in a vaguely Game Boy style layout, and of course a spot to solder on your Arduino Nano. All of which is protected by a very slick laser cut acrylic case, complete with retained buttons and etched labels.

We’ve seen no shortage of handheld Arduino devices, but we have to admit, something about the utilitarian nature of this one has us intrigued. We wouldn’t mind having one of these laying around the lab next time we want to do a quick test.

Continue reading “One Arduino Handheld To Rule Them All”

Building An ESP8266 Game System With MicroPython

After a seemingly endless stream of projects that see the ESP8266 open doors or report the current temperature, it can be easy to forget just how powerful the little WiFi-enabled microcontroller really is. In fact, you could argue that most hackers aren’t even scratching the surface of what the hardware is actually capable of. But that’s not the case for [Brian Wagner] and his students from the Kentucky Country Day School.

Their project, the GamerGorl, is a completely custom handheld game system running on a Wemos D1 Mini development board. The team’s PCB, which was developed over several iterations, is essentially a breakout board which allows them to easily connect up peripheral devices. Given the low total component cost of the GamerGorl and relative simplicity of its construction, it looks like a phenomenal project for older STEM students.

Beyond the ESP8266 board, the GamerGorl features a SSD1106 1.3″ OLED display, a buzzer for sound effects, two tactile buttons, and an analog joystick originally intended for an Xbox controller. Around the backside there’s a WS2812B RGB LED strip that’s at least partially for decoration, but it’s also actively used in some of the games such as the team’s take on Simon.

Even if you aren’t in the market for a portable game system, the GameGorl does provide an interesting case study for MicoPython applications on the Wemos D1 Mini. Browsing through the team’s source code as well as the helpful hints that [Brian] gives about getting the software environment up and running could be useful if you’re looking to expand your ESP8266 programming repertoire. We’d also love to see this device running the “ESP Little Game Engine” we covered recently.

Continue reading “Building An ESP8266 Game System With MicroPython”

A Keyboard For Your Thumb

Here’s an interesting problem that no one has cracked. There are no small keyboards that are completely configurable. Yes, you have some Blackberry keyboards connected to an Arduino, but you’re stuck with the key layout. You could get one of those Xbox controller chat pads, but again, you’re stuck with the keyboard layout they gave you. No, the right solution to building small and cheap keyboards is to make your own, and [David Boucher] has the best one yet.

The Thumb Keyboard uses standard through-hole 4mm tact switches on a 10×4 grid, wired up in a row/column matrix. Yes, this is a mechanical keyboard, which is important: no one wants those terrible rubber dome keyswitches, and you need only look at the RGB gaming keyboard market for evidence of that. These tact switches fit into a standard perfboard, allowing anyone to build this at home with a soldering iron. After wiring up the keyboard and connecting it to an Arduino, [David] had a working keyboard.

There’s a lot going on with this build, not the least of which is the custom, 3D printed bezel for those tiny, tiny tact switches. This is a much simpler solution than building an entirely new PCB, which we’ve seen before. Since this is a 3D printed bezel, it’s easy to put labels or whatnot above the keys, or potentially print buttons. It’s great work, and one of the best small keyboards we could imagine.