One of the most impressive innovations we’ve seen in the world of custom handhelds is the use of “trimmed” PCBs. These are motherboards of popular video game consoles such as the Nintendo Wii and Sega Dreamcast that have literally been cut down to a smaller size. As you can imagine, finding the precise shape that can be cut out before the system stops functioning requires extensive research and testing. But if you can pull it off, some truly incredible builds are possible.
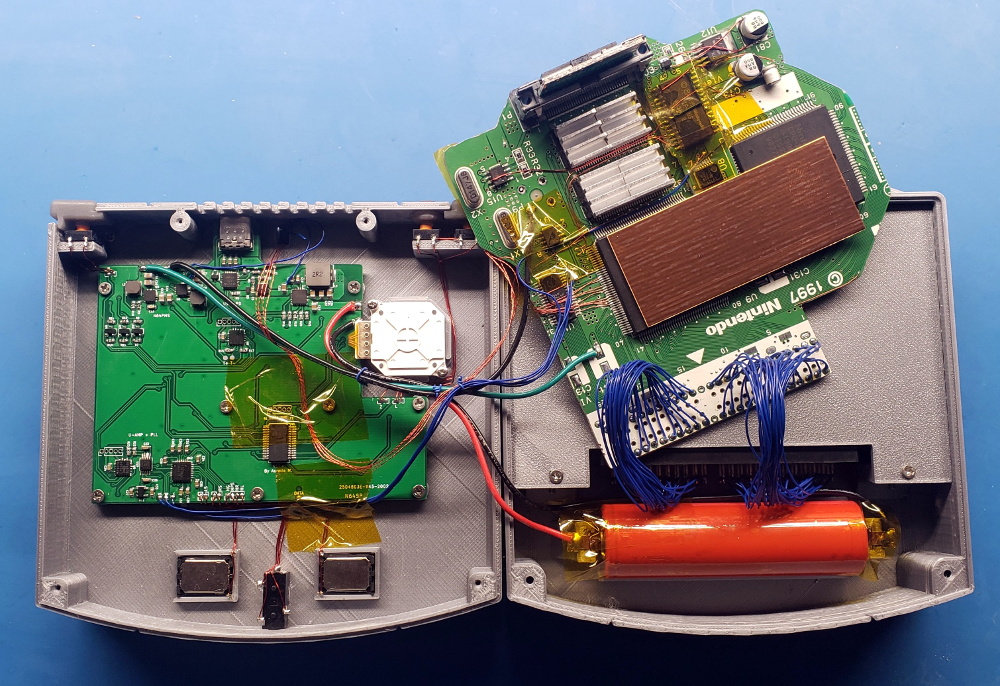
Take for example this absolutely incredible clamshell N64 built by [GMan]. After cutting the motherboard down to palm-sized dimensions, he’s been able to create a handheld system that’s only a bit larger than the console’s original cartridges.
 Incidentally those original cartridges are still supported, and fit into a slot in the rear of the system Game Boy style. It’s still a bit too chunky for tossing in your pocket, but we doubt you could build a portable N64 any smaller without resorting to emulation.
In the video after the break, [Gman] explains that the real breakthrough for trimmed N64s came when it was found that the system’s Peripheral Interface (PIF) chip could be successfully relocated. As this chip was on the outer edge of the PCB, being able to move it meant the board could get cut down smaller than ever before.
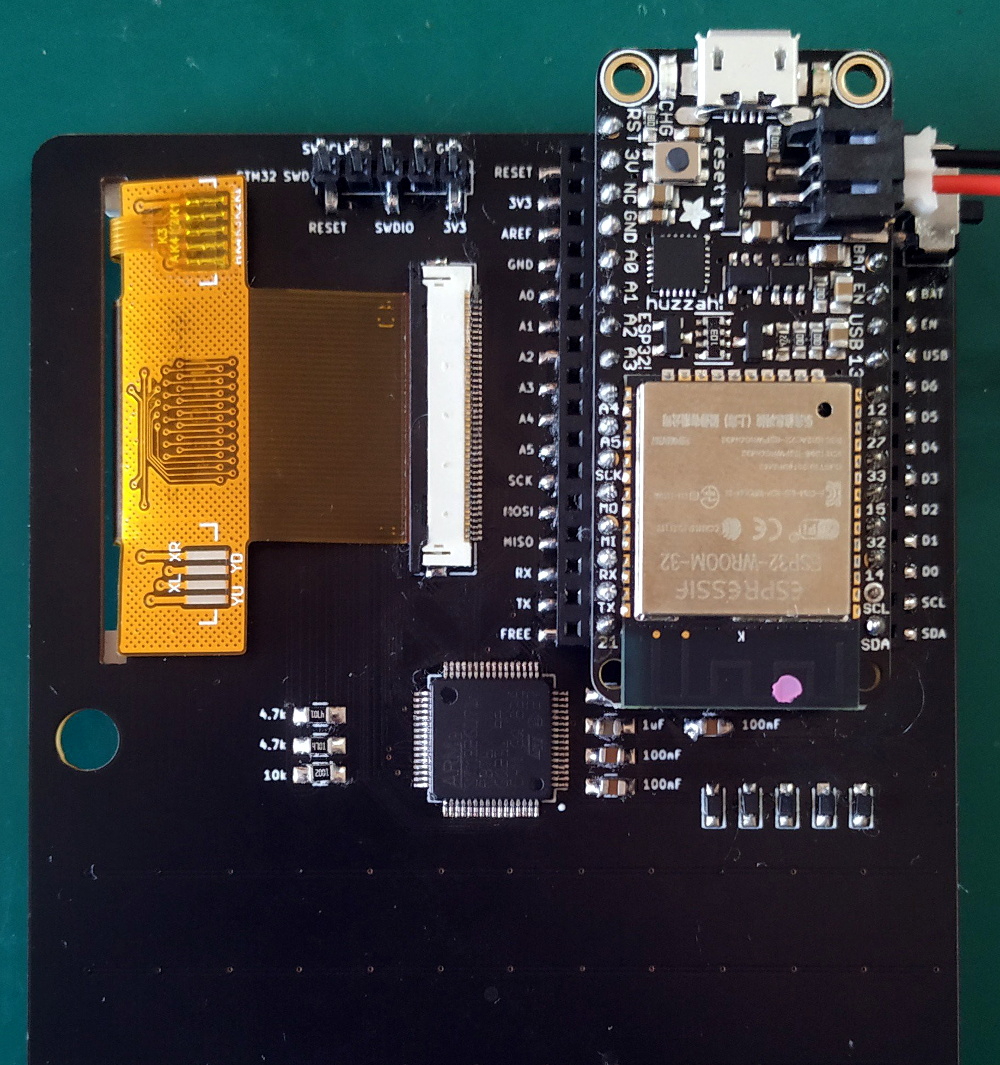
But there’s more than just a hacked N64 motherboard living inside the 3D printed enclosure. [Gman] also designed a custom PCB that’s handling USB-C power delivery, charging the handheld’s 4250 mAh battery, and providing digital audio over I2S. It’s a fantastically professional setup, and you’d be forgiven for thinking the board was part of the original console.
Considering how well designed and built this N64 SP is, it probably will come as no surprise to find this isn’t the first time [Gman] has put something like this together. He used many of the same tricks to build his equally impressive portable Dreamcast last year.
Continue reading “Trimmed PCB Makes The Ultimate Portable N64”