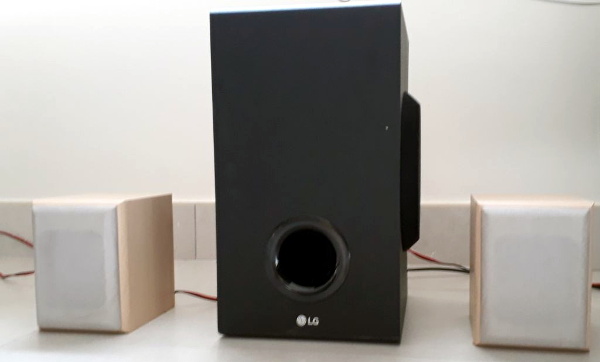
Like many of the stories you’ll find on these pages, this one starts with a user being annoyed about their device’s inability to perform a simple task. All [Jay Tavares] wanted was for his Bose Cinemate speakers to turn themselves on and off as needed. It seems like a reasonable enough request, and indeed, is exactly the point of HDMI’s Consumer Electronic Control (CEC) feature. But in this case, it would take a bit of custom hardware to get similar functionality.
Unfortunately, the speakers [Jay] has only support optical audio; so any interoperability with HDMI-CEC (hacked or otherwise) was immediately out the window. Still, he reasoned that he should be able to detect when the TOSLINK audio source is actually active or not, and give the speaker system the appropriate signal to either power on or shut down. You might think this would require some kind of separate stand-alone device, but as it turns out, all the necessary information was available by reverse engineering the connection between the receiver and the subwoofer.
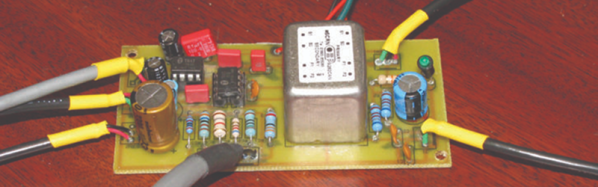
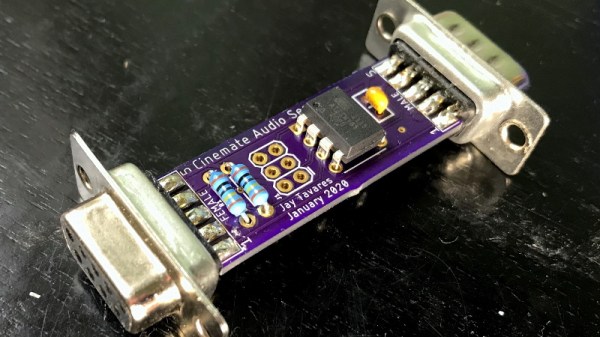
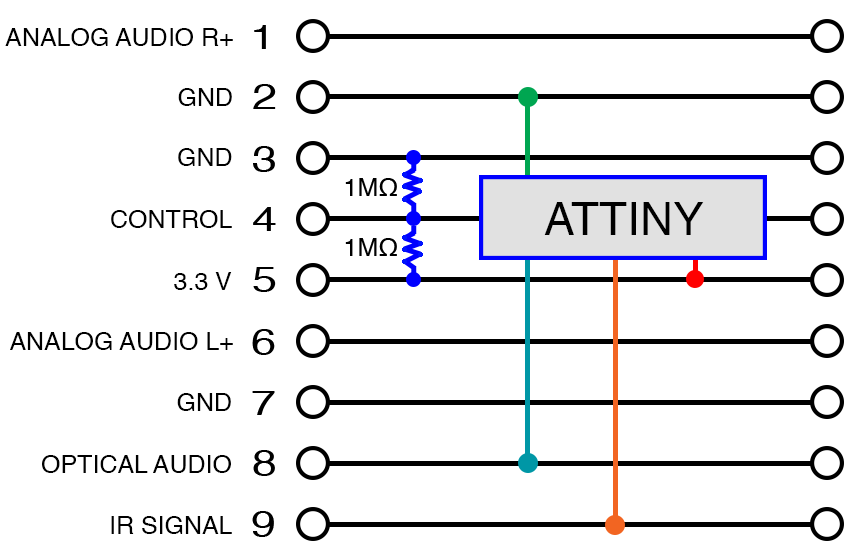 After some investigation, [Jay] found that not only was the content of the TOSLINK audio source being sent over this DB9 cable, but so were the control signals required to turn the system on and off. So he designed a simple pass-through device with an ATtiny85 and a couple passives that latches onto the relevant lines in the cable.
When audio is detected over the optical connection, the MCU will inject the appropriate signals on the control line to simulate the user pressing the “Power” button the remote. When the chip hasn’t detected audio after 10 seconds, it sends the signal to shut the speakers off.
While [Jay] notes he can’t guarantee this works on anything other than the particular Bose Cinemate GS Series II system he has, we’d be willing to bet the concept could be adapted to other models or even brands that use a similar cable to link their principle components. If all else fails, you could always add an ESP8266 to your sound system and control it over WiFi.