Paul Stoffregen did it again: the Teensy 4.0 has been released. The latest in the Teensy microcontroller development board line, the 4.0 returns to the smaller form-factor last seen with the 3.2, as opposed to the larger 3.5 and 3.6 boards.
Don’t let the smaller size fool you; the 4.0 is based on an ARM Cortex M7 running at 600 MHz (!), the fastest microcontroller you can get in 2019, and testing on real-world examples shows it executing code more than five times faster than the Teensy 3.6, and fifteen times faster than the Teensy 3.2. Of course, the new board is also packed with periperals, including two 480 Mbps USB ports, 3 digital audio interfaces, 3 CAN busses, and multiple SPI/I2C/serial interfaces backed with integrated FIFOs. Programming? Easy: there’s an add-on to the Arduino IDE called Teensyduino that “just works”. And it rings up at an MSRP of just $19.95; a welcomed price point, but not unexpected for a microcontroller breakout board.
The board launches today, but I had a chance to test drive a couple of them in one of the East Coast Hackaday labs over the past few days. So, let’s have a closer look.
There’s certainly no shortage of “smart” gadgets out there that will provide you with a notification, or even a live audiovisual stream, whenever somebody is at your door. But as we’ve seen countless times before, not everyone is thrilled with the terms that most of these products operate under. Getting a notification on your phone when the pizza guy shows up shouldn’t require an email address, credit card number, or DNA sample.
For [Nick Touran], half the work was already done. There was already a traditional wired doorbell in his home, he just had to come up with a minimally invasive way to link it with Home Assistant. He reasoned that he could tap into the low-voltage side of the doorbell transformer and watch for the telltale fluctuations that would indicate the bell was doing its thing. The ESP8266 has an ADC to measure voltage and WiFi to connect to Home Assistant, so it seemed like the perfect bridge between old and new.
Transformer voltage before and after
Of course, as with any worthwhile project, it ended up being a bit more complicated. Wired doorbells generally operate on 16-24 VAC, and [Nick] knew if he tried to put his Wemos D1 across the line he’d release the critical Magic Smoke. What he needed was a voltage divider circuit that would take low-voltage AC and drop it to an even lower DC voltage that the microcontroller could cope with.
The simple circuit [Nick] comes up with cuts the voltage way down and removes the negative component completely. So what was originally 18.75 VAC turned into a series of 60 Hz blips at 2.4 VDC; perfect for feeding into a microcontroller ADC. With a baseline to work from, he could then write some code that would watch for variations in this signal to determine when the bell was ringing.
Or at least, that was the idea. While the setup worked well enough on the bench, its performance in the real-world left something to be desired. If his house guest had a heavy hand, it worked great. But a quick tap of the doorbell button would tend to go undetected. After investigating the issue, [Nick] found that he needed to use some software trickery to ensure the ESP8266 was able to keep up with the speedy signal. Once he was able to reliably detect short and long button presses, the rest was just a simple matter of sending an MQTT message to his automation system.
If there’s one thing any cat will work for, it’s food. Usually, this just consists of meowing and/or standing on your chest until you give up the goods. [DynamicallyInvokable] has a beautiful cat, Emma, who meows loudly for food at obscene hours of the morning. As she ages, it’s getting harder and more important to control her weight. Clearly, it was time to build the ultimate automatic cat feeder—one that allows him to get lazy while at the same time getting smart about Emma’s weight.
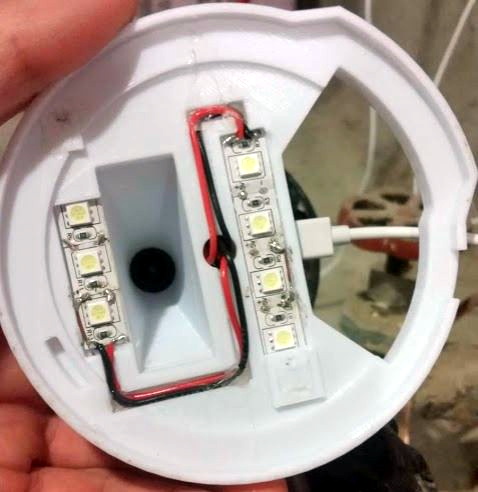
After a year and a half of work, the feeder is complete. Not only does it deliver the goods several times a day, it sends a heap of data to the cloud about Emma’s eating habits. There’s a scale built into the platform, and another in the food bowl. Together, they provide metrics galore that get automatically uploaded to AWS. Everything is controlled with an ESP32 Arduino, including a rainbow of WS2812s that chases its tail around the base of the feeder. The faster it goes, the closer it is to feeding time.
The best part about this unique feeder is that nearly every piece is 3D printed, including the gears. Be sure to check out the build gallery, where you can watch it come together piece by piece. Oh, and claw your way past the break to see Emma get fed.
Emma doesn’t have to worry about sharing her food. If she did, maybe [DynamicallyInvokable] could use facial recognition to meet the needs of multiple cats.
We’re all familiar with the “Black Box” used on commercial aircraft, the flight data recorder which captures the minutia of each and every flight on the off-chance that it’s needed in the event of an accident. But even in less dire circumstances, the complete record of the aircraft’s performance versus what was commanded of it by the pilot can be used to fine tune performance or detect faults before they become serious.
As a data engineer for professional motorsports, [Jussi Luopajärvi] knows similar recorders can be just as useful for vehicles stuck here on terra firma. His entry into the 2019 Hackaday Prize, TestLogger, aims to bring that same kind of technology to the world of RC racing. The gadget allows the driver to easily record a wealth of data about the vehicle during races, giving them valuable insight into the vehicle’s performance.
So what kind of variables are there to record on a 1/8th or 1/12th scale car? Don’t be fooled by their diminutive wheelbases, the modern RC car relies on an impressive amount of technical wizardry that benefits from a close eye.
Right now, [Jussi] says TestLogger can record not only obvious elements like battery level and throttle, but also more esoteric variables such as steering input, individual drive wheel speed, angular velocity, and even g-force in three dimensions. There’s also support for a trackside IR beacon that allows TestLogger to record lap times.
All of the data is stored on TestLogger’s SD card in standard CSV files, which makes it easy for us hacker types to parse and analyze. But for those who are more interested in driving than delimiting, there’s also a very slick website that will let users upload and compare their data. This complete user experience gives TestLogger a very professional feel, and we can’t wait to see where [Jussi] takes it from here.
We spend a lot of time in our community discussing the many home computers from the 8-bit era, while almost completely ignoring their industrial equivalents. While today a designer of a machine is more likely than not to reach for a microcontroller, four decades ago they would have used a single-board computer which might have shared a lot of silicon with the one you used to play Pac Man.
[Epooch] recently came into possession of a CMS 9619A Advanced Single Board Microcomputer, a rather unique Programmable Logic Controller intended for industrial applications. It’s powered by a Motorola 6809 CPU and features the usual array of peripheral chips. To unlock its secrets he reached not for an array of tools from 2019 but for a venerable Apple ][e microcomputer.
In this type of 8-bit machine the various peripherals are enabled through address decoding logic that toggles their chip select line when a particular I/O address is called. Sometimes this task is performed by a set of 74 or similar logic chips, but in the case of the CMS 9619A it falls upon a Programmable Array Logic (PAL). These chips, which could be thought of as a simple precursor to today’s FPGAs, were ideal for creating custom decoding logic.
As you might expect though, a PAL is an opaque device, so to deduce the address map it was necessary to reverse engineer it using the Apple ][‘s printer card and a bit of BASIC code. It then remained to do some ROM disassembly work and wire up the serial ports, before some ROM patching with the Apple ][ as an EPROM programmer to finally access the machine’s debugger.
It is a common situation in electronics to have a control loop, that is some sort of feedback that drives the input to a system such as a motor or a heater based upon a sensor to measure something like position or temperature. You’ll have a set point — whatever you want the sensor to read — and your job is to adjust the driving thing to make the sensor read the set point value. This seems easy, right? It does seem that way, but in realitythere’s a lot of nuance to doing it well and that usually involves at least some part of a PID (proportional, integral, derivative) controller. You can bog down in math trying to understand the PID but [Electronoobs] recent video shows a very simple test setup that clearly demonstrates what’s going on with an Arduino, a motor, a distance sensor, and a ping-pong ball. You can see the video below.
Imagine for a moment heating a tank of water as an example. The simple approach would be to turn on the heater and when the water reaches the setpoint, turn the heater off. The problem there is though that you will probably overshoot the target. The proportional part of a PID controller will only turn the heater fully on when the water is way under the target temperature. As the water gets closer to the right temperature, the controller will turn down the input — in this case using PWM. The closer the sensor reads to the setpoint, the lower the system will turn the heater.
Of course it has the red nipple and lid LED—wouldn’t be a ThinkPad without ’em. ThinkTiny’s nipple is a 5-way joystick that plays Snake, Tetris, Lunar Lander, and more on an OLED screen. Like its predecessor the Tiny PC, [Paul] used an ATtiny1614, which (FYI) has a new one-wire UDPI interface. He can easily reprogram it through pogo pin holes built into the case.
There are some nice stylistic details at play here, too. The lid LED is both delivered and diffused by a 2mm grain of fiber-optic cable. And [Paul] printed the cover with a color change to transparent filament to make the Think logo and the charging LEDs shine through. Maneuver your way past the break to see it in action.
If you haven’t leveled up to AVR programming yet, introduce yourself to Arduboy.