Feeding Dogs Over Twitch Is Latest E-Sport Craze

The modern social-networking fueled Internet loves two things more than anything: pets, and watching other people do stuff. There’s probably a scroll tucked behind a filing cabinet at Vint Cerf’s house that foretells anyone who can harness these two elements will gain control of the Internet Ready Player One style. If so, we’re thinking [Tyler Pearce] is well on his way to ascending the throne.

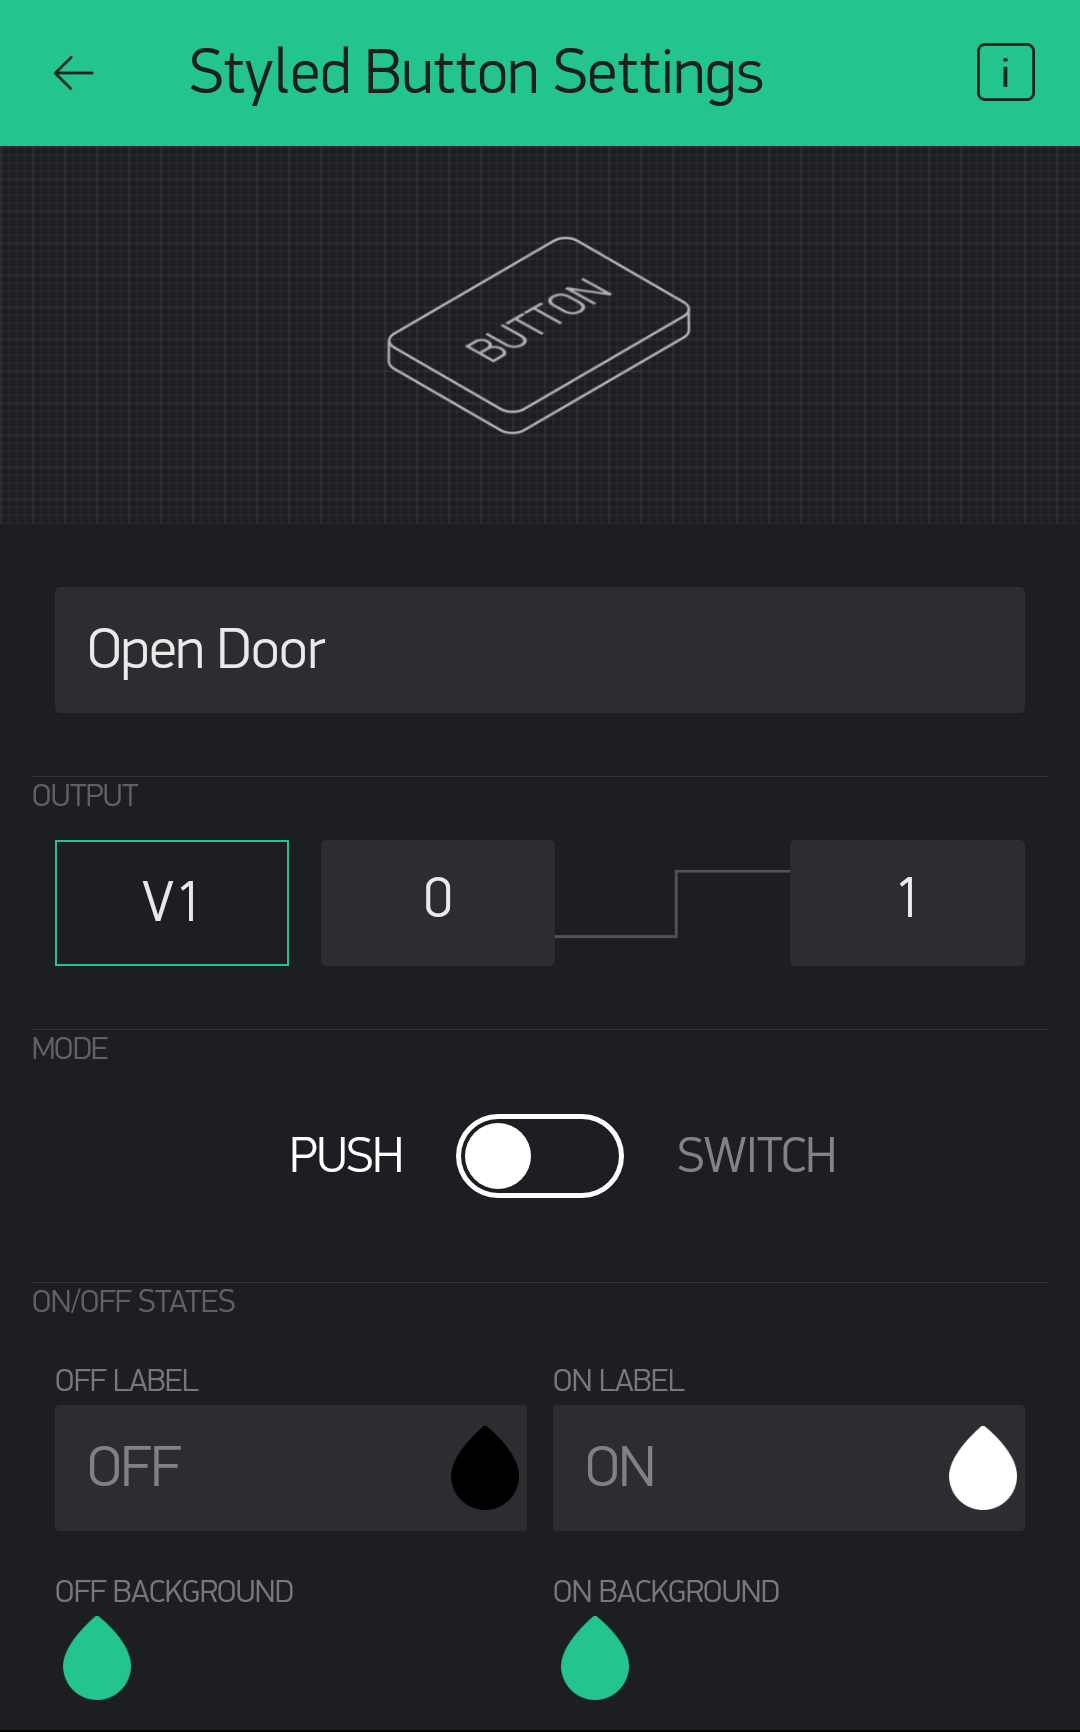
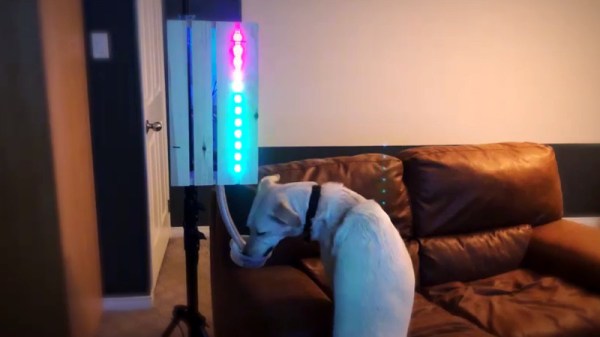
In an effort to make the Overwatch Twitch streams of his betrothed even more enticing, [Tyler] came up with a way for viewers to feed their dog Larry by dropping a command in the chat. There’s a surprisingly complex dance of software and hardware to make this reliable and visually appealing, but it’s worth it as showmanship is important in the brave new world of competitive e-sports. We’re assuming that’s what it says in the issue of ESPN Magazine with the Fortnite player on the cover, but nobody at Hackaday would qualify for a subscription to it so we don’t really know for sure.

A server running on the computer provides a slick administrative dashboard for the treat system, including a running log of who fed Larry and when. There’s also a number of checks in place to prevent too many treats being dispensed in a short time period, and to keep an individual from spamming the system.

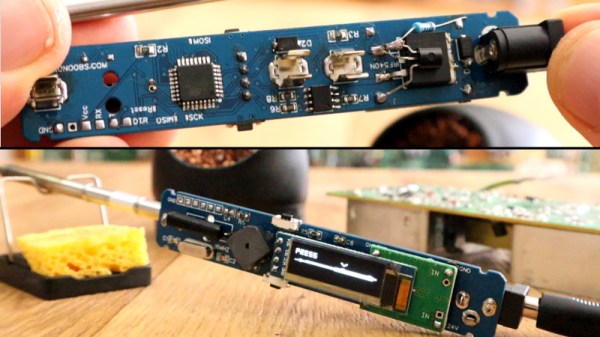
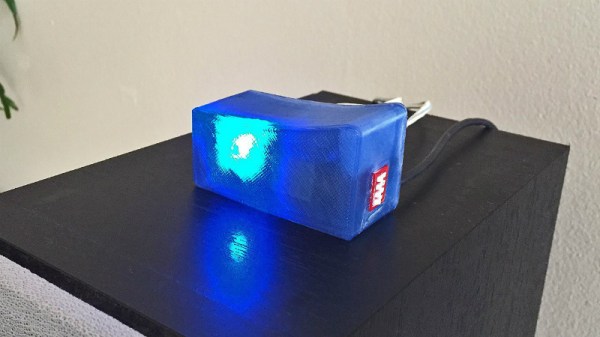
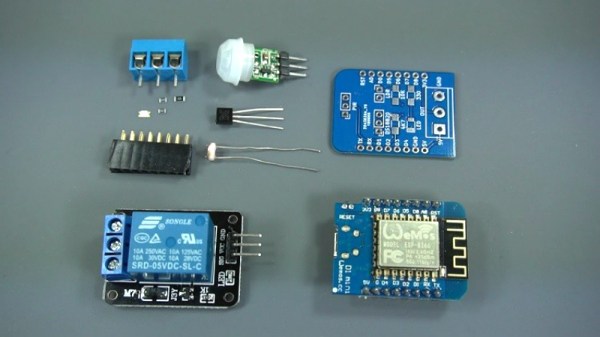
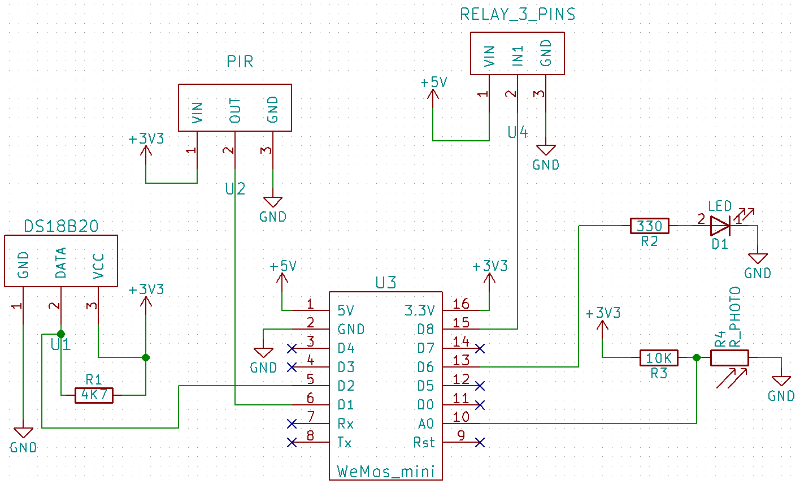
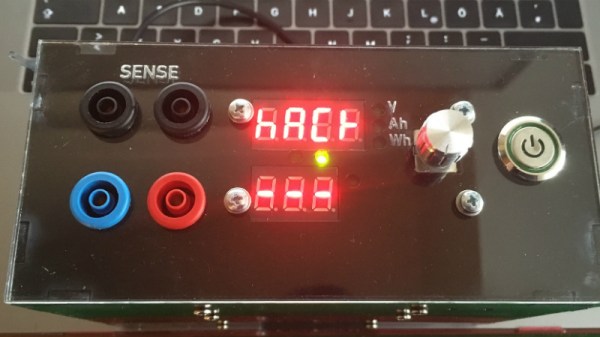
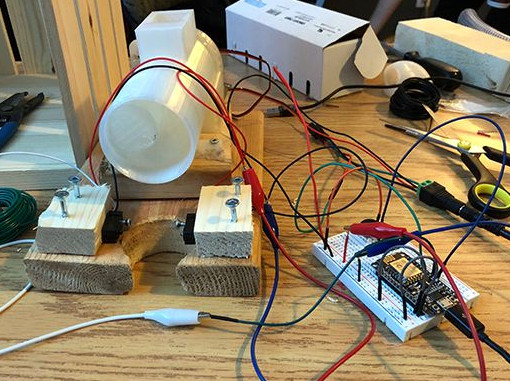
On the hardware side, he’s using two NodeMCU ESP8266 microcontollers connected to a local MQTT broker: one to handle the lighting and one to run the 3D printed auger that actually pushes the food out. The printed auger is powered by a standard hobby servo, and even includes an IR sensor to automatically stop spinning when it detects a treat has been dispensed. [Tyler] reports the auger works quite well, though does have a tendency to jam up if overfilled.

We’ve seen all manner of automated pet feeders over the years, even ones with their own email accounts. So it was probably only a matter of time until they came to Twitch. If you can install Linux with it, why not use it to feed your dog? Or somebody else’s, as the case may be.

DIY Arduino Soldering Iron Hits Version 2.0

A few months ago we brought word that [Electronoobs] was working on his own open source alternative to pocket-sized temperature controlled soldering irons like the TS100. Powered by the ATMega328p microcontroller and utilizing a 3D printed enclosure, his version could be built for as little as $15 USD depending on where you sourced your parts from. But by his own admission, the design was held back by the quality of the $5 replacement soldering iron tips he designed it around. As the saying goes, you get what you pay for.

But [Electronoobs] is back with the second version of his DIY portable soldering iron, and this time it’s using the vastly superior HAKKO T12 style tip. As this tip has the thermocouple and heating element in series it involved a fairly extensive redesign of the entire project, but in the end it’s worth it. After all, a soldering iron is really only as good as its tip to begin with.

This version of the iron deletes the MAX6675 used in V1, and replaces it with a LM358 operational amplifier to read the thermocouple in the T12 tip. [Electronoobs] then used an external thermocouple to compare the LM358’s output to the actual temperature at the tip. With this data he created a function which will return tip temperature from the analog voltage.

While the physical and electrical elements of the tip changed substantially, a lot of the design is still the same from the first version. In addition to the ATMega328p microcontroller, version 2.0 of the iron still uses the same 128×32 I2C OLED display, MOSFET, and 5V buck converter from the original iron. That said, [Electronoobs] is already considering a third revision that will make the iron even smaller by replacing the MOSFET and buck converter. It might be best to consider this an intermediate step before the DIY iron takes on its final form, which we’re very interested in seeing.

The first version of the DIY Arduino soldering iron garnered quite a bit of attention, so it seems there’s a decent number of you out there who aren’t content with just plunking down the cash for the TS100.

Continue reading “DIY Arduino Soldering Iron Hits Version 2.0”

Voice Controlled Stereo Balance With ESP8266

A stereo setup assumes that the listener is physically located between the speakers, that’s how it can deliver sound equally from both sides. It’s also why the receiver has a “Balance” adjustment, so the listener can virtually move the center point of the audio by changing the relative volume of the speakers. You should set your speaker balance so that your normal sitting location is centered, but of course you might not always be in that same position every time you listen to music or watch something.

[Vije Miller] writes in with his unique solution to the problem of the roving listener. He’s come up with a system that can adjust the volume of his speakers without having to touch the receiver’s setup, in fact, he doesn’t have to touch anything. By leveraging configurable voice control software running on his computer, his little ESP8266-based devices do all the work.

Each speaker has its own device which consists of a NodeMCU ESP8266 and X9C104 digital potentiometer inside of a 3D printed case. The audio terminal block on the gadget allows him to connect it inline between the speaker and the receiver, giving [Vije] the ability to adjust the volume through software. The source code, which he’s posted on the Hackaday.io project page, uses a very simple REST-style API to change speaker volume based on HTTP requests which hit the ESP8266’s IP address.

The second part of the project is a computer running VoiceAttack, which lets [Vije] assign different actions based on what the software hears. When he says the appropriate command, the software goes through and fires off HTTP requests to the nodes in the system. Everything is currently setup for two speakers, but it shouldn’t be too difficult to expand to more speakers (or even rooms) with some adjustment to the software.

It’s not the first voice controlled speaker we’ve ever seen, but it does solve a very specific problem in a unique way. We’d be interested in seeing the next logical step, which would see this technology integrated into the speaker itself.

Continue reading “Voice Controlled Stereo Balance With ESP8266”

Less Is More: A Micromatrix Display In A Square Inch

In your living room, the big display is what you want. But in an embedded project, often less is more. We think [bobricius] will agree since he submitted a tiny 4×5 LED display into our square inch challenge. The board features an ATtiny CPU and twenty SMD LEDs in a nice grid. You can see them in action, scrolling to some disco music in the video below.

There is plenty of room left in the CPU for bigger text strings — the flash memory is just over 10% full. A little side-mounted header makes it easy to program the chip if you want to change anything.

Continue reading “Less Is More: A Micromatrix Display In A Square Inch”

Create Your Own ESP8266 Shields

The ESP8266 has become incredibly popular in a relatively short time, and it’s no wonder. Cheap as dirt, impressively powerful, Arduino-compatible, and best of all, includes Wi-Fi right out of the box. But for all its capability and popularity, it’s still lagging behind the Arduino in at least one respect. Namely, the vast collection of add-on “Shields” which plug into the Arduino to add everything from breadboards to GPS receivers.

Until such time as the free market decides to pick up the pace and start making standardized shields for the various ESP8266 development boards, it looks as if hackers are going to have to pick up the slack. [Rui Santos] has put together a very detailed step-by-step guide on the creation of a simple shield for the popular Wemos D1 Mini board, which should give you plenty of inspiration for spinning up your own custom add-on modules.

Presented as a written tutorial as well as a two part video, this guide covers everything from developing and testing your circuit on a breadboard to designing your PCB in KiCad and sending it off for fabrication. The end result is a professional looking PCB that matches the footprint of the stock D1 Mini and adds a DS18B20 temperature sensor, PIR motion detector, photoresistor, and some screw down terminals.

[Rui] goes on to show how you can utilize the new sensors shield via a web interface hosted on the ESP8266, and even wraps the whole thing up in a 3D printed enclosure. All worthwhile skills to check out if you’re looking to produce more cohesive finished products.

If you’re looking for a similar project for the ESP32, [Rui] has you covered there as well. You may also be interested in the series of ESP8266 tutorials we recently highlighted.

Continue reading “Create Your Own ESP8266 Shields”

Photon Door Lock Swaps Keys For A POST Request

At this point we’re all well aware of the fact that there is some inherent danger involved when bringing “things” onto the Internet. Nobody wants to come home to a smoldering pile of ruble because their Internet connected toaster oven decided to get stuck on “Hades.” But even with the risks, occasionally we see projects that prove at least some intrepid hackers are managing to navigate the Internet of Things to solve real-world problems.

[Daniel Andrade] writes in to tell us about the Internet controlled entry system he’s setup at his new apartment, and while we imagine it’s not for everyone, we can’t deny it seems like it has improved his quality of life. Rather than giving all of his friends a copy of his key, he’s setup a system where anyone who has the appropriate link can “buzz” themselves in through the building’s existing intercom system.

Thanks to the old-school intercom setup, the hardware for this project is simple in the extreme. All [Daniel] needed was a relay to close the circuit on the door buzzer, and a way to fire it off. For his controller he chose the Photon from Particle, which is perhaps a bit overkill, but we all tend to work with what we’re personally comfortable with.

Most of the work went into the software, as [Daniel] ended up coming with two distinct ways to control the door lock over the Internet. The first method uses Blynk, which allows you to create slick visual interfaces for mobile devices. His second version is controlled with a POST request to a specific URL, which he likes because it gives him more flexibility as to how he can interact with the lock. Currently he has a simple web page setup that lets friends and family open the door by just clicking a button.

We’ve seen a similar setup using the Photon to open a garage door, and plenty of people have taken to using Blynk to control their home automation setups. All the tools are available for you to roll your own IoT gadgets, you just need to figure out what to do with the things…

ZPB30A1 Electronic Load Gets An Open Firmware

Importing cheap equipment and test gear is something of a mixed blessing. It allows you to outfit your lab without emptying your bank account, but on the other hand there’s usually a reason it’s cheap. Of course, the retail price of a piece of hardware shouldn’t be the metric by which we measure its quality, but there’s got to be a few corners cut someplace when they are selling this stuff for a fraction of what the name brands are charging.

A perfect example is the ZHIYU ZPB30A1 electronic load, available from various online importers for about $30 USD. While the price is right for an adjustable load that can handle up to 110 W, it’s got some pretty glaring shortcomings. In an effort to address at least some of those issues, [Luca Zimmermann] has been working on an open source replacement firmware for the load’s STM8S microcontroller.

[Luca] quickly discovered that the device’s STM8S005K6 chip is write protected, so unfortunately you can’t just flash a new firmware to it. If you want to unlock additional features, you need to perform a brain transplant. Luckily these chips are quite cheap, and you can probably add a couple of them to your cart when you order he ZPB30A1.

With the new GPLv3 licensed firmware installed, the device gains constant power and resistances modes (stock firmware can only do constant current), serial logging, and support for adjusting the value of the shunt resistor. There’s even a basic menu system to shuffle through the new modes. There’s still a couple features that haven’t been implemented, such as automatic shutdown, but it’s already a considerable upgrade from the stock software. Now we just need some details on the slick custom enclosure that [Luca] has put his upgraded ZPB30A1 into.

If this looks too easy, you can always go the DIY Arduino route for your load testing needs, or build a monster than can sink up to 1 kW.

[Thanks to Benik3 for the tip.]