Fixing A Product Design Flaw In A Misting System

[Xerxes3rd] works at a place where they raise reptiles in terrariums. Such enclosures require controlled lighting, temperature and humidity. Humidity is maintained using “misting” devices. These are usually water containers with a pump whose outlet ends in a series of very fine spray nozzles which create the mist. A timer controls the pump’s on and off cycles.

[Xerxes3rd] purchased an Exo Terra Monsoon RS400 misting system – a low-cost misting device and soon discovered that it had a serious design flaw. The built-in timer malfunctions, and it mists a hundred times more than it should! A lot of folks who buy a product and discover it has an inherent design flaw will return it back for a refund. Instead,  [Xerxes3rd] decided to break in and fix it instead –  “warranty void if tampered” be damned.

To start with, he needed to figure out what the problem was. He went about it in clinical fashion, eventually creating a slick document (PDF) outlining his observations and diagnosis. The timer controller board has a PIC micro, some buttons, potentiometers, LED’s and an IR receiver. The misting cycles are set using the two potentiometers – Off time and On time for the pump. His analysis and resolution makes for interesting reading.

What he found was that the PIC micro was reading inconsistent values from the potentiometers. More specifically, the software isn’t doing any smoothing on the analog values it reads from the potentiometers. Since the PIC that controls the system wasn’t easily re-programmable, he opted to replace it with an Arduino Nano. At the same time, he got rid of the potentiometers that were used to set the misting frequency and duration, and added a 16×2 LCD. Time setting is now done using the three on board buttons. He removed the PIC micro and replaced it with two female header sockets, onto which he plugged a small board containing an Arduino Nano and a few components. He also cut the original PCB in half, removing the potentiometers and crystal oscillator in order to make room for the 16×2 character LCD.

The lizards are now probably thanking him for their perfectly timed doses of moisture. Having done this, he could probably add in more features such as a temperature-humidity sensor, a water level sensor or maybe even throw in an ESP8266 module and have the Lizards tweet when they need to be hydrated. Because that’s another thing hackers love – feature creep.

An Amazon Dash-Like Button For The ESP8266

The Amazon Dash Button is a tiny piece of hardware that contains a single pushbutton, a WiFi module, and a nice, shiny corporate logo. Press the button, and products with that logo will be delivered to your house. An impressive bit of marketing, at least. With small, cheap WiFi modules like the ESP8266, it was only a matter of time until something an Amazon Dash clone was developed.

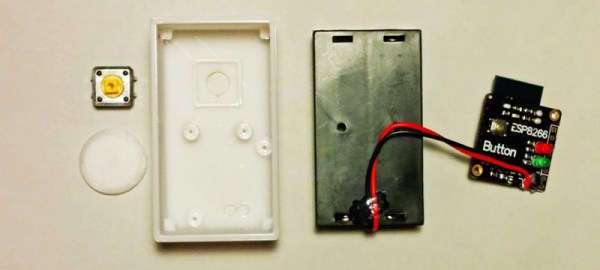
[deqing] created an ESP8266 Dash Button using the ESP-12 module, a button, a 3D printed case, and a pair of AA batteries. Electronically, it’s extremely simple; press the button, the ESP will wake up, request a URL, and put itself back to sleep. That’s all you need to do when you’re replicating the functionality of the Amazon Dash Button – the server will take care of the rest.

To configure the ESP8266, [dequng] is using the ESP-TOUCH app for Android, and setting up new functionality in this ESP button is as simple as putting a URL in the button’s Flash.

Not only is this a great build that has literally hundreds of different uses, it’s also not a breakout board for the ESP8266. It’s great that we’re finally seeing some builds using this cheap WiFi chip in the real world.

Obviously the actual Dash buttons include authentication that this one does not. We recently saw a teardown of the original hardware. We’re still waiting for in-depth analysis of the data squirted to the internet when an order is placed with it, though.

UFO Drone

Roswell Eat Your Heart Out

When [Ian Wood] accidentally broke the camera on his fancy-pants FPV quadrotor he was a little bit upset. But out of all things we break, we hack something new. [Ian] decided to strap on some RGB LEDs to the drone and turn it into a UFO to scare his neighbors!

Now we know what you’re thinking: RGB LEDs? That hardly constitutes a hack! You’re right — but [Ian] didn’t just simply strap some LEDs on and call it a day. Oh no. He’s using a Teensy micro-controller and the NazaCANDecoder to listen to the CAN bus for RC stick positions, flight mode, altitude, battery data, etc. This means the LEDs are actually responding to the way he flies the drone. And since there was a spare channel on his Futaba RX controller, he’s also got an animation mode that can be controlled from the ground to do whatever he wants. He also got rid of the standard indicator LEDs on the quad and wired them into his new setup. They’re all being controlled by a FastLED library on the Teensy. Check it out in the clip after the break.

Continue reading “Roswell Eat Your Heart Out” →

A Tool For Spying On Serial Data

[Piotr] was working on a recent Arduino project when he ran into a problem. He was having trouble getting his Arduino Pro Mini to communicate with an ESP8266 module. He needed a way to snoop on the back and forth serial communications. Since he didn’t have a specialized tool for this task, [Piotr] ended up building his own.

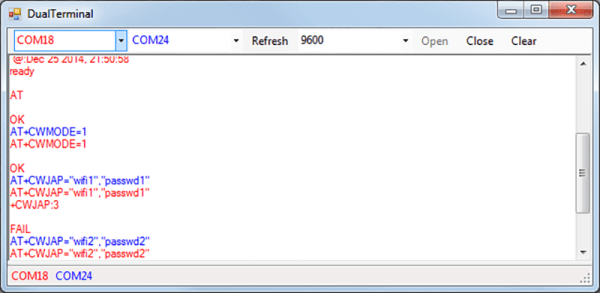
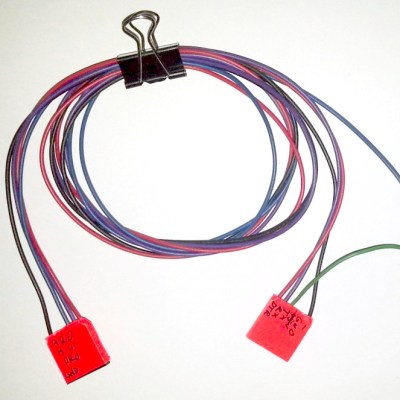
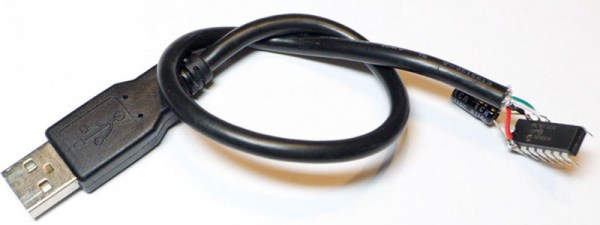
spying-on-serial-thumbThe setup is pretty simple. You start with a standard serial cable containing the TX, RX, DTR, and GND wires. This cable connects the Arduino to the ESP8266 WiFi module. The TX and RX lines are then tapped into. Each wire is routed to the RX pin of two different serial to USB adapters. This way, the data being sent from the Arduino shows up on one COM port and the data being transmitted from the module shows up on the other.
The next piece of the puzzle was coming up with a way to see the data more clearly. [Piotr] could have opened two serial terminals simultaneously, but this wasn’t ideal because it would be difficult to compare the timing of the data. Instead, [Piotr] spent less than an hour writing his own simple serial terminal. This one connects to two COM ports at the same time and prints the data on the same screen. The data from each COM port is displayed in a separate color to make it easy to differentiate. The schematic and source code to this project can be found on [Piotr’s] website.

A Simple Programmable 555

“Instead of an Arduino, he could have done that with a 555 timer.” “Instead of a 555 he could have done that with two transistors.” “Instead of a few transistors, he could have done that with butterflies.” These are quotes from various Hackaday comment threads throughout the years. It seems simplicity is the name of the game here, and if you need a timer chip, how about an 8-pin DIP? This, of course, means an I2C programmable oscillator in the form of an LPC810.

[kodera2t] built this circuit after reaching for a 555 timer a few too many times. It’s a one-chip solution with an ARM core that’s able to generate square waves with 1Hz resolution up to 65536Hz.

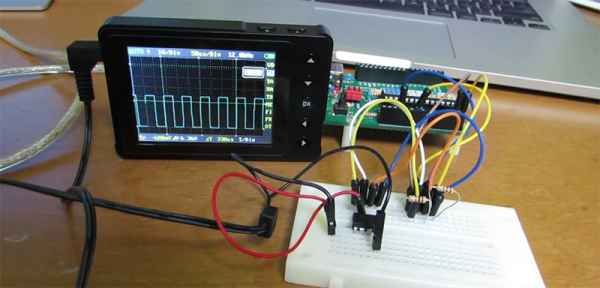
The source for this chip is a lot of C, but once it’s in the Flash of the LPC810, this chip becomes a programmable oscillator with an I2C interface. Yes, it’s a one-component solution, no, it’s not a twenty cent chip, but try programming a 555 over I2C.

The videos below show [kodera] playing around with this I2C oscillator, sweeping the frequency from zero to inaudible teenage angst.

Continue reading “A Simple Programmable 555” →

ESP8266 WiFi Throwies

A few years ago, someone figured out you can take an LED, a coin cell battery, and a magnet, tape them together, and throw them on every conceivable metallic surface. This was the creation of LED throwies, and the world was much worse off for its invention.

With the ESP-8266 WiFi module, we have a tiny, tiny device with a WiFi radio, and just enough processing power to do something interesting. What does that mean? WiFi throwies.

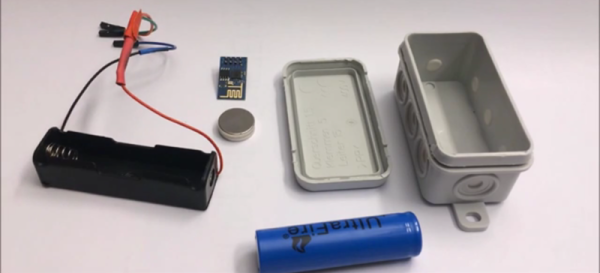
[Andreas Reischle] stuffed an ESP-8266 WiFi module and a lithium cell inside a weatherproof controller loaded up with magnets. On its own, these wouldn’t do much, but with the right combination of software, this little magnetic box can serve as an access point, serving up small JavaScript games to anyone who connects.

The software is based on the NodeMCU firmware and features a web server and a DNS server. The utility of a web server is obvious, and the DNS server redirects all traffic to the device’s index.html file, where a menu of small JavaScript games are presented.

It’s much better than polluting the world with LEDs and lithium; this one has Hunt the Wumpus on it.

Thanks [Oliver] for the tip.

Continue reading “ESP8266 WiFi Throwies” →

Hackaday Prize Entry: BS Free USB

Take a look at some old electronics magazines, or even a few blog posts from 10 years ago, and you’ll notice something strange: parallel ports. Those big ‘ol DB25 were the way to get bits out of a computer and into a microcontroller. There was a reason for this: it was exceptionally easy to do.

Now, we have USB to deal with, and that means VIDs and PIDs, drivers, enumeration, and a whole bunch of cruft that makes blinking an LED a surprisingly complicated process. [Colin O’Flynn]’s project for the 2015 Hackaday Prize aims to fix that with BSU – BS Free USB.

Instead of USB to serial chips attached to another microcontroller, [Colin] is using a few microcontrollers with a built-in USB interfaces. These chips are loaded up with firmware and controlled with a simple API on the computer side. If you want to blink a pin, just add a library to your project and set the pin high. Want some SPI on your computer? That’s just setting a few pins as MOSI, MISO, and SCK and typing in a few bytes. It’s basically a $2 Bus Pirate that you can stick into any project.

If [Colin]’s name sounds familiar in the context of The Hackaday Prize, it’s because he won second place with the ChipWhisperer last year. While a tiny USB thing isn’t quite as cool as a tool to break embedded encryption, the BSU certainly seems more useful to millions of hardware tinkerers around the world.


The 2015 Hackaday Prize is sponsored by: