Flipper Zero Mayhem Hat Adds Camera, More Radios

For a device advertised as the “Multi-tool Device for Hackers”, the Flipper Zero already offers a considerable list of onboard capabilities. But some hard decisions had to be made to get the retail price down, so features like WiFi and Bluetooth had to be left off. Luckily, there’s an expansion interface along the top of the device which makes it possible to plug in additional hardware.

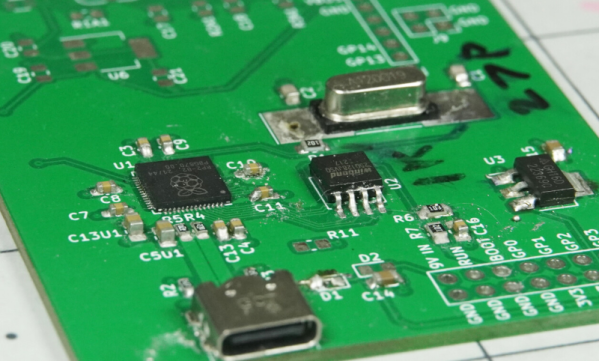
One of those expansions is the “Mayhem Hat” from [Erwin Ried]. This board adds many requested features to the Flipper Zero, as well as some that might not seem as obvious. The addition of an ESP32-CAM brings WiFi and Bluetooth to the party, while also unlocking access to the highly-capable ESP32Marauder firmware and the plethora of security research tools therein.

But the camera also enables some interesting features, such as motion detection and the ability to read QR codes. It even lets you use the Flipper as an impromptu digital camera, complete with an onscreen viewfinder reminiscent of the Game Boy Camera.

What’s more, the Mayhem Hat features its own expansion capabilities. There’s a spot to plug in either a CC1101 or NRF24l01 radio module, both of which are supported by community developed plugins that allow the user to sniff out and hijack signals. There are also extra pins for connecting your own sensors or hardware. In the demo video below you can see the device automatically detect the popular DHT11 environmental sensor and display the current temperature and humidity readings.

[Erwin] has the Mayhem Hat up for sale on Tindie, but as of this writing, is currently out of stock. Apparently, demand for the add-on boards is just as high as for the Flipper Zero itself — not a huge surprise, given the excitement we saw around this platform during its $4.8 million Kickstarter campaign.

Continue reading “Flipper Zero Mayhem Hat Adds Camera, More Radios”

Large E-Paper Slow Movie Player Offers Great Docs

Over the last couple of years we’ve seen several iterations of the “slow movie player” concept, where a film is broken up into individual frames which are displayed on an e-paper display for a few minutes at a time. This turns your favorite movie into a constantly changing piece of long-term art. Unfortunately, due to the relatively high cost of e-paper panels, most of the examples we’ve seen have only been a few inches across.

Of course, technology tends to get cheaper with time, which has allowed [szantaii] to put together this beautiful 10.3-inch version. With a 1872 × 1404 Waveshare panel capable of displaying 16 shades of gray and a Raspberry Pi Zero 2 W installed in a commercially purchased frame, the final product looks very professional. It certainly wouldn’t look out of place in a well-appointed living room.

It’s not just a large display that sets this project apart. [szantaii] has done a phenomenal job documenting both the hardware and software of this project, which includes the “Slow Movie Player service” Python software he’s written. Even if you aren’t using an identical hardware setup, his MIT-licensed code will absolutely get you going in the right direction.

We especially liked the several example configurations provided, as well as the explanation of how ImageMagick’s various grayscale conversion options impact the appearance of the final image.

All in all, this is not only a beautiful and well implemented version of the slow movie player concept — but it’s also the kind of project that helps elevate the entire community thanks to its transparency. We wouldn’t be surprised to see this latest iteration inspire more folks to pick up an e-paper panel and build one of their own. Could 2023 be the year of the slow movie player? We certainly hope so.

The USB Protocol, Explained

If you can explain what a USB PID, a J state, a K state, and an SOF are, you can probably stop reading now. But if you don’t know or you want a refresher, you can spend 15 minutes watching [Sine Lab’s] straightforward explanation of the USB protocol details. You can find the video below.

The motivation for this is he wants to add USB to his projects using an ATMega with a hardware USB implementation. Honestly, most of the time, you’ll just consume some premade library and get it working that way. However, understanding the terminology can help you, especially if things don’t go as planned.

Continue reading “The USB Protocol, Explained”

Low-Power Wi-Fi Includes E-Paper Display

Designing devices that can operate in remote environments on battery power is often challenging, especially if the devices need to last a long time between charges or battery swaps. Thankfully there are some things available that make these tasks a little easier, such as e-ink or e-paper displays which only use power when making changes to the display. That doesn’t solve all of the challenges of low-power devices, but [Albertas] shows us a few other tricks with this development board.

The platform is designed around an e-paper display and is meant to be used in places where something like sensor data needs to not only be collected, but also displayed. It also uses the ESP32C3 microcontroller as a platform which is well-known for its low power capabilities, and additionally has an on-board temperature and humidity sensor. With Bluetooth included as well, the tiny device can connect to plenty of wireless networks while consuming a remarkably low 34 µA in standby.

With a platform like this that can use extremely low power when not taking measurements, a battery charge can last a surprisingly long time. And, since it is based on common components, adding even a slightly larger battery would not be too difficult and could greatly extend this capability as well. But, we have seen similar builds running on nothing more than a coin cell, so doing so might only be necessary in the most extreme of situations.

Cornell Updates Their MCU Course For The RP2040

The School of Electrical and Computer Engineering at Cornell University has made [Bruce Land]’s lectures and materials for the Designing with Microcontrollers (ECE 4760) course available for many years. But recently [Bruce], who semi-retired in 2020, and the new lecturer [Hunter Adams] have reworked the course and labs to use the Raspberry Pi Pico. You can see the introductory lecture of the reworked class below.

Not only are the videos available online, but the class’s GitHub repository hosts extensive and well-documented examples, lecture notes, and helpful links. If you want to get started with RP2040 programming, or just want to dig deeper into a particular technique, this is a great place to start.

From what we can tell, this is the third overhaul of the class this century. Back in 2012 the course was using the ATmega1284 AVR microcontroller, and in 2015 it switched to the Microstick II using a Microchip PIC32MX. Not only were these lecture series also available free online, but each has been maintained as reference after being replaced. One common thread with all of these platforms is their low cost of entry. Assuming you already have a computer, setting up the hardware and software development environment for these modules costs less than the price of a pizza dinner, a fact no doubt appreciated by the ECE department’s budget director.

We’ve covered this course before back in 2015 when it first changed. Another free online course on embedded system design is from [Prof James Conrad] at UNC Charlotte, based on the Renasas RX63N microcontroller — the UNC Charlotte team drove development of the autonomous vehicle project we covered back in 2009. If you know of other online embedded systems classes, let us know in the comments below.

Continue reading “Cornell Updates Their MCU Course For The RP2040”

Videos Teach Bare Metal RP2040

When we write about retrocomputers, we realize that back in the day, people knew all the details of their computer. You had to, really, if you wanted to get anything done. These days, we more often pick peripherals and just assume our C or other high level code will fit and run on the CPU.

But sometimes you need to get down to the bare metal and if your desire is to use bare metal on the RP2040, [Will Thomas] has a YouTube channel to help you. The first video explains why you might want to do this followed by some simple examples. Then you’ll find over a dozen other videos that give you details.

Any video that starts, “Alright, Monday night. I have no friends. It is officially bare metal hours,” deserves your viewing. Of course, you have to start with the traditional blinking LED. But subsequent videos talk about the second core, GPIO, clocks, SRAM, spinlocks, the UART, and plenty more.

As you might expect, the code is all in assembly. But even if you want to program using C without the SDK, the examples will be invaluable. We like assembly — it is like working an intricate puzzle and getting anything to work is satisfying. We get it. But commercially, it rarely makes sense to use assembly anymore. On the other hand, when you need it, you really need it. Besides, we all do things for fun that don’t make sense commercially.

We like assembly, especially on platforms where most people don’t use it. Tackling it on a modern CPU is daunting, but if you want to have a go, we know someone who can help.

Continue reading “Videos Teach Bare Metal RP2040”

A gray 3d-printed box with RV-bridge embossed on it, and a connector-terminated bundle of wires coming out of it.

RV-Bridge Takes HomeKit To The Open Road

In the world of proprietary protocol darkness, it’s comforting to see that the RV realm (Recreational Vehicle, also known as a motorhome) has mostly settled on RV-C, an open protocol that lets various devices and systems inside an RV talk to each other over CAN. The undeniable openness of RV-C is surprising, but we haven’t seen many hobbyists tinker with it — yet.

Now, [Randy Ubillos] sets an example — his gift to us is an ESP32 firmware called RV-Bridge and it lets you control your RV’s RV-C network from HomeKit. After all, your motorhome could benefit from home automation, too!

The RV-C network in [Randy]’s family RV already had a factory-provided front-end and an iOS app, but naturally, it had a limited set of features. Having looked around online he found that both RV-C and HomeKit had open libraries for them, and set out to join these worlds together.

Now he’s released the first revision of RV-Bridge, fully-featured enough for comfortable day-to-day use, and with a setup guide for those who want to try it out! When it comes to hardware, you’ll want an ESP32 board with CAN support — [Randy] has found a perfect board for sale, and made it even more fitting by designing a 3D printed case for RV use; as usual, files are on GitHub!

Making your stock RV more comfy through hacker methods is exactly what we expect to grace our tips line! The kinds of RV projects we’ve seen so far, are also outstandingly cool, yet of different kind – things like building your own RVs out of something not meant to be an RV, whether it’s an abandoned airliner, a school bus, or a jet engine! Oh, and if your hackerspace owns a RV, you can always convert it to something else, be it a mobile hackerspace or a spaceship simulator.