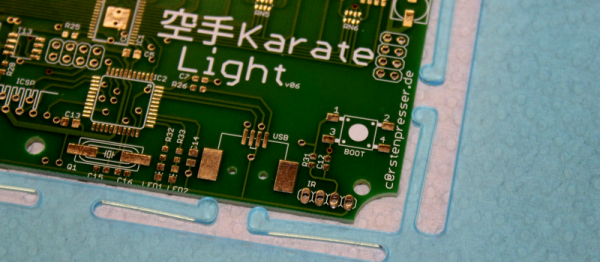
Captain America’s Mighty Shield With 7200N Of Powerful Electromagnets!

At Hackaday, sometimes we nerd out a bit too hard over comic book movies. With Captain America: Civil War in theaters, I knew I had to do a project dedicated to the movie — so I made a ridiculously over powered electromagnet bracer. The hope? To attract a Captain America replica shield from short distances.

electromagnet bracer
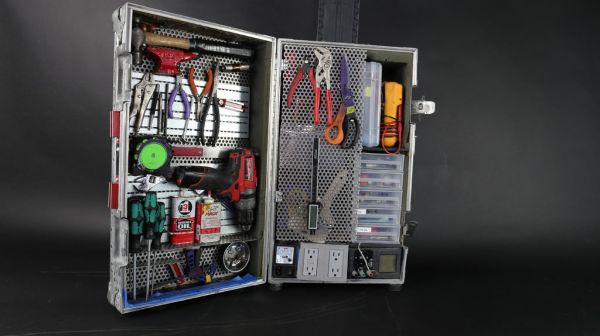
I had the idea for this project a while ago after watching Avengers: Age of Ultron.

If you’re not familiar, it appears Captain America gets a suit upgrade (presumably from Stark himself) that features some pretty awesome embedded electromagnets allowing him to call his shield back to him from afar.

Now unfortunately, electromagnets aren’t that strong and I knew I wouldn’t be able to achieve quite the same effect as good ol’ CGI — but I’d be darned not to try!  Continue reading “Captain America’s Mighty Shield With 7200N Of Powerful Electromagnets!”

That’s No Moon – That’s A Bamboo Death Star

At first glance, [Frank Howarth]’s turned bamboo Death Star seems like a straight woodworking project. No Arduino controlled lights, no Raspberry Pi for audio clips of an X-wing attack or escaping TIE fighter. In other words: where’s the hack?

It’s a freaking bamboo Death Star!

If that’s not enough for you, check out the pattern on the surface of the finished model. That’s not painted on – those are the layers of the laminated bamboo lumber used to create the rings [Frank] used to form the structure. After lots of turning, sanding and polishing, the characteristic vascular bundles of the bamboo create light and dark panels for a convincing effect of the Death Star’s surface detail. And although we like the natural finish, we can imagine a darker stain might have really made the details pop and made for an effect closer to the original.

Still not hackish enough? Then feast your eyes on [Frank]’s shop. It’s a cavernous space with high ceilings, tons of natural light, and seemingly every woodworking machine known to man. While the lathe and tablesaw do a lot of the work for this build, the drool-worthy CNC router sees important duty in the creation of the multiple jigs needed for the build, and for making the cutout for the superlaser, in what must have been a tense moment.

Bamboo is an incredible material, whether for fun builds like this or for more structural uses, like a bamboo bike. All this bamboo goodness puts us in the mood to call on [Gerrit Coetzee] for a new installment on his “Materials You Should Know” series.

Continue reading “That’s No Moon – That’s A Bamboo Death Star”

Dirt Cheap Dirty Decapping

Those tiny black rectangles of epoxy aren’t black boxes anymore. Decapsulating ICs is becoming somewhat common, and if you’re reverse engineering a chip-on-board epoxy blob, or just figuring out if the chip you bought is the chip you wanted, you’ll need to drop some acid. Usually this means finding someone with the knowhow to decap a chip, or having enough confidence in yourself to mess around with fuming nitric acid. Now Dangerous Prototypes has a better solution – Dirty Decapsulation. Send your chip to Dangerous Prototypes, and they’ll melt away the epoxy and take a few pictures of the die hidden inside your chip.

dirty-decapping
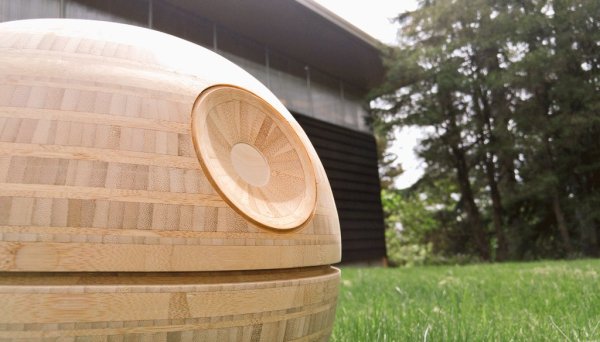
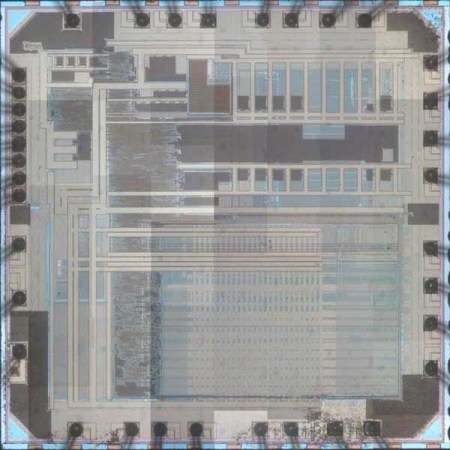
Dirty Decapsulation is Dangerous Prototype’s addition to their array of hacker services including cheap, crappy PCBs and SLA printing service. Dirty Decapsulation follows in the tradition of these other services; it’s not the best you can possibly get, but you’re not paying thousands of dollars for the job.

Right now, Dirty Decapsulation will take a chip, strip off the epoxy, and take a few pictures. These pictures are stitched together, producing a medium quality image of the die. No, you can’t see individual gates, and you can’t see different layers of metal and silicon. If you want that, you’ll need some nitric or a few thousand dollars. Dirty Decapsulation is just to verify the chip’s identity and give a rough idea of the layout of the die.

When The Smart Hits The Fan

A fan used to be a simple device – motor rotates blades, air moves, and if you were feeling fancy, maybe the whole thing oscillates. Now fans have thermostats, timers, and IR remotes. So why not increase the complexity by making a smart fan with an IoT interface?

[Casper]’s project looks more like a proof of concept or learning platform than a serious attempt at home automation. His build log mentions an early iteration based on a Raspberry Pi. But an ESP8266 was a better choice and made it into the final build, which uses an IR LED to mimic the signals from the remote so that all the stock modes of the fan are supported. The whole thing is battery powered and sits on a breadboard on top of the fan, but we’ll bet that a little surgery could implant the interface and steal power internally. As for interfaces, take your pick – an iOS app via the SmartThings home automation platform, through their SmartTiles web client, or using an Amazon Echo. [Casper] mentions looking into MQTT as well but having some confusion; we’d suggest he check out [Elliot Williams]’ new tutorial on MQTT to get up to speed.

Continue reading “When The Smart Hits The Fan”

X-Ray Everything!

We’re not 100% sure why this is being done, but we’re 110% happy that it is. Someone (under the name of [The X-Ray Playground]) is putting interesting devices under an X-ray camera and posting videos of them up on YouTube. And he or she seems to be adding a few new videos per day.

Want to see the inner workings of a pneumatic microswitch? Or is a running pair of servo motors more your speed? Now you know where to look. After watching the servo video, we couldn’t help but wish that a bunch of the previous videos were also taken while the devices were being activated. The ball bearing wouldn’t gain much from that treatment, but the miniature piston certainly would. [X-Ray Playground], if you’re out there, more working demos, please!

How long the pace of new videos can last is anyone’s guess, but we’re content to enjoy the ride. And it’s just cool to see stuff in X-ray. If we had a postal address, we know we’d ship some stuff over to be put under the lens.

We don’t have as many X-ray hacks as you’d expect, which is probably OK given the radioactivity and all. But we have seen [MikesElectricStuff] taking apart a baggage-scanner X-ray machine in exquisite detail, and a DIY fluoroscope (yikes!), so we’re not strangers. Who needs Superman? We all have X-ray vision these days.

Thanks [OiD] for the tip!

3D Printing Hailstone Molds For Science

Hollywood would have you believe that tornadoes are prevalent in the Midwest. We’re much more likely to see hail in the springtime—balls of slushy ice that pelt our roofs and dimple our cars. [Dr. Ian Giammanco] and his wife and fellow scientist [Tanya Brown-Giammanco] have been studying hail at the Insurance Institute for Business and Home Safety’s research lab since 2012. In 2013, their team created over 9,000 artificial hailstones and fired them at a mock-up of  a house in the first indoor full-scale hailstorm.

As fun as it sounds to shoot balls of ice at different things, they did it to better understand the humble hailstone and the damage it can do to insurable goods. Those hailstones from a few years ago were created manually by injecting molds and freezing them. Recently, [the Giammancos] and  have taken a more advanced approach to creating artificial hail so they can study the physical characteristics. They scan actual hailstones in order to create models of them. Then they make a 3D-printed mold and use it in a hail-making machine that uses diffused carbon dioxide to mimic the layering that occurs when natural hailstones are formed.

While it would be nice to be able to control hail, the next best thing is mitigating the damage it causes. The better that scientists understand hail, the better materials will become that can withstand its impact. Perhaps someone can perfect a shape-shifting building material and make it resistant to hail.

35 MPH NERF Darts!

Did you know the muzzle velocity of a NERF dart out of a toy gun? Neither did [MJHanagan] until he did all sorts of measurement. And now we all know: between 35 and 40 miles per hour (around 60 km/h).

foo_thumbnailFirst, he prototyped a single beam-break detector (shown above) and then expanded his build to two in order to get velocity info. A Propeller microcontroller took care of measuring the timing. Then came the gratuitous statistics. He took six different darts and shot them each 21 times, recording the timings. Dart #3 was the winner, but they all had similar average speeds. You’re not going to win the office NERF war by cherry-picking darts.

Anyway, [MJ] and his son had a good time testing them out, and he thinks this might make a good kids’ intro to science and statistics. We think that’s a great idea. You won’t be surprised that we’ve covered NERF chronographs before, but this implementation is definitely the scienciest!

Thanks [drudrudru] for the tip!