Every twenty to twenty-five years, trends and fads start reappearing. 2016 is shaping up to be a repeat of 1992; the X-files is back on the air, and a three-way presidential election is a possibility. Star Trek is coming back, again. Roll these observations back another twenty-five years, and you have The Outer Limits, Star Trek, and riots at the DNC convention in Chicago.
History repeating itself is not the exclusive domain of politics and popular culture. It happens with tech, too: the cloud is just an extension of thin clients which are an extension of time-sharing. Everything old is new again.
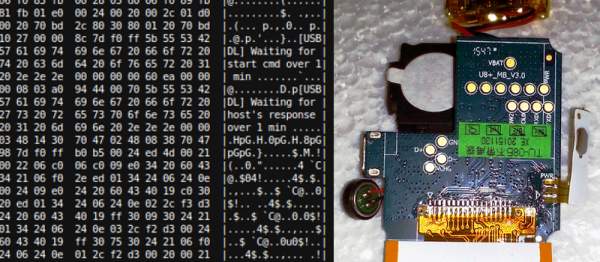
For the last few years, Soft Machines, a fabless semiconductor company running in stealth mode, released the first preview for an entirely new processor architecture. This new architecture, VISC, offers higher performance per Watt than anything available on the market. If you’ve been paying attention for the last decade or so, the future of computing isn’t 200-Watt space heaters that also double as powerful CPUs. The future is low power machines that are good enough to run Facebook or run some JavaScript. With servers, performance per Watt is possibly the most important metric. How will Soft Machines upend the semiconductor market with new processors and new architectures? If you know your history, it shouldn’t be a surprise.
Continue reading “Variable Instruction Computing: What Is Old Is New Again”


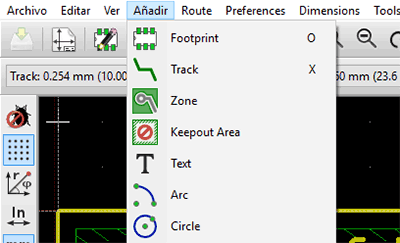 Mientras que ha habido otros intentos por localizar KiCad a otros idiomas, la mayoría de estos proyectos se encuentran incompletos. En una actualización de KiCad hace algunos meses, la localización al español ya contaba con algunas cadenas ya traducidas, pero no demasiadas. Los esfuerzos de [ElektroQuark] han acercado KiCad a millones de hablantes nativos de español, no solo algunos de sus menús.