Raspberry Pi Crazy Guitar Rig Turns You Into A Hard ‘N Heavy One-Man Band

It’s a common problem: you’re at a party, there’s a guitar, and your plan to impress everyone with your Wonderwall playing skills is thwarted by the way too loud overall noise level. Well, [Muiota betarho] won’t have that issue ever again, and is going to steal the show anywhere he goes from now on with his Crazy Guitar Rig 2.0, an acoustic guitar turned electric — and so much more — that he shows off in three-part video series on his YouTube channel. For the impatient, here’s video 1, video 2, and video 3, but you’ll also find them embedded after the break.

To start off the series, [Muiota betarho] adds an electric guitar pickup, a set of speakers, and an amplifier board along with a battery pack into the body of a cheap acoustic guitar. He then dismantles a Zoom MS-50G multi-effect pedal and re-assembles it back into the guitar itself with a 3D-printed cover. Combining a guitar, effect pedal, amp and speaker into one standalone instrument would make this already an awesome project as it is, but this is only the beginning.

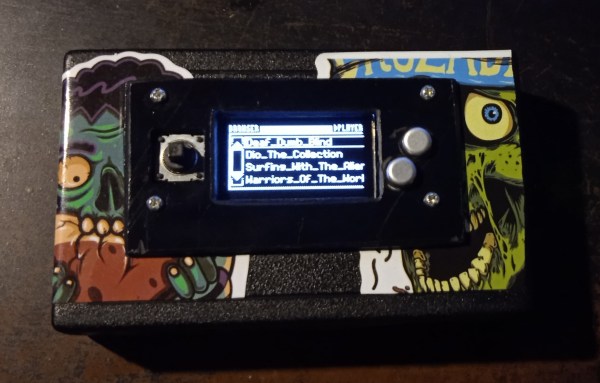
Touch screen and controls closeup
RPi touch screen running SunVox, plenty of buttons, and integrated multi-effect pedal on the left

So, time to add a Raspberry Pi running SunVox next, and throw in a touch screen to control it on the fly. SunVox itself is a free, but unfortunately not open source, cross-platform synthesizer and tracker that [Muiota betarho] uses to add drum tracks and some extra instruments and effects. He takes it even further in the final part when he hooks SunVox up to the Raspberry Pi’s GPIO pins. This allows him to automate things like switching effects on the Zoom pedal, but also provides I/O connection for external devices like a foot switch, or an entire light show to accompany his playing.

Of course, adding a magnetic pickup to an acoustic guitar, or generally electrifying acoustic instruments like a drum kit for example, isn’t new. Neither is using a single-board computer as effect pedal or as an amp in your pocket. Having it all integrated into one single device on the other hand rightfully earns this guitar its Crazy Guitar Rig name.

(Thanks for the tip, [alex]!)

Continue reading “Raspberry Pi Crazy Guitar Rig Turns You Into A Hard ‘N Heavy One-Man Band”

Making Music With A Go Board Step Sequencer

Ever wonder what your favorite board game sounds like? Neither did we. Thankfully [Sara Adkins] did, and created a step sequencer called Let’s Go that uses the classic board game Go as input.

In the game Go, two players place black and white tokens on a grid, vying for control of the board. As the game progresses, the configuration of game pieces gets more complex and coincidentally begins to resemble Conway’s Game of Life (or a weird QR Code). Sara saw music in the evolving arrangement of circles and transformed the ancient board game into a modern instrument so others could hear it too.

To an observer, [Sara’s] adaptation looks fairly indistinguishable from the version played in China 2,500 years ago — with the exception of an overhead webcam and nearby laptop, of course. The laptop uses OpenCV to digitize the board layout. It feeds that information via Open Sound Control (OSC) into popular music creation software Max MSP (though an open-source version could probably be implemented in Pure Data), where it’s used to control a step sequencer. Each row on the board represents an instrumental voice (melodic for white pieces, percussive for black ones), and each column corresponds to a beat.

Every new game is a new piece of music that starts out simple and gradually increases in complexity. The music evolves with the board, and adds a new dimension for players to interact with the game. If you want to try it out yourself, [Sara] has the project fully documented on her website, and all of the code is available on GitHub. Now we’re just left wondering what other games sound like — [tinkartank] already answered that question for chess, but what about Settlers of Catan?

Continue reading “Making Music With A Go Board Step Sequencer”

Reel In The Years With A Cassette Player Synth

Variable-speed playback cassette players were already the cool kids on the block. How else are you going to have any fun with magnetic tape without ripping out the tape head and running it manually over those silky brown strips? Sure, you can change the playback speed on most players as long as you can get to the trim pot. But true variable-speed players make better synths, because it’s so much easier to change the speed. You can make music from anything you can record on tape, including monotony.

[schollz] made a tape synth with not much more than a variable-speed playback cassette player, an Arduino, a DAC, and a couple of wires to hook it all up. Here’s how it works: [schollz] records a long, single note on a tape, then uses that recording to play different notes by altering the playback speed with voltages from a MIDI synth.

To go from synth to synth, [schollz] stood up a server that translates MIDI voltages to serial and sends them to the Arduino. Then the DAC converts them to analog signals for the tape player. All the code is available on the project site, and [schollz] will even show you where to add Vin and and a line in to the tape player. Check out the demo after the break.

There’s more than one way to hack a cassette player. You can also force them to play full-motion, color video.

Continue reading “Reel In The Years With A Cassette Player Synth”

3D-Printed Adapter Keeps Your Guitar In Tune And In Style

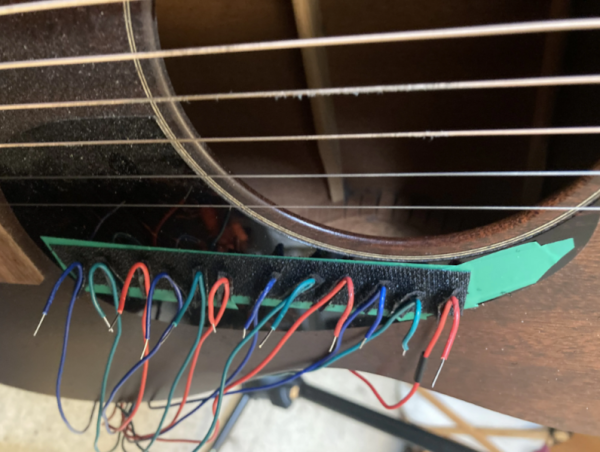
If you like building or upgrading guitars, you may have already learned the valuable lesson that the devil absolutely is in the detail when it comes to to replacement parts. Maybe you became aware that there are two types of Telecaster bridges right after you drilled the holes through the body and noticed things just didn’t quite fit. Or maybe you liked the looks of those vintage locking tuners and the vibe you associate with them, only to realize later that the “vintage” part also refers to the headstock, and the holes in your modern one are too big.

The latter case recently happened to [Michael Könings], so he did what everyone with a 3D printer would: make an adapter. Sure, you can also buy them, but where’s the fun in that? Plus, the solution is as simple as it sounds. [Michael] modelled an adaptor to bridge the gap between the headstock holes and the tuner shaft, but unlike the commercial counterpart that are mounted only on one side, his fills up the entire hole and fits the entire construct tightly together. For even more overall stability, he added an interlocking mechanism on the back side that keeps all the adaptors in line, and also allows for some possible distance differences.

[Michael] initially considered using wood filament for cosmetic reasons, but due to lack of the material went with simple white PLA instead. In the end, it doesn’t matter too much, as most of it hides under the new tuners’ metal covers anyway — and the small parts that are visible will serve as a great reminder of this lesson in guitar variety. Speaking of 3D printing and guitar variety, now that we reached the headstock, and have seen bodies for a while already (including bass), only 3D-printed guitar necks are missing. Well, we’ve had them on violins though, even with 6 strings, but they also don’t have to deal with frets and have a bit less tension going on.

Axe Hacks: New Sounds For Your Electric Guitar Beginning From What Makes Them Tick

Creating music is a perfect hobby for anyone into hacking, and the amount of musical hacks and self-made instruments we come across here makes that supremely evident. It’s just a great match: you can either go full-on into engineering mode as music is in the end “just” applied physics, or simply ignore all of the theory and take an artistic approach by simply doing whatever feels right. The sweet spot is of course somewhere in between — a solid grasp of some music theory fundamentals won’t hurt, but too much overthinking eventually will.

The obvious choice to combine a favorite pastime like electronics or programming with creating music would be in the realm of electronic music, and as compelling as building synthesizers sounds, I’ll be going for the next best thing instead: the electric guitar. Despite its general popularity, the enormous potential that lies within the electric guitar is rarely fully utilized. Everyone seems to just focus on amp settings and effect pedals when looking for that special or unique sound, while the guitar itself is seen as this immutable object bestowed on us by the universe with all its predestined, magical characteristics. Toggle a pickup switch, and if we’re feeling extra perky, give that tone pot a little spin, that’s all there is to it.

The thing is, the guitar’s electrical setup — or wiring — in its stock form simply is as boring and generic as it can get. Sure, it’s a safe choice that does the job well enough, but there’s this entirely different world of tonal variety and individual controllability locked inside of it, and all it really takes is a screwdriver and soldering iron to release it. Plus, this might serve as an interesting application area to dive into simple analog electronics, so even if guitars aren’t your thing yet, maybe this will tickle your creativity bone. And if bass is more your thing, well, let me be ignorant and declare that a bass is just a longer guitar with thicker, lower-tuned strings, meaning everything that follows pretty much applies to bass as well, even if I talk about guitars.

However, in order to modify something, it helps to understand how it functions. So today, we’ll only focus on the basics of an electric guitar, i.e. what’s inside them and what defines and affects their tone. But don’t worry, once we have the fundamentals covered, we’ll be all settled to get to the juicy bits next time.

Continue reading “Axe Hacks: New Sounds For Your Electric Guitar Beginning From What Makes Them Tick”

Adding MIDI To A Mini Synth Is Easy As Pi

There are a handful of relatively dirt cheap synths out there like the KORG Monotron, but many of them use ribbon controllers that aren’t very precise.  Ribbon controllers basically slide pots that you operate with your finger or a stylus.  They’re painted to look like piano keys in order to show you approximately where the notes are supposed to be. The Stylophone is another extremely affordable synth that does even less as a synthesizer and uses this type of input. It’s a fun input if you don’t mind imprecision, but can be annoying otherwise.

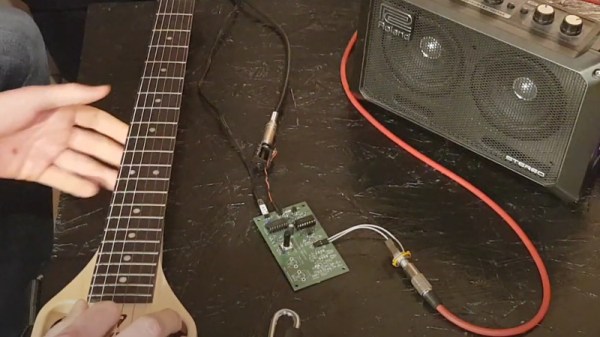
[schollz] isn’t satisfied to synth this way, so they added MIDI input to their KORG Monotron using a Raspberry Pi and a DAC. Fortunately, the Monotron is quite the hackable little synth, with nice, big, labelled pads on the PCB.

All it really took was a couple of solder joints in the right places, plus a clever Python script. The script listens for MIDI input from a keyboard, and then controls an MCP4725 DAC, which sends voltages to the Monotron. [schollz] wrote a tuning function that computes the FFT of the MIDI tones to find the fundamental frequencies of each to send along to the Monotron. Check it out after the break.

If liquid control is what you’re after but all you have is a keyboard, try making your own ribbon controller.

Continue reading “Adding MIDI To A Mini Synth Is Easy As Pi”

Controlling A Broken Super Nintendo With MIDI

A Super Nintendo that has trouble showing sprites doesn’t make for a very good game system. As it turns out, Super Mario World is a lot less fun when the titular hero is invisible. So it’s no surprise that [jwotto] ended up tossing this partially functional SNES into the parts bin a few years back.

But he recently came up with a project that may actually benefit from its unusual graphical issues; turning the glitched console into a circuit bent video synthesizer. The system was already displaying corrupted visuals, so [jwotto] figured he’d just help things along by poking around inside and identifying pins that created interesting visual effects when shorted out.

Installing the new electronics into the SNES.

Once he mapped out the pins, he wired them all up to a transistor switching board that he’d come up with for a previous project. That would let an Arduino short out the pins on command while still keeping the microcontroller relatively isolated from the SNES. Then it was just a matter of writing some code that would fire off the transistors based on MIDI input.

The end result is a SNES that creates visual glitches along with the music, which [jwotto] can hook up to a projector when he does live shows. A particularly neat feature is that each game responds in its own way, so he can swap out the cartridge to show completely different visuals without having to change any of the MIDI sequencing.

A project like this serves as a nice introduction to both circuit bending and MIDI hacking for anyone looking to get their digital feet wet, and should pair nicely with the MIDI Game Boy Advance.

Continue reading “Controlling A Broken Super Nintendo With MIDI”