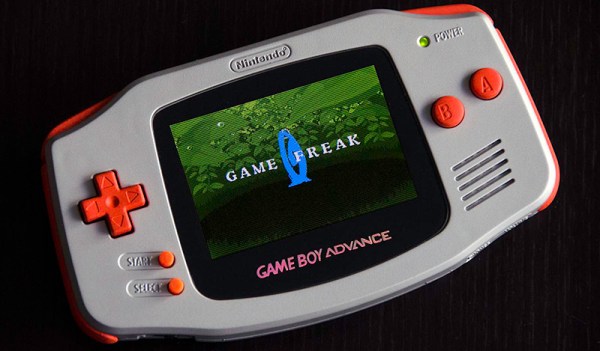
When it was announced in 2000 at a Nintendo trade show, the Game Boy Advance was clad in beautiful silver plastic, accented with brilliant orange buttons. As is usually the case with product introductions, the first color and style displayed to be public became the most popular. There was one problem with this silver and orange GBA; Nintendo never put it into production. Fast forward fifteen years, and [Michael Choi] decided it was time to make his own silver and orange Game Boy. It’s a great introduction to mold making and very detailed painting, and a useful guide for turning engineering prototypes into beautiful objects.
[Michael]’s build began with an aftermarket shell, painted with Tamiya spray paints. The color is remarkably accurate, considering the only pictures for the silver and orange Game Boy are fifteen years old, and with the right painting technique, these colors are indistinguishable from a properly colored, injection molded piece of plastic.
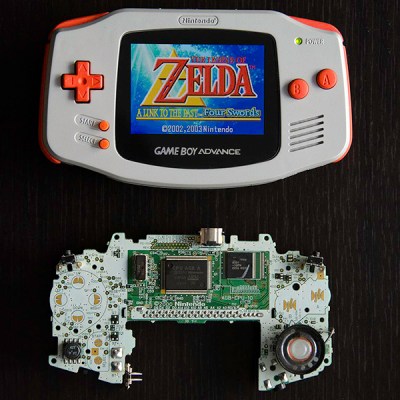 The buttons were not as easy as the shell. [Michael] originally decided casting would be the best solution, but after multiple attempts, he couldn’t get the color right. Even with opaque dyes in the resin, the buttons would still come out slightly translucent. In the end, [Michael] decided to paint the original buttons.
This casemod isn’t just about changing the color of the enclosure. [Michael] also wanted is Game Boy to have the backlight found in the second revision clamshell GBA. This was easily acquired on eBay, and with a few slight hardware modifications and a beautiful glass lens to replace the plastic occupying the bezel, [Michael] has a gorgeous Game Boy Advance, taken straight from a press event fifteen years ago.

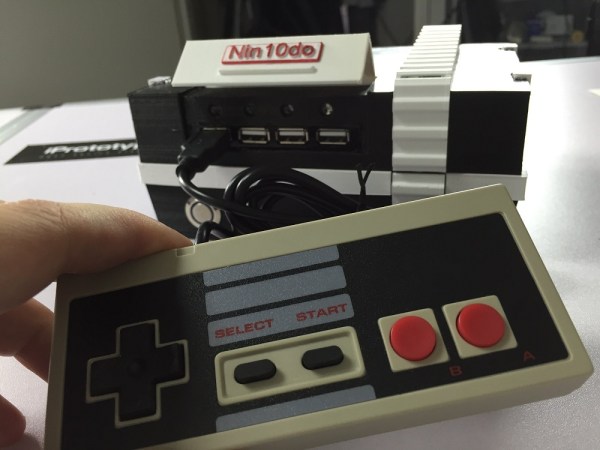
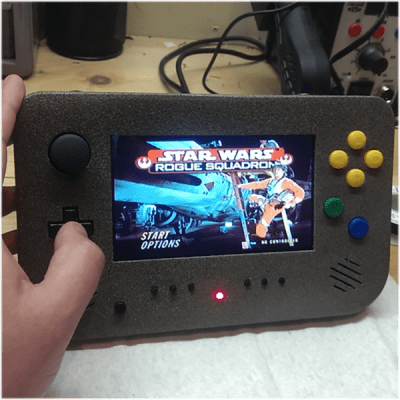 The enclosure for this project was initially printed in PLA, the parts glued together and finally filled for a nice, smooth finish. [Chris] says PLA was a bad choice – the low melting point means the heat from milling the face plate gums up the piece. In the future, he’ll still be using printed parts for enclosures, but for precision work he’ll move over to milling polystyrene sheets.