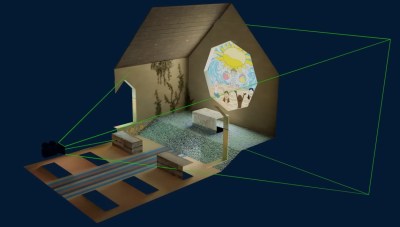
Back of the dock shown. You can see that the dock is milled out of a massive chunk of aluminium, and you can see the charging, HDMI and Ethernet ports being accessible on the back.

Nintendo Switch Stock Dock Imperfect? Mill Your Own!

Despite the seat of honor it enjoys in literally millions of households, the official Nintendo Switch Dock is certainly far from perfect. For one, it’s not milled out of a hefty block of aluminum. A less apparent but no less important issue is that the ports are positioned kind of awkward – [Kevin] from Modified believes that the USB ports should be facing the front side, while the HDMI, Ethernet, and charging inputs should be on the backside — a reasonable position. He set out to fix both of these problems at the same time, and tells us the CNC-heavy rebuild story in a short but captivating video.

The original dock consists of two PCBs, and these two boards are the only thing [Kevin] didn’t redesign from scratch. As they’re connected with a flexible cable, he could freely rotate and thus completely reposition the ports-equipped board without soldering. He added some standoffs to secure this board to the case, and after 3D printing a few iterations for test-fitting, the milling went on for all of us to marvel at.

The resulting dock is pretty, functional, and even has some extra features — for instance, the “i” in the embossed Nintendo logo lights up when the dock is in use. In no small part due to the Nintendo logo, we don’t expect this one to grace store shelves, but we hope that it provides inspiration to other makers to do their builds. If you like this rebuild and crave more, whether you’re looking for inspiration, CNC work insights, or pretty milling videos, [Kevin]’s milled Xbox case project is an excellent “Watch next” choice.

Continue reading “Nintendo Switch Stock Dock Imperfect? Mill Your Own!”

Picture showing the way the cut-down piece of chip is soldered onto the mainboard - looking, indeed, like a QFN package.

Making A Handheld NES By Turning DIP Chips Into…QFN?

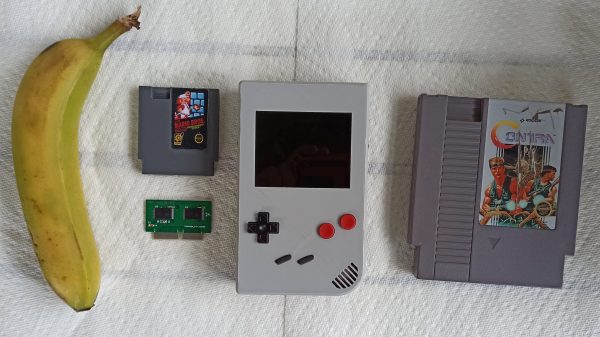
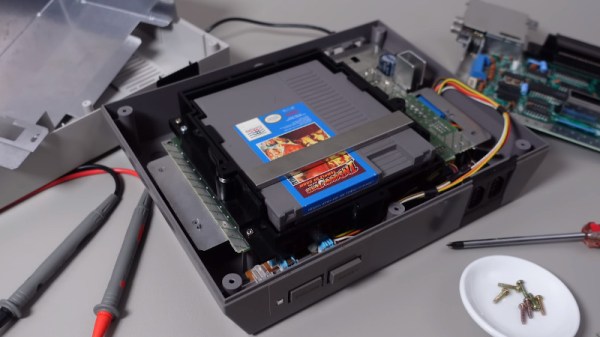
You can achieve a lot with a Dremel. For instance, apparently you can slim the original NES down into the hand-held form-factor. Both the CPU and the PPU (Picture Processing Unit) are 40-pin DIP chips, which makes NES minification a bit tricky. [Redherring32] wasn’t one to be stopped by this, however, and turned these DIP chips into QFN-style-mounted dies (Nitter) using little more than a Dremel cutting wheel. Why? To bring his TinyTendo handheld game console project to fruition, of course.

DIP chip contacts go out from the die using a web of metal pins called the leadframe. [Redherring32] cuts into that leadframe and leaves only the useful part of the chip on, with the leadframe pieces remaining as QFN-like contact pads. Then, the chip is mounted onto a tailored footprint on the TinyTendo PCB, connected to all the other components that are, thankfully, possible to acquire in SMD form nowadays.

This trick works consistently, and we’re no doubt going to see the TinyTendo being released as a standalone project soon. Just a year ago, we saw [Redherring32] cut into these chips, and wondered what the purpose could’ve been. Now, we know: it’s a logical continuation of his OpenTendo project, a mainboard reverse-engineering and redesign of the original NES, an effort no doubt appreciated by many a NES enthusiast out there. Usually, people don’t cut the actual chips down to a small size – instead, they cut into the mainboards in a practice called ‘trimming’, and this practice has brought us many miniature original-hardware-based game console builds over these years.

Continue reading “Making A Handheld NES By Turning DIP Chips Into…QFN?”

CRT TV screen showing a Super Mario Bros main screen with "Social Media Bros" written on the title screen instead. There's a NES console to the right of it, with a perfboard on top of it, wires going into the console port.

ConnectedNES Brings Twitter Into Super Mario Bros World

Back in 2016, artist and video game historian [Rachel Weil (HXLNT)] was hanging out with her friend and hacking on console stuff, as friends do. [Rachel] was galvanized by the idea of having an iconic game like Super Mario Bros be interrupted by push notifications, and set out to bring a Twitter feed to her NES gaming experience. What she ended up with is ConnectedNES — a charming combination of a custom Twitter modem and a hacked Super Mario Bros ROM, creating a social media experience you have to see for yourself.

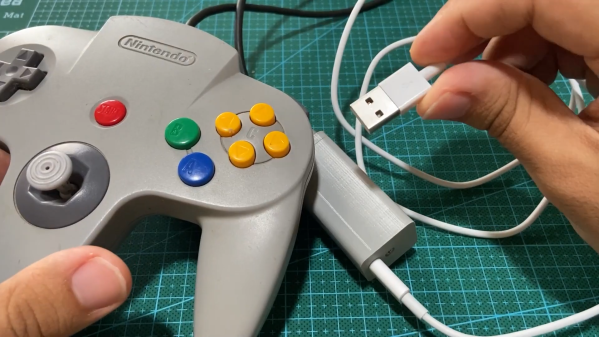
The technical side is as immaculate as the visuals. Data is transferred to the NES through the controller port using a Particle Photon that’s emulating a NES controller, and everything is encased in an adorable shell made out of yarn needlework.

The Photon currently taps into the Twitter feed through a proxy server run locally, and listens for tweets with specific keywords, relaying them to the ROM through mimicking controller port inputs. The ROM, now bearing the name Social Media Bros, went through some careful assembly trimming work. In particular, [Rachel] had to sacrifice Green Mario to the bit bucket gods.

Playing this game has to be quite the experience. Thankfully, source code for everything — the proxy server, the Photon firmware and the NES ROM — is on GitHub for all of us NES enthusiasts to hack at. If simply reading the feed is not enough, you can send tweets from your NES as well.

The NES Gets Its Own OS

Until recently, most video game systems didn’t need their own operating systems in order to play games. Especially in the cartridge era — the games themselves simply ran directly on the hardware and didn’t require the middleman of an operating system for any of the functionality of the consoles. There were exceptions for computers that doubled as home computers such as the Commodore, but systems like the NES never had their own dedicated OS. At least, until [Inkbox] designed and built the NES-OS.

The operating system does not have any command line, instead going directly for a graphical user interface. There are two programs that make up the operating system. The first is a settings application which allows the user to make various changes to the appearance and behavior of the OS, and the second is a word processor with support for the Japanese “Family Keyboard” accessory. The memory on the NES is limited, and since the OS loads entirely into RAM there’s only enough leftover space for eight total files. Those files themselves are limited to 832 bytes, which is one screen’s worth of text without scrolling.

While it might seem limited to those of us living in the modern era, the OS makes nearly complete use of the available processing power and memory of this 1980s system that was best known for Super Mario Bros. and Duck Hunt. It’s an impressive build for such a small package, and really dives into a lot of the hardware and limitations when building software for these systems. If you need more functionality than that, we’d recommend installing Linux on the NES Classic instead.

Continue reading “The NES Gets Its Own OS”

A Pokemon Silver Cartridge Made Of Pure Silver

The big problem with Pokemon Silver is that it came in a cartridge made of only-slightly-sparkly grey plastic. [Modified] decided to fix all that, making an all-silver cartridge instead.

The cartridge was first modeled to match the original as closely as possible, and 3D printed for a fit check. From there, a test cartridge was machined out of a block of aluminium to verify everything was correct. It’s a wise step, given the build relies on a 1-kilogram bar of silver worth roughly $750.

With everything checked and double-checked, machining the silver could go ahead. Every scrap of silver that could be saved from the CNC machining was captured in a box so that it could be recycled. Approximately 28 grams of silver was lost during the process. WD40 was used as a coolant during the machining process, as without it, the silver didn’t machine cleanly. The final cart weighed 164 grams.

It’s not a particularly hard project for an experienced CNC operator, but it is an expensive one. Primary expenses are the cost of the silver bar and the Pokemon cart itself, which can be had for around $50 on the usual auction sites.

However, the “heft and shine” of the finished product is unarguably glorious. Imagine handing that over to a friend to plug into their Game Boy! Just don’t forget to ask for it back. If you’re rich enough to do the same thing with Pokemon Gold or Platinum, don’t hesitate to drop us a line. 

We love a good casemod, and this one reminds us of a brilliant crystal PlayStation 2 from years past.

Continue reading “A Pokemon Silver Cartridge Made Of Pure Silver”

Why You’ve Never Heard About Nintendo’s U-Force

90’s kids think that the Power Glove was the coolest game peripheral of the epoch. We might have thought so too, until we heard about Don’t Touch: The Story of the U-Force from [The Gaming Historian].

The device itself folded up like a laptop, and on the two surfaces had four IR LED/sensor pairs. All of these combined would localize your fist in space for playing Mike Tyson’s Punch Out, or would work with various other passive controller add-ons like a flight yoke for playing Top Gun. (One of the coolest bits is the flip-out IR reflectors triggered by the buttons in the yoke.)

All-in-all, the video’s take is that a number of factors doomed the U-Force to play second fiddle to the Power Glove. Battling Mattel’s marketing prowess is obvious, but other things like manufacturing problems due to bad hinges and inconsistent IR sensors delayed release and added cost. In the end, though, [Dave Capper], the U-Force’s inventor, puts it down simply to non-convincing gameplay. There were no blockbuster games that used it to its full potential.

At the time, the U-Force utilized more IR LEDs than any other consumer electronic device.

We think there’s interesting hacker potential in a simple interface like this. Perhaps its biggest Achilles heel outside of the lack of a killer application was the fact that it required calibration. We can imagine all sorts of awesome interactions, and we’re not afraid of a little tweaking. Or maybe we would update the sensors to something more modern, like those inexpensive time-of-flight distance units.

Thanks [Karl Koscher] for bringing this documentary to our attention in the comments about the very similarly interesting laser theremin project we featured last year. It’s definitely opened our eyes to an old interaction of the past that would seem no less magical today.

Continue reading “Why You’ve Never Heard About Nintendo’s U-Force”

Building A GameCube Mini Because Nintendo Never Did

Nintendo never made a GameCube Mini, with the console’s form factor remaining the same until the eventual launch of the Wii in 2006. [Bringus Studios] decided to build one of his own instead.

The build began with a Revision C GameCube motherboard, which comes without the digital video port and the second serial port. It also comes with an integrated power supply on the motherboard which makes it much easier to slim down into a smaller form factor. The main space saving, though, came from removing the rarely-used ports on the bottom of the console and the DVD drive. The latter was replaced with PicoBoot, which allows ISOs to be loaded from an SD card.

Once trimmed down and fitted with a replacement cooling fan, the console then got a custom half-height 3D-printed case. It’s tidy and functional, but we’d love to see a more finished resin-printed version more accurately aping the traditional GameCube aesthetic.

If you want something even more portable, consider building a pocket-sized Wii. Video after the break.

Continue reading “Building A GameCube Mini Because Nintendo Never Did”