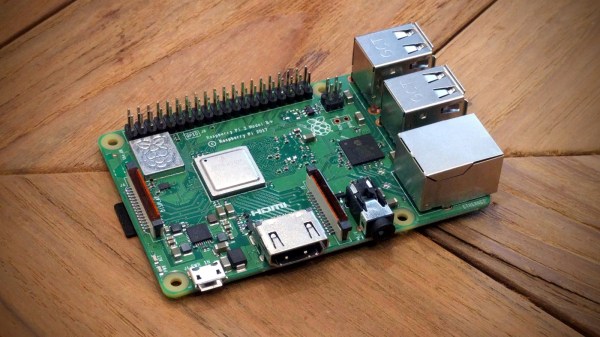
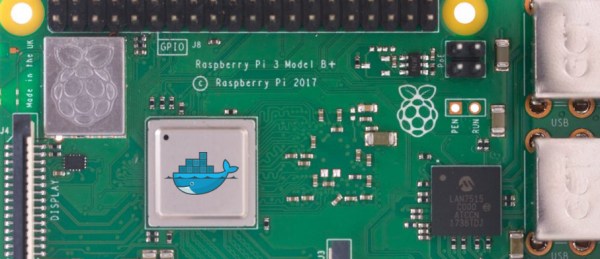
This is an interesting development for media users and machine learning hackers: [doe300] has implemented OpenCL on the Raspberry Pi 3 Model B+called VCFCL That’s big news because the Pi 3+ has a Graphics Processing Unit (GPU) built into the processor that has been generally underutilized. The VideoCore IV GPU is built into the Broadcom BCM2837B0 and is surprisingly capable for a low-power chip. Although this GPU is well documented, it hasn’t been used that widely because you have to code specifically for this class of GPU. Adding in support for a high-level framework like OpenCL will make it much easier to run and adapt existing packages.
Raspberry Pi1932 Articles
Howto: Docker, Databases, And Dashboards To Deal With Your Data
So you just got something like an Arduino or Raspberry Pi kit with a few sensors. Setting up temperature or motion sensors is easy enough. But what are you going to do with all that data? It’s going to need storage, analysis, and summarization before it’s actually useful to anyone. You need a dashboard!
But even before displaying the data, you’re going to need to store it somewhere, and that means a database. You could just send all of your data off into the cloud and hope that the company that provides you the service has a good business model behind it, but frankly the track records of even the companies with the deepest pockets and best intentions don’t look so good. And you won’t learn anything useful by taking the easiest way out anyway.
Instead, let’s take the second-easiest way out. Here’s a short tutorial to get you up and running with a database backend on a Raspberry Pi and a slick dashboard on your laptop or cellphone. We’ll be using scripts and Docker to automate as many things as possible. Even so, along the way you’ll learn a little bit about Python and Docker, but more importantly you’ll have a system of your own for expansion, customization, or simply experimenting with at home. After all, if the “cloud” won’t let you play around with their database, how much fun can it be, really?
Continue reading “Howto: Docker, Databases, And Dashboards To Deal With Your Data”
Raspberry Pi Jukebox Hits All The Right Notes
We (and by extension, you) have seen the Raspberry Pi crammed into nearly every piece of gear imaginable. Putting one inside a game console is so popular it’s bordering on a meme, and putting them into old stereos and other pieces of consumer electronics isn’t far behind. It’s always interesting to see how hackers graft the modern Raspberry Pi into the original hardware, but we’ll admit it can get a bit repetitive. So how about somebody scratch building an enclosure for their jukebox project?
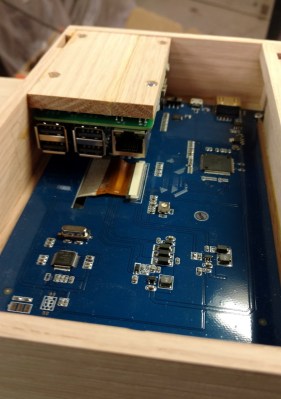 [ComfortablyNumb] took the road less traveled when he created this very nice wooden Raspberry Pi enclosure in the shape of an eighth note. Stained and varnished and with a nice big touch screen in the middle to handle the controls, it’s an attractive and functional piece of home audio gear that we imagine most people would be happy to hang on their wall.
The process starts by printing out the desired shape on a piece of paper to use as guide, and then gluing together strips of wood to create the rough outline. Then the surface was thoroughly sanded to bring all of the strips of wood to the same level, and the final design was cut out. On the back of the note, [ComfortablyNumb] boxed out an area to hold the Waveshare seven-inch touch screen panel and the Raspberry Pi itself.
Having seen so many projects where the Pi is rather unceremoniously shoehorned into another device, it’s refreshing to see the results of a purpose-built enclosure. Since [ComfortablyNumb] was able to build the electronics compartment to his exact dimensions, the final result looks exceptionally clean and professional. Not a drop of hot glue to be seen. It also helps that this build only required the Pi and the display; as the device is meant to be plugged into an existing audio setup, there’s no onboard amplifier. The audiophiles out there might recoil in horror, but adding a dedicated digital to analog converter (DAC) would be easy enough to add if the stock audio on the Pi isn’t good enough for you.
The project is finished off with stain and several coats of varnish to get that deep and rich color. We don’t often find ourselves working with dead trees around these parts, but we’ve got to admit that the final product does look quite handsome. Certainly beats the LEGO cases many of our Pi projects live in.
If you’re looking for more wooden-encased Pi jukeboxes, you might enjoy this somewhat abstract magstripe-based take on the concept. Of course, we’ve also seen our fair share of actual jukeboxes receive a Raspberry infusion over the years.
[via /r/raspberry_pi]
Sly Guy Nabs Pi Spy
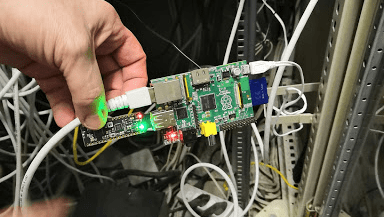
When one of [Christian Haschek’s] co-workers found this Raspberry Pi tucked into their network closet, he figured it was another employee’s experiment – you know how that goes. But, of course, they did the safe thing and unplugged it from the network right away. The ensuing investigation into what it was doing there is a tour de force in digital forensics and a profile of a bungling adversary.
A quick check of everyone with access to that area turned up nothing, so [Christian] shifted focus to the device itself. There were three components: a Raspberry Pi model B, a 16GB SD card, and an odd USB dongle that turned out to be an nRF52832-MDK. The powerful SoC on-board combines a Cortex M4 processor with the RF hardware for BLE, ANT, and other 2.4 GHz communications. In this case, it may have been used for sniffing WiFi or bluetooth packets.
The next step was investigating an image of the SD card, which turned out to be a resin install (now called balena). This is an IoT web service that allows you to collect data from your devices remotely via a secure VPN. Digging deeper, [Christian] found a JSON config file containing a resin username. A little googling provided the address of a nearby person with the same name – but this could just be coincidence. More investigation revealed a copyright notice on some mysterious proprietary software installed on the Pi. The copyright holder? A company part-owned by the same person. Finally, [Christian] looked into a file called resin-wifi-01 and found the SSID that was used to set up the device. Searching this SSID on wigle.net turned up – you guessed it – the same home address found from the username.
But, how did this device get there in the first place? Checking DNS and Radius logs, [Christian] found evidence that an ex-employee with a key may have been in the building when the Pi was first seen on the network. With this evidence in hand, [Christian] turned the issue over to legal, who will now have plenty of ammunition to pursue the case.
If you find the opportunity to do some Linux forensics yourself, or are simply interested in learning more about it, this intro by [Bryan Cockfield] will get you started.
Automate Your Home From The Clearance Rack
The month or so after the holidays have always been a great time to pick up some interesting gadgets on steep clearance, but with decorations and lights becoming increasingly complex over the last few years, the “Christmas Clearance” rack is an absolute must see for enterprising hackers. You might just luck out like [ModernHam] and find a couple packs of these dirt cheap wireless light controllers, which can fairly easily be hacked into the start of a home automation system with little more than the Raspberry Pi and a short length of wire.
In the video after the break, [ModernHam] walks the viewer through the start to finish process of commanding these cheap remote plugs. Starting with finding which frequencies the remotes use thanks to the FCC database and ending with using cron to schedule the transmission of control signals from the Pi, his video really is a wealth of information. Even if you don’t have this particular model of remote plug, or don’t necessarily want to setup a home automation system, there’s probably some element of this video that you could still adapt to your own projects.
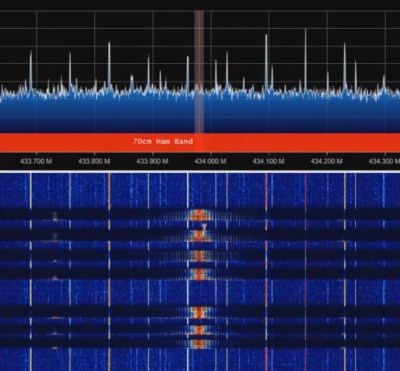 The first step of the process is figuring out how the remote is communicating to the plugs. [ModernHam] noticed there was no frequency listed on the devices, but using their FCC IDs he was able to find the relevant information. In the United States, devices like these must have their FCC IDs visible (though they could be behind a battery door) by law, so the searchable database is an invaluable tool to do some basic reconnaissance on a poorly documented gadget.
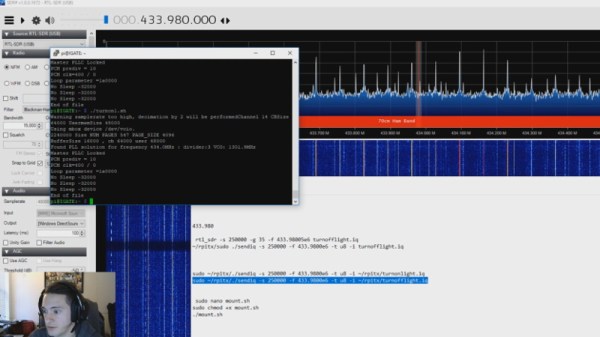
An RTL-SDR receiver is then used to fine tune the information gleaned from the FCC filing. [ModernHam] found that the signals for all four of the remote plugs were being broadcast on the same frequency, which makes controlling them all the easier. Using the rtl-sdr command, he was able to capture the various signals from the transmitter and save them to separate files. Then it’s just a matter of replaying the appropriate file to get the plugs to do your bidding.
Of course, the RTL-SDR can’t transmit so you’ll have to leave your dongle behind for this last step. Luckily all you need to transmit is the rpitx package created by [F5OEO], along with a supported Raspberry Pi and a small length of wire attached to the appropriate GPIO pin. This package contains the tool sendiq which can be used to replay the raw captures made in the previous step. With some scripting, it’s fairly straightforward to automate these transmissions to control the remote plugs however you wish from the Pi.
The RTL-SDR Blog put together their own guide for “brute forcing” simple remote control devices like this as well, and we’ve even seen similar techniques used against automotive key fobs in the past. Amazing what a piece of wire and some clever code can pull off.
Continue reading “Automate Your Home From The Clearance Rack”
DIY Clapper Is 1980s Style With Raspberry Pi Twist
Home automation isn’t all that new. It is just more evolved. Many years ago, a TV product appeared called the Clapper. If you haven’t heard of it, it was basically a sound-operated AC switch. You plug, say, a lamp into the device and the clapper into the wall and you can then turn the lamp on or off by clapping. If you somehow missed these — and you can still get them, apparently — have a look at the 1984 commercial in the video below. [Ash] decided to forego ordering one on Amazon and instead built her own using a Raspberry Pi.
[Ash’s] prototype uses an LED and could — in theory — drive anything. If you wanted to make a real Clapper replacement you’d need a relay or some other kind of AC switch suitable for the load. The actual clap detection software is from [nikhiljohn10] and simply waits for two loud noises. No fancy machine learning to differentiate between a clap and a cat knocking over a vase. Just a threshold and some timing.
Continue reading “DIY Clapper Is 1980s Style With Raspberry Pi Twist”
This Computer Mouse Houses A Mouse Computer
Everyone has heard of a computer mouse before, but what about a mouse computer?
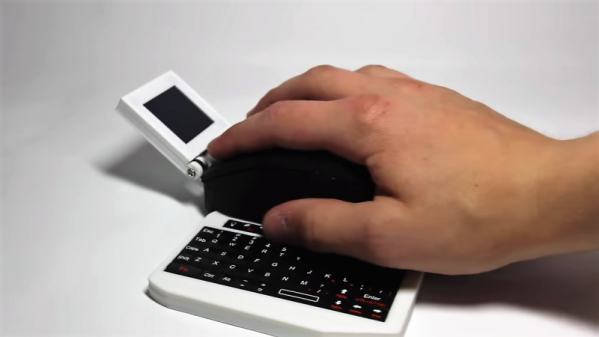
Granted, [Electronic Grenade]’s all-in-one computer in an oversized mouse-shaped case is almost without practical value. But that’s hardly the point, which was just to do something cool. Inspiration came from keyboards stuffed with a Raspberry Pi to make a mostly-all-in-one machine; this Rodent of Unusual Size is the next logical step. With a Pi Zero W and a LiPo battery alongside a mouse mechanism inside the 3D-printed case – alas, no real mouse currently on the market would house everything – the computer sports not only a tiny and nearly-usable LCD display, but also a slide-out Bluetooth keyboard. The ergonomics of a keyboard at right angles to the display gives us pause, but again, usability is not the point. And don’t expect much in the performance department – the rig barfs after a few seconds of playing Minecraft.
Still, for all its limitations, this mouse computer has a certain charm. We always enjoy “just because I can” projects, whether they be a Gameboy ukelele or a fire-breathing animatronic duck. Such projects are often valuable not for what they produce, but for pushing into areas where no one has gone before.
Continue reading “This Computer Mouse Houses A Mouse Computer”

