SegaPi Zero Shows Game Gear Some Respect

If you were a gamer in 1991, you were presented with what seemed like an easy enough choice: you could get a Nintendo Game Boy, the gray brick with a slightly nauseating green-tinted screen that was already a couple of years old, or you could get yourself a glorious new Sega Game Gear. With full color display and games that were ported straight from Sega’s home consoles, it seemed like the Game Gear was the true future of portable gaming. But of course, that’s not how things actually went. In reality, technical issues like abysmal battery life held the Game Gear back, and conversely Nintendo and their partners were able to squeeze so much entertainment out of the Game Boy that they didn’t even bother creating a true successor for it until nearly a decade after its release.

While the Game Gear was a commercial failure compared to the Game Boy back in the 1990s and never got an official successor, it’s interesting to think of what may have been. A hypothetical follow-up to the Game Gear was the inspiration for the SegaPi Zeo created by [Halakor]. Featuring rechargeable batteries, more face buttons, and a “console” mode where you can connect it to a TV, it plays to the original Game Gear’s strengths and improves on its weaknesses.

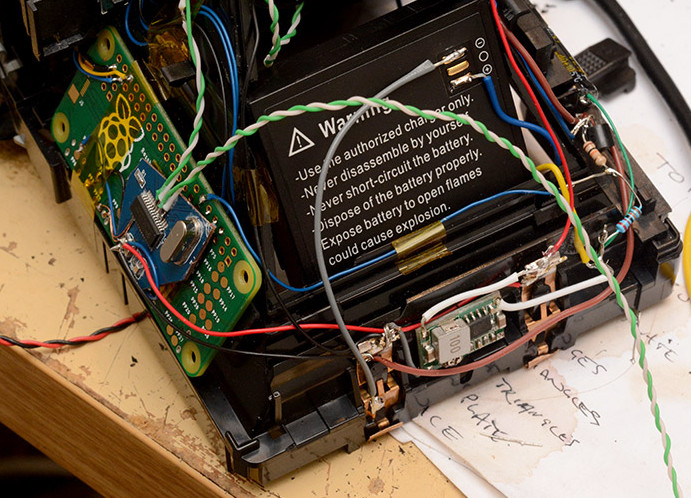
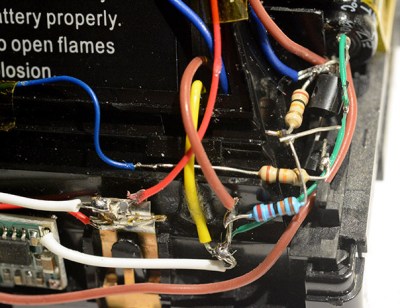
As the name implies the SegaPi Zero is powered by the Raspberry Pi Zero, and an Arduino Pro Micro handles user input by tactile switches mounted behind all the face buttons. A TP4056 charging module and step-up converter are also hiding in there, which take care of the six 3.7 lithium-Ion 14500 batteries nestled into the original battery compartments. With a total capacity of roughly 4,500 mAh, the SegaPi Zero should be able to improve upon the 3 – 4 hour battery life that helped doom the original version.

There’s no shortage of projects that cram a Raspberry Pi into a classic game system, but more often than not, they tend to be Nintendo machines. It could simply be out of nostalgia for Nintendo’s past glories, but personally we’re happy to see another entry into the fairly short list of Sega hacks.

Pop Goes The Haunted Jack-in-the-Box

Is Halloween sneaking up on you, too?  It’s less than two weeks away, but there is still plenty of time to build something that will scare the pants off trick-or-treaters and party guests alike. This year, Hackaday regular [Sean Hodgins] hacked his favorite holiday by taking something that ships with a base level of scariness and making it autonomous. What could be more frightening than a haunted toy?

The (decades-old) jack-in-the-box mechanism is simple. Turning the crank operates a mechanical music box that plays the traditional “Pop Goes the Weasel”. When the music box hits the high note, a jutting piece of plastic on the barrel of music box disturbs the other end of the latch, which frees the scary clown inside. [Sean] used a 100:1 DC motor to turn the crank from the inside, and a Pi camera to detect victims in the vicinity. Once the camera locks on to a face, the box cranks itself and eventually ejects the jester. Since most of the space inside is already taken up by the spring, [Sean] housed the electronics in a custom 3D-printed base with a hole cut out for the camera’s eye.

Many modifications are possible with a project like this. [Sean] is now in complete control of the latch operation, so he could make the clown pop appear instantly, or randomly, or sometimes not at all. Check out [Sean]’s entertaining build video after the break.

Want to make your own fright machine from scratch? We’ve got all the inspiration you need, from tabletop to trash can-sized monsters. Continue reading “Pop Goes The Haunted Jack-in-the-Box”

Spare RPi? You Have A Currency Trading Platform

While Bitcoin and other altcoins are all the rage these days, there is still a lot of activity in the traditional currency exchanges. Believe it or not, there’s money to be made there as well, although it rarely makes fanciful news stories like cryptocurrency has been. Traditional currency trading can be done similar to picking stocks, but if you’d rather automate your particular trading algorithm you can set up a Raspberry Pi to make money by trading money.

This particular project by [dmitry] trades currency on the Forex exchange using an already-existing currency trading software package called MetaTrader. This isn’t an ARM-compatible software suite though, so some auxiliary programs (Wine and ExaGear Desktop) need to be installed to get it working properly. From there, its easy enough to start trading in government-backed currency while reaping all of the low-power-usage benefits that the Pi offers.

[dmitry] does note that you can easily use MetaTrader on a standard laptop, but you might be tempted to go against your trading algorithms and even then you won’t be reaping the power benefits of the ARM processor. We don’t see too many traditional currency or stock trading tips around here, but don’t forget that it’s still possible to mine some types of cryptocurrency even if BitCoin is out of reach of most now.

Encrypt Data On The Fly On A Pi With Cryptopuck

There was a time that encryption was almost a dirty word; a concept that really only applied to people with something to hide. If you said you wanted to encrypt your hard drive, it may as well have been an admission to a crime. But now more than ever it’s clear that encryption, whether it’s on our personal devices or on the web, is a basic necessity in a digital society. The age of Big Data is upon us, and unless you’re particularly fond of being a row in a database, you need to do everything you can to limit the amount of plaintext data you have.

Of course, it’s sometimes easier said than done. Not everyone has the time or desire to learn how the different cryptographic packages work, others may be working on systems that simply don’t have the capability. What do you do when you want to encrypt some files, but the traditional methods are out of reach?

Enter the latest project from [Dimitris Platis]: Cryptopuck. By combining the ever-versatile Raspberry Pi Zero, some clever Python programs, and a few odds and ends in a 3D printed case, he has created a completely self-contained encryption device that anyone can use. Stick a USB flash drive in, wait for the LED to stop blinking, and all your files are now securely encrypted and only accessible by those who have the private key. [Dimitris] envisions a device like this could be invaluable for reporters and photographers on the front lines, protesters, or really anyone who needs a discreet way of quickly securing data but may not have access to a computer.

The hardware side is really just the Pi, a switch, a single LED for notifications, and a battery. The real magic comes from the software, where [Dimitris] has leveraged PyCrypto to perform the AES-256 encryption, and a combination of pyinotify and udiskie to detect new mounted volumes and act on them. The various Python scripts that make up the Cryptopuck suite are all available on the project’s GitHub page, but [Dimitris] makes it very clear the software is to be considered a proof of concept, and has not undergone any sort of security audit.

For some background information on how the software used by the Cryptopuck works you may want to check out this excellent primer from a few years back; though if you’d like to read up on why encryption is so important, you don’t need to go nearly as far back in time.

Continue reading “Encrypt Data On The Fly On A Pi With Cryptopuck”

A Raspberry Pi Rain Man In The Making

We see a lot of Raspberry Pis used to play games, but this is something entirely different from the latest RetroPie build. This Raspberry Pi is learning how to read playing cards, with the goal of becoming the ultimate card counting blackjack player.

If [Taxi-guy] hasn’t named his project Rain Man, we humbly suggest that he does so. Because a Pi that can count into a six-deck shoe would be quite a thing, even though it would never be allowed anywhere near a casino. Hurdle number one in counting cards is reading them, and [Taxi-guy] has done a solid job of leveraging the power of OpenCV on a Pi 3 for the task. His description in the video below is very detailed, but the approach is simple: find the cards in a PiCam image of the playing field using a combination of thresholding and contouring. Then, with the cards isolated, compare the rank and suit in the upper left corner of the rotated card image to prototype images to identify the card. The Pi provides enough horsepower to quickly identify an arbitrary number of non-overlapping cards; we assume [Taxi-guy] will have to address overlapping cards and decks that use different fonts at some point.

We’re keen to see this Pi playing blackjack someday. As he’s coding that up, he may want to look at algorithmic approaches to blackjack strategies, and the real odds of beating the house.

Continue reading “A Raspberry Pi Rain Man In The Making”

Terrible Cluster Of PIs

When we first saw [Ajlitt’s] Hackaday.io project Terrible Cluster we thought, perhaps, he meant terrible in the sense of the third definition:

3. exciting terror, awe, or great fear; dreadful; awful. (Dictionary.com)

After looking at the subtitle, though, we realized he just meant terrible. The subtitle, by the way, is: 5 Raspberry PI Zeros. One custom USB hub. Endless disappointment.

There are four Raspberry Pi Zero boards that actually compute and one Raspberry Pi Zero W serves as a head node and network router. The total cost is about $100 and half of that is in SD cards. There’s a custom USB backplane and even a 3D-printed case.

At first, using five tiny computers in a cluster might not seem like a big deal. Benchmarking shows the cluster (with a little coaxing) could reach 1.281 GFLOPS, with an average draw of 4.962W. That isn’t going to win any world records. However, the educational possibilities of building a $100 cluster that fits in the palm of your hand is interesting. Besides, it is simply a cute build.

We’ve seen much larger Pi clusters, of course. You might be better off with some desktop CPUs, but — honestly — not much better.

Running The SNES Classic Mini Emulator On The Raspberry Pi

Unless you’ve been living under a rock, you’d be familiar with Nintendo’s hugely popular Classic Mini consoles. Starting with the NES, and now followed with the SNES, the consoles ship in a cute, miniature enclosure and emulate Nintendo classics using the horsepower of modern ARM chips. These consoles use an emulator that has been created especially for the purpose by Nintendo, in house – and [Morris] [krom] wanted to see if he could take the emulator on the SNES Classic Mini and run it on the Raspberry Pi.

Yes, there are already SNES emulators on the Raspberry Pi. But anyone interested in the nuts and bolts of emulation can see the clear interest in the tricks and techniques Nintendo are using to achieve the feat. In particular, Nintendo engineers have the benefit of access to internal documentation that can make the job a lot easier, particularly when dealing with edge cases.

[krom] has been kind enough to share the full instructions necessary to recreate this feat. One stumbling block was the difference in hardware between the Raspberry Pi and the SNES Classic Mini – the Pi using a Broadcom GPU instead of the SNES’s Mali hardware. However, a workaround was simple enough – swapping out some libraries was all that was required. It also gives some interesting insight – it looks like the SNES Classic Mini relies on the SDL libraries to run.

While emulation of the SNES has been a largely solved problem for quite some time, it’s great to see more work going on in the field. In particular, the official Nintendo emulation is reported to be particularly adept at running games that rely on the SuperFX chip.

For another take on SNES emulation, try out your old Mario games on the HoloLens.

Thanks [Morris] for the tip!