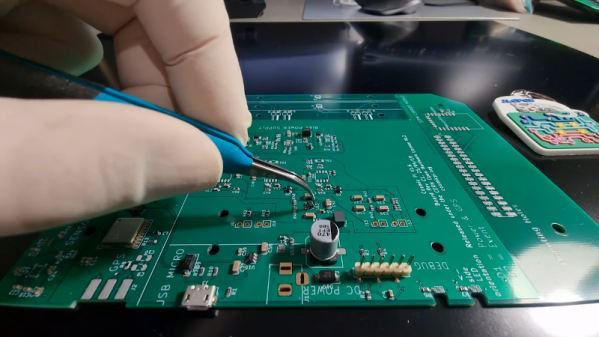
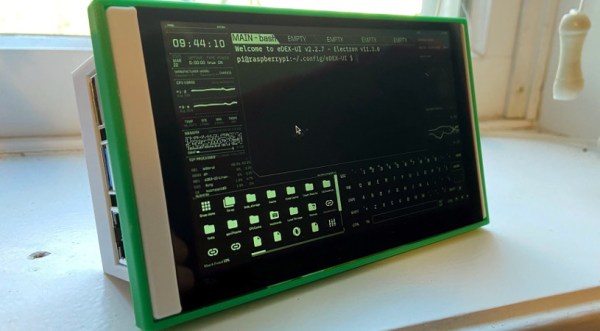
Raspberry Pi Crazy Guitar Rig Turns You Into A Hard ‘N Heavy One-Man Band

It’s a common problem: you’re at a party, there’s a guitar, and your plan to impress everyone with your Wonderwall playing skills is thwarted by the way too loud overall noise level. Well, [Muiota betarho] won’t have that issue ever again, and is going to steal the show anywhere he goes from now on with his Crazy Guitar Rig 2.0, an acoustic guitar turned electric — and so much more — that he shows off in three-part video series on his YouTube channel. For the impatient, here’s video 1, video 2, and video 3, but you’ll also find them embedded after the break.

To start off the series, [Muiota betarho] adds an electric guitar pickup, a set of speakers, and an amplifier board along with a battery pack into the body of a cheap acoustic guitar. He then dismantles a Zoom MS-50G multi-effect pedal and re-assembles it back into the guitar itself with a 3D-printed cover. Combining a guitar, effect pedal, amp and speaker into one standalone instrument would make this already an awesome project as it is, but this is only the beginning.

Touch screen and controls closeup
RPi touch screen running SunVox, plenty of buttons, and integrated multi-effect pedal on the left

So, time to add a Raspberry Pi running SunVox next, and throw in a touch screen to control it on the fly. SunVox itself is a free, but unfortunately not open source, cross-platform synthesizer and tracker that [Muiota betarho] uses to add drum tracks and some extra instruments and effects. He takes it even further in the final part when he hooks SunVox up to the Raspberry Pi’s GPIO pins. This allows him to automate things like switching effects on the Zoom pedal, but also provides I/O connection for external devices like a foot switch, or an entire light show to accompany his playing.

Of course, adding a magnetic pickup to an acoustic guitar, or generally electrifying acoustic instruments like a drum kit for example, isn’t new. Neither is using a single-board computer as effect pedal or as an amp in your pocket. Having it all integrated into one single device on the other hand rightfully earns this guitar its Crazy Guitar Rig name.

(Thanks for the tip, [alex]!)

Continue reading “Raspberry Pi Crazy Guitar Rig Turns You Into A Hard ‘N Heavy One-Man Band”

Toddler Arcade Cabinet Is A Stand-Up Job

A few years ago, [Mark] built an arcade cabinet into a low table. But once his new gaming buddy [Grayson] came along and started crawling, it wasn’t practical to have a low, pointy table around. Trouble is, [Mark] had already given [Grayson] his first taste with a Thomas the Tank Engine game. Since the kid was hooked, [Mark] rebuilt the table arcade into a toddler-sized arcade cabinet that they can both use.

The brain — a Raspberry Pi running RetroPie — should be familiar to most of our readers. [Mark] found the perfect crappy old monitor when they were upgrading at his office, and found some nice speakers to give it good bass. We love the details like the chrome edging, and especially the kick bar/footrest along the bottom. It can be difficult to decide how to decorate a multi-arcade cabinet, so [Mark] went the sticker bomb route with 700 of them randomly distributed and safe from toddler wear and tear under five coats of clear wood varnish.

We think this looks great, especially since [Mark] doesn’t have a workshop and cut all that MDF by hand on a jigsaw in the kitchen. Check out the happy train engineer after the break.

Maybe once [Grayson] is old enough to break tablets, [Mark] can build a gaming tab-inet out of it. Just sayin’.

Continue reading “Toddler Arcade Cabinet Is A Stand-Up Job”

Bullet Time On A Budget With The Raspberry Pi

Bullet time became the hottest new cinema effect after it burst on the scene in The Matrix (1999). Back then, the cutting edge special effects required serious hardware and serious processing power to do the job. These days, of course, things have moved along somewhat. [Eric Paré] is no stranger to a high-end setup, but wanted to see what could be done at the lower end of the market. (Video, embedded below.)

Rather then relying on a bank of expensive DSLRs, [Eric] decided to try building a bullet-time camera rig out of 15 Raspberry Pis, and the standard Raspberry Pi Camera. Whereas just one camera in one of his professional setups may cost well over $1000, this entire rig was likely built for less than that in its entirety.

Initial results were jerky and unappealing, but [Eric] persevered. One of the biggest problems was inaccuracy in the camera assemblies, as they were stuck on with thermal paste. With some custom mods and tweaks, [Eric] was eventually able to get things to a passable state. It also has the benefit, compared to a DSLR rig, that the cameras can be mounted much more closely together due to their small size.

Work is already underway to upgrade the rig to the new Raspberry Pi HQ Camera, which we’ve discussed before.

Continue reading “Bullet Time On A Budget With The Raspberry Pi”

Raspberry Pi Helps Racer Master The Track

Looking to give himself a competitive edge, racer [Douglas Hedges] wanted to come up with a system that could give him real-time feedback on how his current performance compared to his previous fastest lap time. Armed with a Raspberry Pi and some Python libraries, he set out to add a simple telemetry system to his car. But as is often the case with these kind of projects, things just started snowballing from there.

The Raspberry Pi based data acquisition system.

At the most basic level, his system uses GPS position and speed information to light up a strip of RGB LEDs on the dashboard: green means he’s going faster than the previous best lap, and red means he isn’t. Any interface more complex than that would just be a distraction while he focuses on the track. But that doesn’t mean the Raspberry Pi can’t collect data for future review after the race is over.

With the basic functionality in place, [Douglas] turned his attention to collecting engine performance data. It turned out the car already had some pre-existing equipment for collecting metrics such as the air-fuel ratio and RPM, which he was able to connect to the Raspberry Pi thanks to its use of a well documented protocol. On top of that he added a Labjack U3 data acquisition system which let him pull in additional information like throttle position and coolant temperature. Grafana is used to visualize all of this data after the race, though it sounds like he’s also considering adding a cellular data connection vehicle data can be streamed out in real-time.

In the past we’ve seen onboard data collection systems make real-world races look more like their virtual counterparts, but it seems like the solution [Douglas] has come up with is more practical in the heat of the moment.

Continue reading “Raspberry Pi Helps Racer Master The Track”

3D Printed Video Terminal Dials C For Cyberpunk

Created for the Disobey 2020 hacker conference in Finland, this Blade Runner inspired communications terminal isn’t just for decoration. It was part of an interactive game that required attendees to physically connect their conference badges up and “call” different characters with the functional keypad on the front of the unit.

[Purkkaviritys] was in charge of designing the 3D printed enclosure for the device, which he says takes an entire 2 kg roll of filament to print out. Unfortunately he wasn’t as involved in the electronics side of things, so we don’t have a whole lot of information about the internals beyond the fact that its powered by a Raspberry Pi 4, features a HyperPixel 4.0 display, and uses power over Ethernet so it could be easily set up at the con with just a single cable run.

A look at the custom keypad PCB.

The keypad is a custom input device using the Arduino Micro and Cherry MX Blue switches with 3D printed keycaps to get that chunky payphone look and feel. [Purkkaviritys] mentions that the keypad is also responsible for controlling the RGB LED strips built into the sides of the terminal, and that the Raspberry Pi toggles the status of the Caps, Scroll Lock, and Num Lock keys to select the different lighting patterns.

Naturally we’d like to see more info on how this beauty was put together, but given that it was built for such a specific purpose, it’s not like you’d really need to duplicate the original configuration anyway. Thanks to [Purkkaviritys] you have the STL files to print off our own copy of the gloriously cyberpunk enclosure, all you’ve got to do now is figure out how to make video calls with it.

Continue reading “3D Printed Video Terminal Dials C For Cyberpunk”

KiwiSDR Vs RaspberrySDR — A Tale Of Two SDRs

Once you move away from the usual software defined radio (SDR) dongles, you have only a few choices unless you want to drop some serious cash. One common hobby-grade SDR is the KiwiSDR. This popular unit runs Linux and can receive up to 30 MHz. The platform uses a dedicated A/D converter, an FPGA, and BeagleBone computer. Success of course breeds imitators, and especially when you have an open source design like the Kiwi, you are going to find similar devices with possibly different end goals. That’s how the RaspberrySDR came to be. This is a very similar unit to the KiwiSDR but it uses a Raspberry Pi, along with a handful of other differences. What’s different? [KA7OEI] tells us in a recent blog post.

Other than the obvious difference of the computer and all that it entails, the RaspberrySDR has a higher speed A/D (125 MHz vs 66 MHz) and 16-bits of resolution instead of the Kiwi’s 14 bits. This combines to give the Raspberry a wider receive range (up to 60 MHz) and — in theory — better performance in terms of dynamic range and distortion.

Continue reading “KiwiSDR Vs RaspberrySDR — A Tale Of Two SDRs”

An Elegant Modular Enclosure System For The Raspberry Pi 4

[NODE] has been experimenting with Raspberry Pi servers and mini computers for a long time, and knows all too well how the wiring can quickly turn into a rat’s nest. His latest creation is  the Mini Server version 3, a modular enclosure system for the Raspberry Pi 4, is designed to turn it into practical computing box.

The basic enclosure is a 92 mm x 92 mm x 26 mm 3D printed frame with a custom PCB top cover. One of the main goals was to collect all the major connectors on one side and make the micro SD slot easily accessible. To do this [NODE] created a set of custom PCB adaptors to route the USB-C and an HDMI port to the same side as the other USB ports, and move the micro SD slot to the bottom of the enclosure. A low profile adaptor was also designed to connect a mSATA SSD to one of the USB 3 ports, and there is space inside the enclosure for one or two cooling fans. Unlike previous version of the mini server, no hardware modifications are required on the Pi itself.

The only downside that we can see is that it doesn’t allow external access to the GPIO ports, but the entire project is open source specifically to allow people to make their own modifications.

[NODE] is a big fan of turning Raspberry Pis into custom computing devices, ranging from small terminal devices and pocket servers, to complete laptops.