Solar Weather Station Listens For Lightning

Custom weather stations are a common enough project these days, especially based around the ESP8266. Wire a sensor up to the MCU, power it up with an old phone charger, and you’re half way there. But if you want something that’s going to operate remotely on the long term, you’ve got to put a little more thought into it.

Which is exactly what [BuckarewBanzai] did for his solar powered Raspberry Pi weather station. With an industrial NEMA-rated enclosure, a beefy 35 watt photovoltaic panel, and enough lead-acid battery capacity to keep the show going for days, this build is certainly more robust than most. Some might call it overkill, but we think anyone who’s ever deployed hardware outdoors for more than a few days knows you can never be too careful when Mother Nature is involved.

To keep the 18 Ah battery topped off, [BuckarewBanzai] is using a 10 amp Wanderer charge controller. It sounds as though he burned through a few lesser models before settling on this one; something to consider for your own off-grid projects. An LM2596 regulator is then used to provide a stable 5 V for the Raspberry Pi.

In addition to the BME280 environmental sensor that picks up on temperature, humidity, and pressure, there’s also a AS3935 lightning sensor onboard which [BuckarewBanzai] says can pick up strikes up to 40 kilometers away. All of this environmental data is collected and stored in a local SQLite database, and gets pushed offsite every five minutes with a REST API so it can be visualized with Grafana.

Critics in the audience will no doubt pick up on the solderless breadboard located in the center of the weather station, but [BuckarewBanzai] says he’s already on the case. He’s working on a custom PCB that will accept the various modular components. Not only should this make the station more reliable, but he says it will cut down on the “spaghetti” wiring. Though for the record, this is hardly the worst offender we’ve seen in that department.

Making Smalltalk On A Raspberry Pi

Today, you probably don’t think much about object-oriented programming, it’s just part of the landscape. But decades ago, it was strange and obscure technology. While there were several languages that led up to the current object-oriented tools we use today, one of the most influential was Xerox PARC’s Smalltalk language. [Michael Engel] took a C++ implementation of the Smalltalk VM, some byte code for a complete Smalltalk system, a Raspberry Pi “bare metal” library, and produced a Smalltalk workstation running on a bare Raspberry Pi — even a Pi Zero. The code is on GitHub and is admittedly a work in progress.

Smalltalk was interesting — and sometimes annoying — because everything was an object. Literally everything. The system took over the entire machine. It provided the GUI, the compiler, and the run time libraries. That’s probably why it was easy for [Michael] to forego the usual Linux OS for his project.

Continue reading “Making Smalltalk On A Raspberry Pi”

DJing Without The Truckload Of Equipment; Secret Ingredient Is Raspberry Pi

There is a romance to notions of a byegone age of DJing — driving a pair of Technics 1200s dwarfed on either side by the stacks, pumping techno bass through the laser-tinged darkness into a hungry crowd. Even if the reality of early evening Saturday wedding parties playing inoffensive crooners for the 50-somethings didn’t really live up to it.

The trouble with DJing old-style was that it required extensive logistics to shift all that equipment not to mention a record collection, so the modern DJ for whom everything has gone digital is truly lucky in the scale of their operation. For some people even that is too much to carry, and [Dennisdebel] has minimised a DJ rig to the next level, by running the popular Mixxx DJing software on a Raspberry Pi hooked up to his DJ controller. You can see the result in the video below the break.

This is more of a HOWTO for installing a set of software packages on the Pi to achieve an aim rather than a special hardware hack, but as he points out the interest lies in regaining control of the process. The DJ space is dominated by commercial offerings increasingly laden with DRM and proprietary cloud offerings, so this represents a means of taking back control of the process. If it’s not hacky enough, you can always add a home-made DJ mixing station.

Continue reading “DJing Without The Truckload Of Equipment; Secret Ingredient Is Raspberry Pi”

Merlin Pi Camera Is A Photographic Wizard

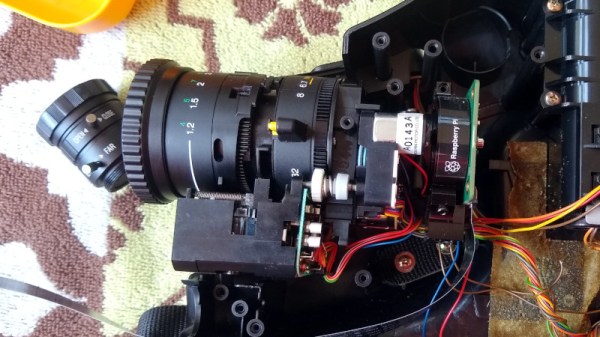
[Mister M] was quite excited to mess around with the new high-quality Raspberry Pi camera and build a project around it. Unfortunately, lockdown forced him to rummage through old tech on hand rather than hunting down a fresh eye-catching enclosure out in the wild. We spent many hours playing with one of these Merlin toys whenever six AA batteries could be spared to feed the matrix of hungry 1970s LEDs, so we would argue that [Mister M] should explore his personal stores more often.

Before we forget — it’s cool; this one was already broken. The Merlin Pi camera’s wizardry works on two levels — [Mister M] can take still pictures and record video through the GUI he built for the touchscreen, or go retro and use the little push buttons nestled in the Merlin control panel. [Mister M] worked a Dropbox uploader into the GUI, so he doesn’t have to worry about filling up the SD card with backyard bird movies in the middle of filming them.

[Mister M] says he accidentally warped the Merlin’s battery cover while trying to soak away the sticker and had to use a piece of acrylic. Although it’s unfortunate, we think it may have been for the better given the huge hole necessitated by the camera lens. Check out the build video after the break.

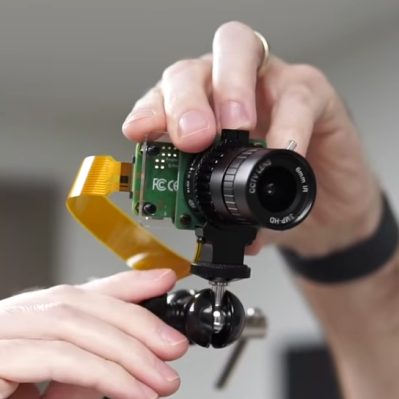
If you hadn’t heard about this beefy new camera module until now, our own [Jenny List] brought it into focus a couple months back and more recently had a go at hacking with it herself.

Continue reading “Merlin Pi Camera Is A Photographic Wizard”

Adding PCIe To Your Raspberry Pi 4, The Easier Way

Ever since people figured out that the Raspberry Pi 4 has a PCIe bus, the race was on to be the first to connect a regular PCIe expansion card to a Raspberry Pi 4 SBC. Now [Zak Kemble] has created a new approach, using a bridge PCB that replaces the VL805 USB 3 controller IC. This was also how the original modification by [Tomasz Mloduchowski] worked, only now it comes in a handy (OSHPark) PCB format.

After removing the VL805 QFN package and soldering in the bridge PCB, [Zak] confirmed that everything was hooked up properly and attempted to use the Raspberry Pi 4 with a PCIe extender. This showed that the Raspberry Pi would happily talk with a VL805-based USB 3.0 PCIe expansion card, as well as a Realtek RTL8111-based Ethernet card, but not a number of other PCIe cards. Exactly why this is is still unclear at this point.

As a bonus, [Zak] also found that despite the removal of the VL805 IC from the Raspberry Pi rendering its USB 3 ports useless, one can still use the USB-C ‘power input’ on the SBC as a host controller. This way one can have both PCIe x1 and USB on a Raspberry Pi 4.

This is the third iteration we’ve seen for using PCIe with the Pi. If you’re building on the work of [Thomasz Mloduchowski], which inspired [Colin Riley] to add expanders, and now this excellent hack by [Zak], we want to hear about it!

(Thanks to Itay for the tip)

Mini “Gaming PC” Nails The Look, Streams The Games

To have a proper gaming “rig”, you need more than a powerful GPU and heaps of RAM. You’ve also got to install a clear side-panel so lesser mortals can ogle your wiring, and plenty of multicolored LEDs to make sure it’s never actually dark when you’re up playing at 2 AM. Or at least, that’s what the Internet has led us to believe.

The latest project from [Michael Pick] certainly isn’t doing anything to dispel that stereotype. In fact, it’s absolutely reveling in it. The goal was to recreate the look of a high-end custom gaming PC on a much smaller scale, with a Raspberry Pi standing in for the “motherboard”. Assuming you’re OK with streaming them from a more powerful machine on the network, this diminutive system is even capable of playing modern titles.

But really, the case is the star of the show here. Starting with a 3D printed frame, [Michael] really went all in on the details. We especially liked the little touches such as the fiber optics used to bring the Pi’s status and power LEDs out to the top of the case, and the tiny and totally unnecessary power button. There’s even a fake graphics card inside, with its own functional fan.

Even if you’re not interested in constructing custom enclosures for your Raspberry Pi, there are plenty of tips and tricks in the video after the break that are more than worthy of filing away for future use. For example, [Michael] shows how he fixed the fairly significant warping on his 3D printed case with a liberal application of Bondo and a straight-edge to compare it to.

This isn’t the first time we’ve seen a Raspberry Pi masquerade as a high-end computer, but it’s surely the most effort we’ve ever seen put into the gag.

Continue reading “Mini “Gaming PC” Nails The Look, Streams The Games”

Faux Vintage Radio Gets AirPlay Upgrade

There’s plenty of vintage-styled hardware out these days, with quality and functionality being mixed at best. [Huan] found such a device in the form of an attractively-styled Bluetooth speaker. Deciding he could improve on the capabilities while retaining a stock look, he got down to hacking.

The aim of the project was to keep the original volume knob, buttons and screen, while replacing the internals with something a bit more capable. A Raspberry Pi Zero was sourced as the brains of the operation, with the Google Voice AIY hardware used as the sound output after early attempts with a discrete amplifier faced hum issues. An Arduino Pro Micro was pressed into service to read the volume encoder along with the buttons and drive the charlieplexed LED screen. Shairport Sync was then installed on the Pi Zero to enable Airplay functionality.

It’s a basic hack that nonetheless gives [Huan] an attractive AirPlay speaker, along with plenty of useful experience working with Arduinos and Raspberry Pis. We’ve seen similar hacks before, too. If you’re working on your own stereo resurrection at home, be sure to drop us a line!