DIY Photo Backup In The Field

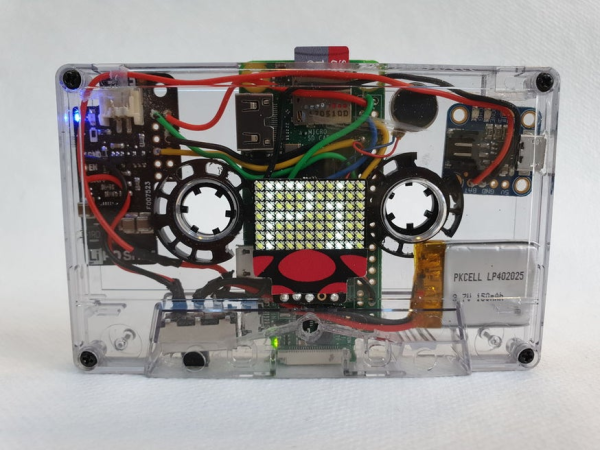
They say a file isn’t backed up if it isn’t backed up twice. This is easy enough to do if you have access to your computer and a network, but if you’re a photographer you might end up in a place without either of these things and need a way to back up the files you just created. For that you’ll need a specialized photo backup tool which you can easily build yourself.

While commercial offerings are available which back up files locally from a camera’s SD card to another medium, they suffer from a high price. [André]’s solution can be had for a fraction of that cost. Using a Raspberry Pi Zero, a tiny USB hub, and a high capacity jump drive, a photographer can simply plug in an SD card and the Pi will handle the backups with varying levels of automation. The software that [André] made use of is called Little Backup Box written by [Dmitri Popov] and can be used typically as an automatic backup for any other device as well.

This is a great solution to backing up files on the go, whether they’re from a camera or any device that uses an SD card. Removable storage is tiny and easily lost, so it’s good to have a few backups in case the inevitable happens. Raspberry Pis are an ideal solution to data backup, and can even be battery powered if you’re really roughing it for a few days.

Date Clock Requires (Almost) No Interaction

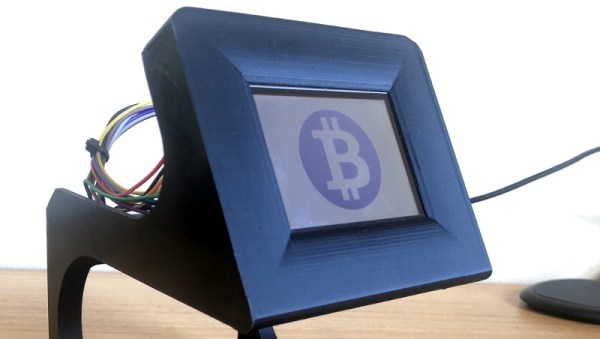
A lot of commercial offerings of technology aimed at helping the elderly seem to do a good job on the surface, but anything other than superficial interaction with them tends to be next to impossible for its intended users. Complicated user interfaces and poor design consideration reign in this space. [7402] noticed this and was able to design a better solution for an elderly relative’s digital day planner after a commercial offering he tried couldn’t automatically adjust for Daylight Savings.

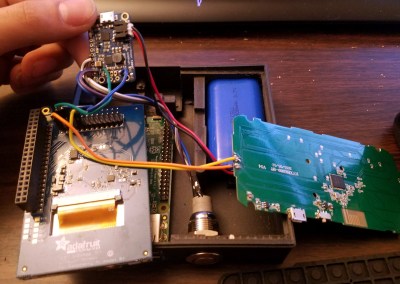
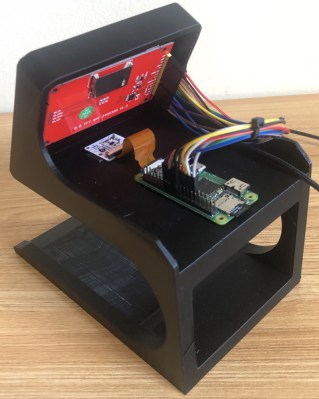
Of course, the clock/day planner has a lot going on under the surface that the elderly relative may not be able to use, but the solution to all of that was to make it update over the network. This task [7402] plans to do remotely since the relative does not live anywhere nearby. It is based on a Raspberry Pi connected to a Uniroi screen which automatically dims but can be switched off by means of a large button in the front. The UI shows the date, time, and a number of messages or reminders in large font in order to improve [7402]’s relative’s life.

This is a great idea for anyone with their own elderly relative which might need something like this but won’t want to interact with the technology other than the cursory glance, but the project is also a great illustration of proper design for the intended users. Commercial offerings often had hidden buttons and complicated menus, but this has none of that, much like this well-designed walker for an elderly Swede.

A Foolproof Raspberry Pi Media Player

The media landscape in the home has changed precipitously over the years. Back in the days when torrents were king, DVD players and TVs started to sprout USB ports and various methods of playing digital videos, while hackers repurposed office machines and consoles into dedicated media boxes. [Roiy Zysman] is a fan of a clean, no-fuss approach, so built his PiVidBox along those lines.

The build, unsurprisingly, starts with a Raspberry Pi. Cheap, capable of playing most common codecs, and fitted with an HDMI port as standard, it’s a perfect platform for the job. Rather than fiddle with complex interfaces or media apps, instead, the PiVidBox uses a simple script. The Pi is configured to continually scan the /media folder for mounted devices, and play any videos it comes across. Simply pop in an SD card or USB drive, and the content starts rolling. No buttons, remotes, or keyboards needed!

It’s a interface without much flexibility, but it makes up for that in barebones simplicity. We can imagine it would come in handy for a conference room or other situation where users grow tired of messing around with configurations to get screens to work. The Raspberry Pi makes a rather excellent basis for a media player build, and we’ve seen some stunning examples in the past!

Building A 3D Scanner With A 3D Printer

Using a 3D printer to make high quality parts is a great way to improve the look and appeal of any project. If you want to replicate something exactly, though, you’ll need either a very good set of calipers and a lot of time or a 3D scanner. Using the 3D scanner and the 3D printer go along very well together, especially if you use your 3D printer to build your 3D scanner too.

This project comes to us from [Vojislav] who spent the past two years perfecting this 3D scanner. Using a vast array of 3D printed parts, this build looks professional on every level. It also boasts a Raspberry Pi Zero and a fleet of camera modules, not to mention its own LED lighting. [Vojislav] has provided the printer files and the software needed to run it on the project page. It all runs through command line and python code, but that shouldn’t be a big hurdle.

While there is no video of it in action, it seems like all the parts are there for a solid 3D scanner, provided you have access to a 3D printer that can churn out the parts you’ll need. If you need something larger, there are some other options available as well that really take your photogrammetry skills to the next level.

Water Flow Meter Knows Tank Level

There’s almost always more than one way to get any particular job done. Suppose for instance you have a tank you fill up from a well, and you’d like to know when the time is right to refill the tank. The obvious answer is to measure the level of the tank, and there are plenty of ways to do that. However, [Liam Hanninen] has a different approach. Using a flow meter, he measures how much water leaves the tank. Assuming that you know it was once full, you can deduce how much water is left.

Using a YF-S201 flowmeter on a Raspberry Pi, the code uses Python to populate a database. The meter will need to be calibrated to get an exact volume measurement.

Continue reading “Water Flow Meter Knows Tank Level”

A Mobile Terminal For The End Of The World

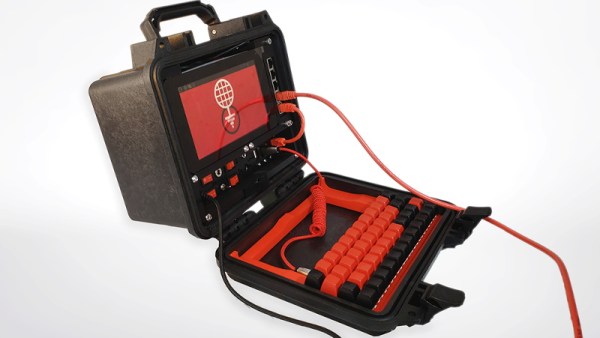
If civilization goes sideways and you need to survive, what are the bare essentials that should go in your bunker? Food and fresh water, sure. Maybe something to barter with in case things go full on The Postman. That’s all sensible enough, but how’s that stuff going to help you get a LAN party going? If you’re anything like [Jay Doscher], you’ll make sure there’s a ruggedized Raspberry Pi system with a self-contained network with you when the bombs drop.

Or at least, it certainly looks the part. He’s managed to design the entire project so it doesn’t require drilling holes through the Pelican case that serves as the enclosure, meaning it’s about as well sealed up as a piece of electronics can possibly be. The whole system could be fully submerged in water and come out bone dry on the inside, and with no internal moving parts, it should be largely immune to drops and shocks.

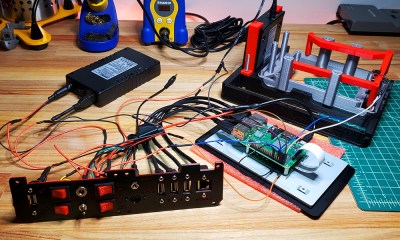
But we imagine [Jay] won’t actually need to wait for nuclear winter before he gets some use out of this gorgeous mobile setup. With the Pi’s GPIO broken out to dual military-style panel mount connectors on the front, a real mechanical keyboard, and an integrated five port Ethernet switch, you won’t have any trouble getting legitimate work done with this machine; even if the closest you ever get to a post-apocalyptic hellscape is the garage with the heat off. We especially like the 3D printed front panel with integrated labels, which is a great tip that frankly we don’t see nearly enough of.

This is actually an evolved version of the Raspberry Pi Field Unit (RPFU) that [Jay] built back in 2015. He tells us that he wanted to update the design to demonstrate his personal growth as a hacker and maker over the last few years, and judging by the final product, we think it’s safe to say he’s on the right path.

Network Booting The Pi 4

We’ve talked about PXE booting the Raspberry Pi 3B+, and then looked at the Raspberry Pi 4 as a desktop replacement. But there’s more! The Pi 4 sports a very useful new feature, the flashable bootloader. Just recently a beta version of that bootloader was released that supports PXE  — booting up over the network — which has become a must-have for those of us who have had consistently bad experiences with root filesystems on SD cards.

Pi with no SD CardWhat are the downsides, I hear you ask? You might see slower speeds going across the network compared to a high quality SD card, particularly with the Pi 4 and its improved SD card slot. PXE does require an Ethernet cable; WiFi is not enough, so you have that restriction to contend with. And finally, this isn’t a portable option — you are tethered to that network cable while running, and tethered to your network to boot at all.

On the other hand, if you’re doing a permanent or semi-permanent install of a Pi, PXE is absolutely a winner. There are few things worse than dragging a ladder out to access a Pi that’s cooked its SD card, not to mention the possibility that you firewalled yourself out of it. Need to start over with a fresh Raspbian image? Easy, just rebuild it on the PXE server and reboot the Pi remotely.

Convinced PXE is for you? Let’s get started! Continue reading “Network Booting The Pi 4”