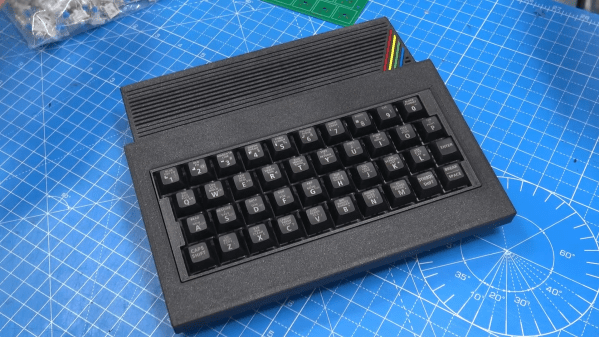
A 3D-printed case for the ZX Spectrum with a mechanical keyboard

The ZX Spectrum Finally Gets A Proper Keyboard

The Sinclair ZX Spectrum is fondly remembered by many for being their first introduction into the wonderful world of computing. Its advanced capabilities coupled with a spectacularly low price made it one of the great home computers of the 1980s, at least in the UK and nearby countries. What was less spectacular about the Spectrum was its awful keyboard: although a step up from the flat membrane keyboards of earlier Sinclair computers, the Spectrum’s tiny rubbery keys made typing anything more than a few characters a bit of a chore.

If you’re planning to do any serious programming on your Spectrum, you might therefore want to check out [Lee Smith]’s latest project in which he redesigns the Spectrum’s case to include a proper mechanical keyboard. [Lee] got this idea when he was looking for ways to fix a few Spectrums with broken or missing cases, and stumbled upon several projects that aim to recreate classic Sinclair machines using modern components. He took a keyboard PCB meant for the ZX Max 128 project, populated it with some high-quality switches, and added a modified set of keycaps from the ManuFerHi N-Go.
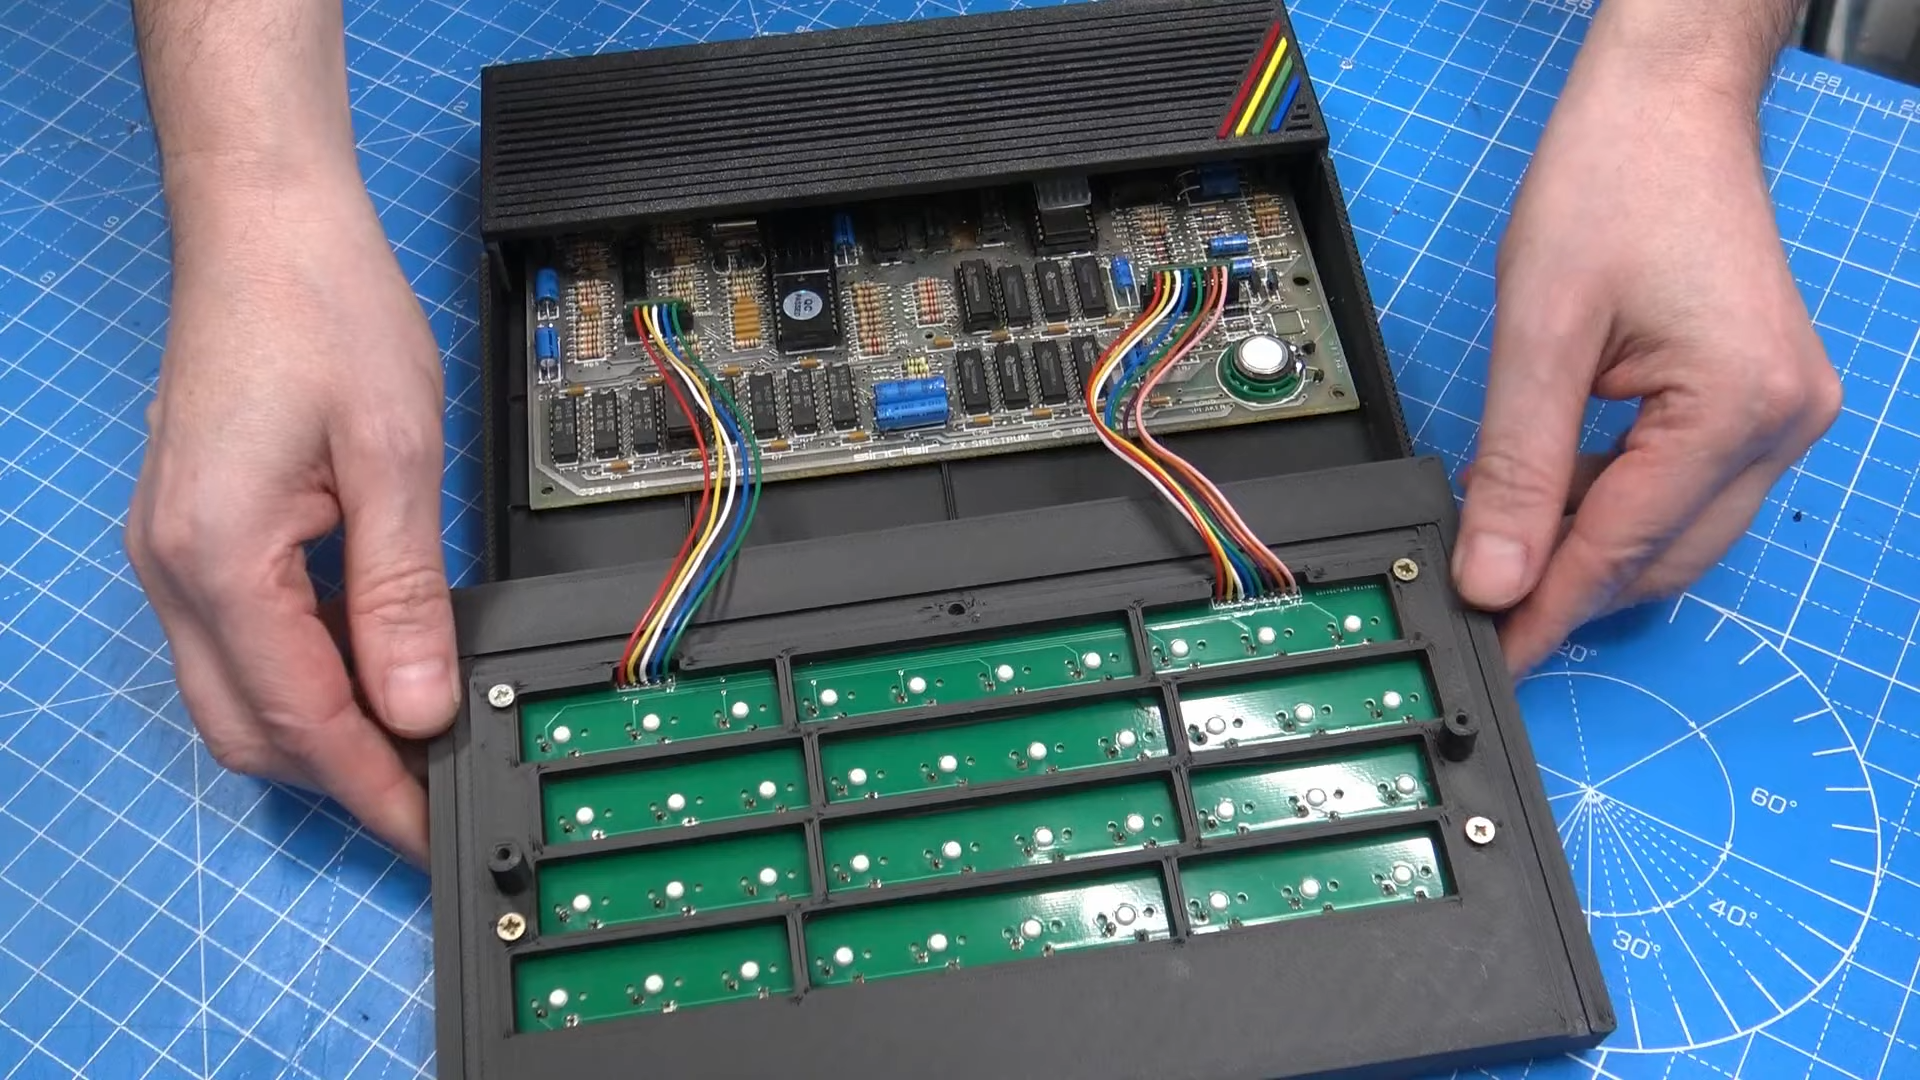
A new ZX Spectrum case, opened to show the keyboard connecting to the mainboard
The new keyboard plugs into the original connectors and doesn’t require any board-level modifications.

Together, those parts formed a modern, comfortable keyboard that still had the proper labelling on all keys. This is rather essential on the Spectrum, since each key is also used to generate symbols and BASIC keywords: for instance, the “K” key also functions as LIST, +, LEN and SCREEN$.

With the keyboard design settled, [Lee] set to work on the rest of the case: he designed and 3D-printed a sleek enclosure that takes the new keyboard as well as an original Spectrum mainboard. The resulting system is called the ZX Mechtrum, and looks fabulous with its matte black exterior and the obligatory four-coloured rainbow. A replaceable rear panel also allows several board-level modifications, like composite video or VGA output, to be neatly incorporated into the design.

We wrote an extensive retrospect on the Spectrum on its 40th anniversary earlier this year. If, somehow, you actually like the Spectrum’s original rubbery keyboard, then you can also modify the whole thing to work with modern computers.

Continue reading “The ZX Spectrum Finally Gets A Proper Keyboard” →
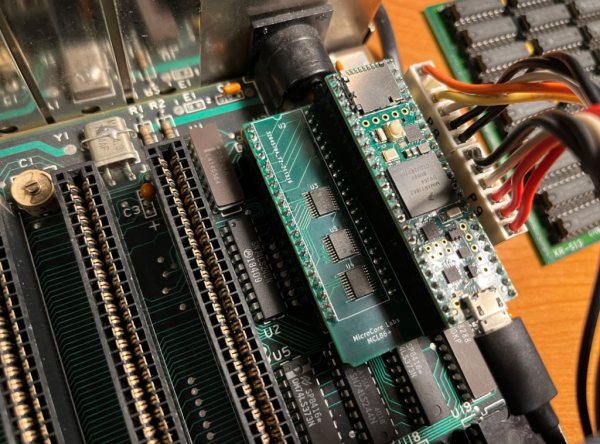
Teensy Twofer Of Plug-In Emulated Retro CPUs

[Ted Fried] wrote in with not one but two (2!) new drop-in replacements for widespread old-school CPUs: the Zilog Z80 and the Intel 8088. Both of the “chips” run in cycle-accurate mode as well as in a super turbo mode, which can run so fast that you’ll need to use the Teensy’s internal RAM just to keep up.

Both of these designs have a hardware and software component. The PCBs basically adapt the pinout of the Teensy to the target CPU, with a bunch of 74VLC latches on board to do the voltage level conversion. The rest is a matter of emulating all of the instructions on the Teensy, which is more than fast enough to keep up. If this sounds familiar to you, it’s basically the same approach that [Ted] used last year to bring us his replacement for the 6502 found in the Apple ][ and Commodore 64.

Why would you want an emulated CPU when the originals are still available? [Ted] inherited a busted Osborne I, an ancient Z80 luggable. By replacing the original Z80 with his emulation, he could diagnose the entire system, which led him to discover some bad DRAM chips and get the old beast running again. Or maybe you just want to play IBM XT games at insane speeds?

And it looks like [Ted] has updated his 6502 emulation to include the undocumented C64 opcodes, so if you’re into that scene, you should be covered as well.

If any of this tickles your fancy, head over to [Ted]’s blog, microcore labs, and follow along. Although now that he’s covered most of the famous retrocomputers, we have to ask ourselves what processor is going to be next?

Virtualizing IPhoneOS 1.0

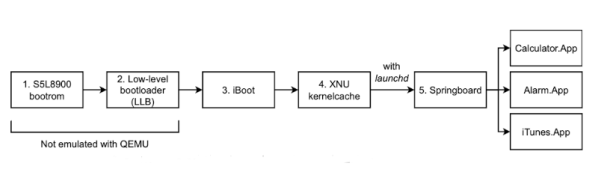
Virtualizing computers is nothing new. However, Apple devices always present challenges. Just ask anyone who has built a Hackintosh. At least computer hardware is usually exposed, but on phones, the challenge is even harder due to mysterious devices. [Martijn] managed to reverse engineer the iPod Touch 1G enough to run iPhoneOS 1.0 on it and has several blog posts explaining how he did it.

The emulator is the ubiquitous QEMU. He has emulation for the critical hardware, including the cryptographic modules, the hardware clock, and the timer, along with memory and display and interface hardware. However, Wifi, some USB, audio, the light sensor, and some graphics hardware are still absent. That doesn’t stop the OS from booting, however.

Continue reading “Virtualizing IPhoneOS 1.0” →

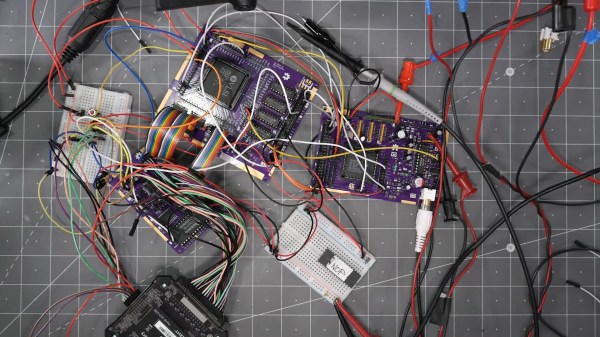
Three purple OshPark boards and a white bread board all attached using a number of jumper wires on a grey cutting mat.

An (Almost) Single-Chip Apple IIe

The Apple II is one of the most iconic microcomputers, and [James Lewis] decided to use the Mega-II “Apple IIe on a chip” from an Apple IIgs to build a tiny Apple IIe.

While there was an Apple II compatibility card using the related Gemini chip, it was initially unclear whether the Mega-II could even work outside of an Apple IIgs given the lack of documentation for either Apple II SOC. [Lewis] did finally get the Mega-II to boot after a great deal of effort in debugging and design. The system is built with three boards: the Mega-II and RAM board, a CPU board with a 65C02, and a video out board.

To simplify routing, the boards are all four layer PCBs. Unfortunately, the chips needed to make this system, especially the Mega-II, aren’t available on their own and must be harvested from an existing IIgs. [Lewis] took care to make sure any desoldering or other part removal was done in a way that it could be reversed. If you want to see all the nitty gritty details, check out his GitHub for the project.

If you want another 6502-based computer in a tiny package, why not try this one built on Perf+ boards?

Continue reading “An (Almost) Single-Chip Apple IIe” →

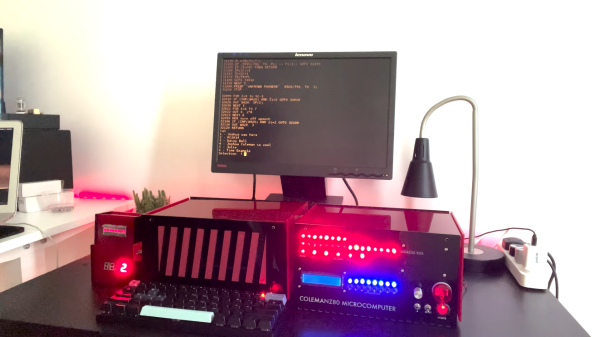
A homebrew computer built inside plexiglass cases with lots of LEDs

The Coleman Z80 Is A Modern Take On A 1970s Computer

[Joshua Coleman] likes to design his own computers. Sometimes, that means drawing up bus architectures,  memory maps and I/O port pinouts. Other times, he can focus his efforts more on the general aesthetics, as well as on building a great set of peripherals, as he shows in his latest ColemanZ80 project. Thanks to the RC2014 architecture defining most of the essential features of a classic Z80 computing platform, [Joshua] was able to design a modern retrocomputer that’s not only genuinely useful, but also looks as if it came off a production line yesterday.

The external design is a sight to behold: bright red laser-cut acrylic pieces form a neat, semi-transparent case with ventilation slots on the sides and lots of blinkenlights on the front. Inspired by 1970s classics like the Altair 8800, the front panel gives the user a direct view of the machine’s internal state and allows simple command inputs through a series of tumbler switches. The CPU, RAM and other basic devices are housed in one case, with all the expansion modules in a second one, linked to the mainboard through a 40-wire flatcable.

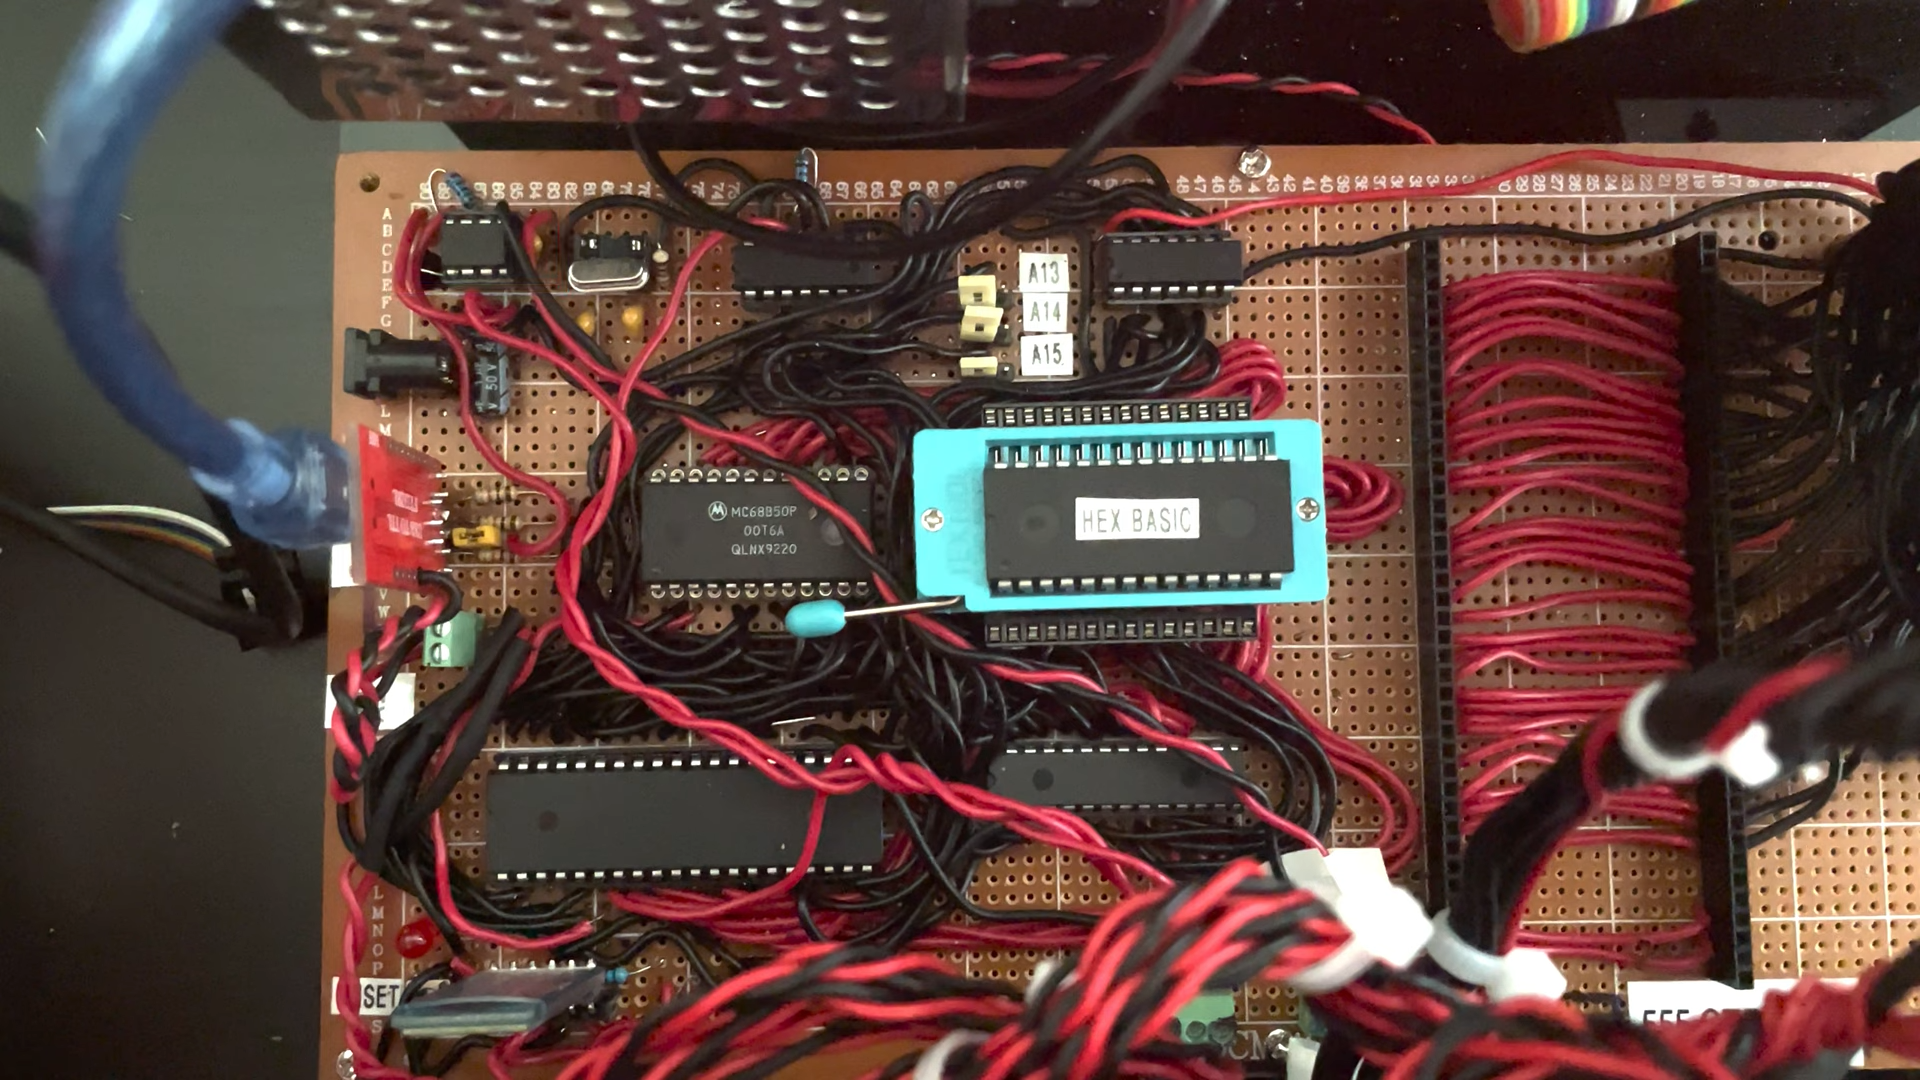
A hand-built Z80 computer's mainboard
Lots of classic chips, but also loads of hand-routed wires grace the ColemanZ80’s mainboard.

Although the mainboard closely follows the RC2014 design, [Joshua] went through a lot of effort to tune the system to his specific needs. The expansion boards he built include an NS16550 UART to replace the default 68B50, a battery-backed real-time clock, a YM2149-based sound card and even a speech synthesizer module built around the classic SP0256 chip, of Speak & Spell fame. An even more unusual feature is the presence of an AM9511, one of the earliest math coprocessors ever made, to speed up floating-point calculations. All of these modules were built entirely by hand on prototype boards: we can barely imagine how much time this must have taken.

Output devices include a VGA adapter courtesy of a Raspberry Pi Pico as well as a regular 4-digit 7-segment LED display and a set of classic HP “bubble” LEDs. [Joshua] runs several demos in his video (embedded below), ranging from computing the Mandelbrot set to playing chiptunes on the YM2149. There’s plenty of scope for further expansion, too: [Joshua] plans to build more peripherals including a floppy drive interface and a module to operate a robotic car.

This is not the first Coleman Z80 computer: the previous version ran on an architecture [Joshua] designed all by himself. We’ve seen several other impressive RC2014 derivatives, like a tiny micro version and this Altair-inspired case.

Continue reading “The Coleman Z80 Is A Modern Take On A 1970s Computer” →

A Love Letter To My Lost Amiga

My first love was a black wedge. It was 1982, and I had saved up to buy a Sinclair ZX81. That little computer remains the only one of the huge number that I have owned over the years about which I can truly say that I understood its workings completely; while I know how the i7 laptop on which this is being written works I can only say so in a loose way as it is an immensely complex device.

Computing allegiance is fickle, and while I never lost an affection for the little Sinclair I would meet my true electronic soulmate around eight years later as an electronic engineering student. It no longer graces my bench, but this was the computer against which all subsequent machines I have owned would be measured, the one which I wish had not been taken from me before its time, and with which I wish I could have grown old together. That machine was a Commodore Amiga, and this is part love letter, part wistful musing about what could have been, and part rant about what went wrong for the best desktop computer platform ever made. Continue reading “A Love Letter To My Lost Amiga” →

See The ATARI GEM Desktop Running On A Portable Word Processor… Thing

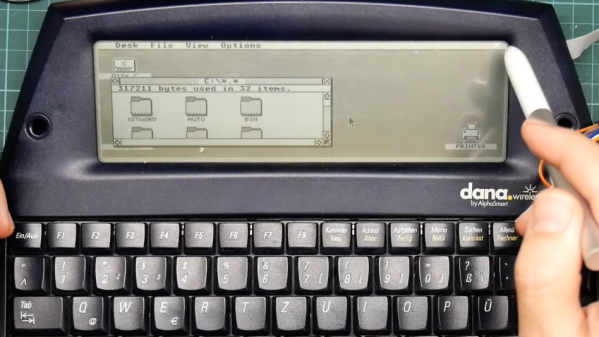
Get ready for vintage computing aplenty in [David Given]’s project to port EmuTOS to the AlphaSmart Dana. He’s got it all on video, too. All 38 hours of it over 13 episodes!

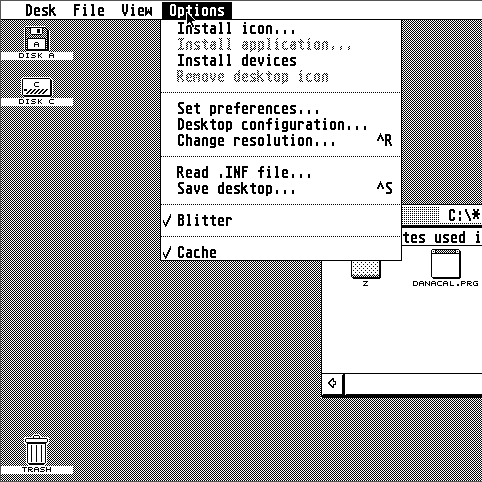
The GEM desktop, as seen on the Atari ST line of computers.

[David]’s fork of EmuTOS is an open source version of the Atari TOS, which is itself the 68000-based OS for the Atari ST line of computers.

As for the AlphaSmart Dana, it is a roughly twenty-year-old portable word processor thing with pen input which runs a version of PalmOS. It’s a slightly oddball piece of hardware, but quite capable in its own way. A match obviously made in heaven? It is if you have [David]’s skill and drive!

To get EmuTOS working on the Dana, the first step was figuring out how to find and work with the Dana’s debug port, using it to get direct access to the CPU while bypassing the boot ROM. Turns out that the Dana’s 68000-compatible processor has a handy feature: by manipulating the right pin, one can remote-control the CPU (to a certain extent) via the UARTs. That’s the entry point for a whole lot of hacking that ultimately results in firing up the GEM desktop on the Dana, and being able to run (some) original Atari ST software. Probably the biggest issue is that the screen size isn’t a great match for what the OS expects, but it works.

Continue reading “See The ATARI GEM Desktop Running On A Portable Word Processor… Thing” →