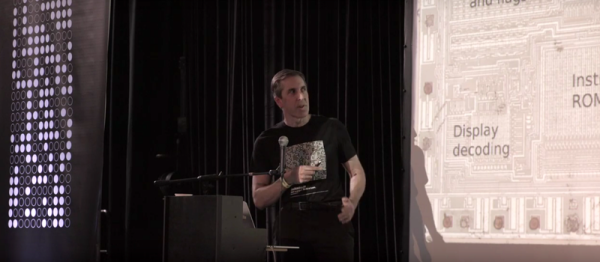
[Ken Shirriff] has seen the insides of more integrated circuits than most people have seen bellybuttons. (This is an exaggeration.) But the point is, where we see a crazy jumble of circuitry, [Ken] sees a riddle to be solved, and he’s got a method that guides him through the madness.
In his talk at the 2016 Hackaday SuperConference, [Ken] stepped the audience through a number of famous chips, showing how he approaches them and how you could do the same if you wanted to, or needed to. Reading an IC from a photo is not for the faint of heart, but with a little perseverance, it can give you the keys to the kingdom. We’re stoked that [Ken] shared his methods with us, and gave us some deeper insight into a handful of classic silicon, from the Z80 processor to the 555 timer and LM7805 voltage regulator, and beyond.
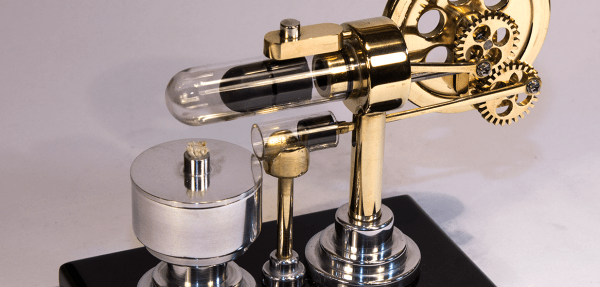
In the early years of the nineteenth century, steam engines were at work in a variety of practical uses. However, they were still imperfect in many ways. One particular problem were the boilers, that had a tendency to explode, causing injuries and fatalities. Reverend Dr. Robert Stirling, a Scottish clergyman, was concerned about the death toll from exploding boilers. Based on previous work by George Cayley (known for his pioneering work on aeronautics), Stirling filed his patent for a safer engine in 1816. That makes this year the bicentenary of this engine. The Stirling engine has the highest theoretical efficiency of any thermal engine. It is also a relatively simple machine. Unlike other types of engines, there are no valves, and that makes the mechanical design much simpler.
Possibly the greatest hacker show on Earth, the 33rd annual Chaos Communication Congress (33C3) begins Tuesday morning in Hamburg, Germany. And Hackaday will be there! Contributing Editor [Elliot Williams] is taking the night train up and will be trying to take it all in for you. The schedule looks tremendous.
If you can’t make it, don’t fret. There will be live streaming, and the talks are usually available in preliminary edit for viewing or download just a few minutes after they finish. It’s even cooler to watch the talks with friends, though. Every hackerspace with a video projector could be playing along, live or after the fact. Pick some cool talks and have a “movie night”.
If you’re going to be in Hamburg, and you want to show us something cool, tell us that something is NOTAHACK!1!! in person, or even just say “Hi”, we’ll be wandering around from talk to talk and session to session just like you, only with a backpack full of Hackaday stickers.
If there’s anything you think we should see, post up in the comments. If there’s enough call for it, we’ll have a Hackaday meetup once we can figure out a good time and location. Bring us a cool hack, and we’ll document it on the spot! Our DECT phone number is 2475.
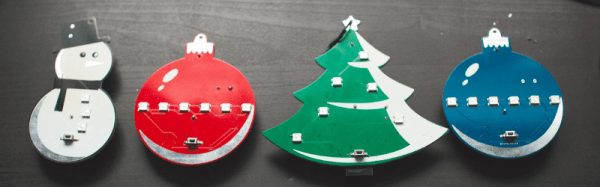
The ornament projects we post around here tend to be simple, stand-alone projects. We are, however, well into the era of the Internet of Things (like it or not) and holiday ornaments need not be single, unconnected blinking objects. For Christmas this year, [Sean Hodgins] came up with some connected DIY ornaments that respond to Christmas cheer.
[Sean Hodgins] had some beautiful PCBs done up in festive shapes and he hand-pastes and oven-solders the SMD components on both sides. Each one is battery powered and controlled by an ESP8266. LEDs and a button on the front of each ornament comprise the user interface. When the button is pressed, data is sent to a Phant server and a “Christmas Cheer” counter is incremented. Other ornaments, so long as they can connect to the Phant server, will periodically check the counter. If the Christmas Cheer has increased, the ornaments will play a tune and flash some lights.
The ornaments are open-source — [Sean Hodgins] posted the code and PCB designs on GitHub. They look great, and would be a good way to let people know you’re thinking of them over the holidays. Check out this light-up menorah or these lighted acrylic ornaments for more holiday fun!
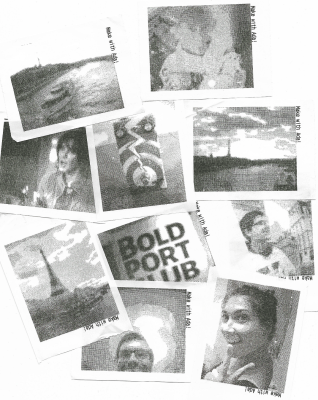
Digital cameras are great, because you can take thousands of pictures without running out of film. But there’s something to be said for having a tangible image you can hold in your hand. The Polaroid cameras of yesteryear were great for this, but now they’re hard to find and the price per photograph is ludicrously expensive.
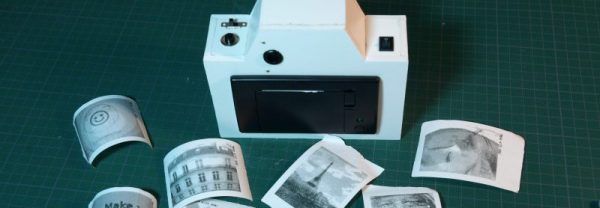
Dithering allows the camera to print a much better image.
Over the past few years, a few people have sought a way to create printed photographs at a lower cost. One of the best ways to do this is to find something much cheaper than Polaroid film — like thermal paper.
[Fabien-Chouteau]’s thermal printing camera isn’t the first — you’ve got the Gameboy Camera/Printer and a few others to thank for that. But it’s a great example of the form. The camera combines an Adafruit thermal receipt printer with an OpenMV camera, both easily sourced, if not exactly cheap. It even adds a ST7735 LCD for live display of the camera’s image, just like consumer-grade cameras!
It’s not just a slapped together kludge of parts bin components, however. While the thermal printer is only capable of printing black or white pixels, its resolution is much higher than the image from the camera. This allows the camera to use a 3×3 block of printed pixels to represent a single pixel from the camera, and with some fancy dithering techniques, can emulate shades of grey quite effectively. It’s tricks like this that really add polish to a project, and make a big difference to the picture quality at the end of the day.
It’s not the first thermal printer camera we’ve seen – [Ch00f]’s woodgrain instant camera build highlighted the issues of careful camera selection when pursuing this type of build.
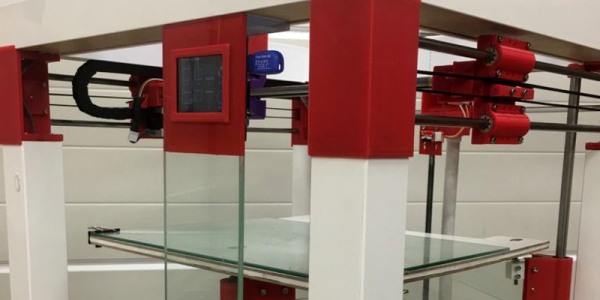
In this Instructable, [Wayne Mason-Drust] shares the step by step guide on how to make a cool, good-looking, 3D printer based on the Ikea LACK table. From an Ikea lantern weather station to a fully printed CNC based on an Ikea table, it’s almost safe to say that a 3D printer Ikea hack was overdue.
The idea to use a Ikea table as a base for a 3D printer first came to [Wayne] as he used this table to support other 3D printer he had working in his business. He realized that, even after five years of use, the table showed no signs of wear or distortion. So he decided to start to work on a 3D printer based on this precise table, the one that used to hold the printer.
[Wayne] stacked two together and named it Printtable (pun intended?). This open source, cartesian rep-rap 3D printer looks pretty slick. With a build area of 340mm X 320mm and 300mm on the Z axis and a price tag for the parts starting as low as $395, seems like a pretty decent 3D printer. With some work sourcing the parts, maybe it can be even lower.
Or we can just wait until Ikea starts selling them.
San Francisco’s Millennium Tower is sinking. Since its completion in 2009, the 58-story, 645-foot tall residential building has settled 16 inches and tilted perhaps 2 inches to the northwest. Since the foundation issues came to light in August 2016, the vertiginous ultra-luxury highrise has become the subject of outrage, ridicule, and at least two pieces of pending litigation.
Nothing that we build is static. Our office towers, apartment complexes, and single family homes move in response to loads applied by the environment. Buildings sway in the wind, expand and contract in response to temperature changes, and shift with the land upon which they rest. In most scenarios, these deflections are so minuscule that the occupants never even notice. Millennium Tower happens to be a large enough project with a severe enough problem that the whole world can’t help but gawk.
In foundation design, not all terra is firma. While a one or two story wood-framed building can be built safely with a shallow foundation on crummy soil, a major skyscraper requires a foundation that can transfer extremely high loads into the earth. But the strata below our city streets can consist of anything from sand to clay to solid rock, and many cities, including San Francisco, have infilled former marshes and bays with soil in order to expand their coastlines and generate valuable real estate. Millennium Tower was built in South of Market, a neighborhood that mostly used to belong to San Francisco Bay.