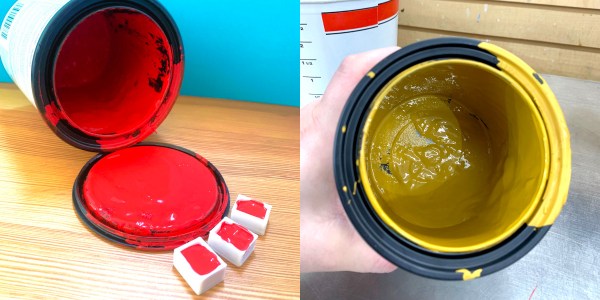
How can the big box store mix the perfect shade of English Wedgwood right before your eyes? The answer is in highly-concentrated pigments that come in many different sizes up to a whopping five gallons. Now, just imagine the amount of watercolor, acrylic, or other types of paint that could be made by simply scraping the walls of an empty 5-gallon tub, which you know is just getting thrown away with all that usable pigment inside.
 Not only is [technoplastique] making watercolors and other paints out of these pigments, but their true focus is on creating an easily-reproducible process for turning not just pigments into paint, but other things as well, like dried turmeric, charcoal, or any other feasible material.
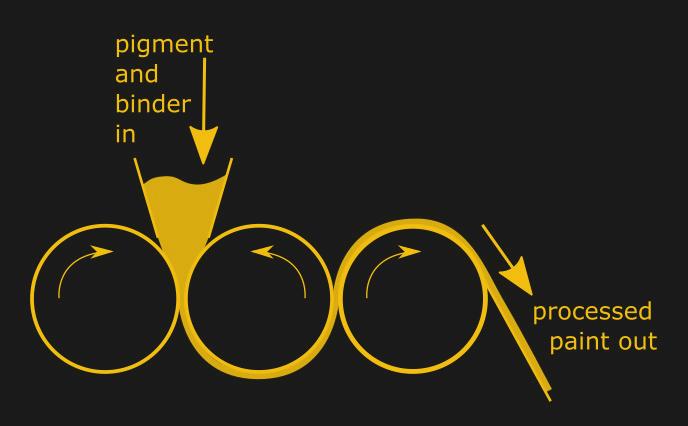
The process will likely take the form of an open-source three-roller milling machine, which are commonly used in paint manufacture. Basically you have three rollers that process the pigment and binder, and the mixture is run through as many times as necessary. Although they are fairly simple machines in design, building them to work well requires adherence to precise technical specs.
We can’t wait to see what [technoplastique] comes up with to use for the stainless steel rollers. The rest of the plan involves a Raspberry Pi Pico, one DC motor per roller, a motor shield, and a power supply, but the rollers are pretty crucial. If you have any ideas other than steel rolling pins (the kitchen kind) or pipe couplings (which are too short, anyway), let us know in the comments!
![]()