Dollar Store Helping Hands For Soldering

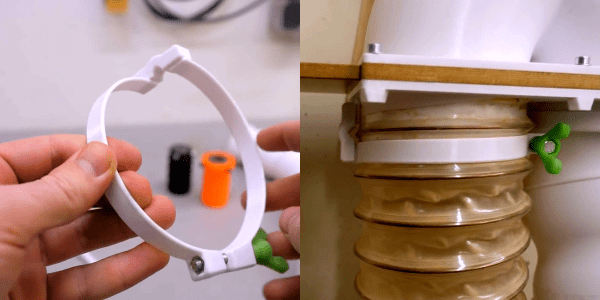
Although [I Love To Make] appears to have text in Chinese, their recent video (see below) is like a wordless workshop so it won’t matter if you are up on your Mandarin or not. The soldering vise looks like it mostly came from a dollar store (or perhaps a yaun store).

As far as we can tell, the assembly is two utility clips like you might use on a cork board or to seal up chips, a Micro SIM cutter, and TV rabbit ears. Oh, and a syringe. The rabbit ears get mostly destroyed in the build process. You have to do some cutting and plastic melting, too (we might have used a drill), but nothing you couldn’t do with some simple hand tools. They don’t show it, but apparently, they drilled a hole in the SIM cutter, so you’ll need a drill anyway.

Continue reading “Dollar Store Helping Hands For Soldering”

The Crystal (Testing) Method

It used to be any good electronics experimenter had a bag full of crystals because you never knew what frequency you might need. These days, you are likely to have far fewer because you usually just need one reference frequency and derive all the other frequencies from it. But how can you test a crystal? As [Mousa] points out in a recent video, you can’t test it with a multimeter.

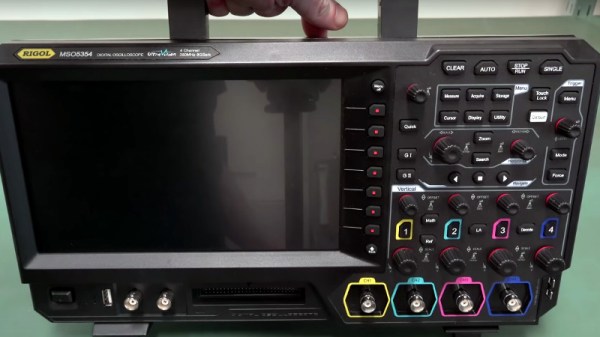
His approach is simple: Monitor a function generator with an oscilloscope, but put the crystal under test in series. Then you move the frequency along until you see the voltage on the oscilloscope peak. That frequency should match the crystal’s operating frequency.

Continue reading “The Crystal (Testing) Method”

Playing Doom On Keysight Oscilloscope Via Windows CE

We all know the drill when buying a digital oscilloscope: buy the most hackable model. Some choose to void the warranty right away and access features for which the manufacturer has kindly provided all the hardware and software but has disabled through licensing. Few of us choose to tap into the underlying embedded OS, though, which seems a shame.

When [Jason Gin]’s scope started giving him hints about its true nature, he decided to find a way in. The result? An oscilloscope with a Windows desktop that plays Doom. The instrument is a Keysight DSOX1102G which [Jason] won during the company’s “Scope Month” giveaway. Relatively rare system crashes showed the familiar UI trappings of Windows CE.

Try as he might, [Jason] couldn’t get the scope to crash on cue — at least not until he tried leaving an external floppy drive plugged into the USB port on startup. But in order to use the desktop thus revealed, a keyboard and mouse were needed too. So he whipped up a custom USB switch cable, to rapidly toggle in the keyboard and mouse after the crash. This gave him the keys to the kingdom, but he still had a long way to go. We won’t spoil the story, but suffice it to say that it took [Jason] a year and a half, and he learned a lot along the way.

It was nice to hear that our review of the 1000X series scopes helped [Jason] accomplish this exploit. This hack’s great for bragging rights, as one way to prove you’ve owned a system is telling people it runs Doom!

Cool Tools: Deus Ex Autorouter

The first thing you probably asked yourself when learning how to lay out PCBs was “can’t the computer do this?” which inevitably led to the phrase “never trust the autorouter!”. Even if it hooks up a few traces the result will probably be strange to human eyes; not a design you’d want to use.

But what if the autorouter was better? What if it was so far removed from the autorouter you know that it was something else? That’s the technology that JITX provides. JITX is a company that has developed new tools that can translate a coarse textual specification of a board to KiCAD outputs autonomously.

Continue reading “Cool Tools: Deus Ex Autorouter”

DIY degaussing coil

Degaussing Coil To Restore Gameplay Like It’s 1985

You may think that cathode ray tube (CRT) TVs and monitors have gone the way of the dinosaur, but you’d be wrong. Many still have them for playing video games at home or in arcades, for vintage computing, and yes, even for watching television programs. [Nesmaniac] uses his TV for playing Super Mario Bros but for several years it had a red area in the top right corner due to a nearby lightning strike. Sadly, it stood out particularly well against the game’s blue background. His solution was to make a degaussing coil.

Homemade degaussing coilWe have an article explaining degaussing in detail but in brief, the red was caused by that area of the metal shadow mask at the front of the display becoming magnetized by the lightning strike. One way to get rid of the red area is to bring a coil near it and gradually move the coil away. The coil has AC from a wall socket running through it, producing an oscillating magnetic field which randomizes the magnetic field on the shadow mask, restoring the colors to their former glory.

You’ll find [Nesmaniac’s] video explaining how he made it below. It’s a little cartoonish but the details are all there, along with the necessary safety warnings. His degaussing coil definitely qualifies as a hack. The coil itself came from a 15″ CRT monitor and his on/off switch came from a jigsaw. A 100 watt light bulb serves as a resistance to minimize current and if more or less current is needed then the bulb can be swapped for one with a different wattage.

To demonstrate it in action and give a few more construction details, we’ve included a second video below by [Arcade Jason] who made his for degaussing arcade game screens.

Continue reading “Degaussing Coil To Restore Gameplay Like It’s 1985”

Build Your Own LAN Cable Tester

Sure, you can buy a cable tester, but what fun is that? [Ashish] posted a nice looking cable tester that you can build with or without an onboard Arduino. If you don’t use an Arduino, the project uses a 555 chip to test the eight wires in an Ethernet cable. The readout is simple. When testing a conductor, one of 8 LEDs will light. If one doesn’t light, the cable is open. If more than one light up, there is a short. Mixed up pins will cause the LEDs to light out of sequence. You can see the device in the video below.

The 555 device is fine for the design and we were surprised that the project had provisions for using an Arduino as nothing more than a pulse generator. It could replace most of the circuit which is pretty simple. A decade counter converts the pulses into 8 pulses (a wiring change makes it reset on the 9th count). The rest of the circuit is nothing more than LEDs, resistors, and diodes.

Continue reading “Build Your Own LAN Cable Tester”

Pocket High Voltage Generator Becomes Great Test Tool

[The LED Artist] often found a need for a relatively high voltage (100 to 200 Volt) but low current DC power supply, and it turns out that a small HV generator that uses a single AA cell only took about an hour to make. The device ended up being a pretty handy tool for testing things like LED filaments (which have a forward voltage of over 60 V), or even neon and nixie tubes.

The device’s low current means that nixie and neon elements won’t light up very brightly, but they will light up enough to verify function and operation. [The LED Artist] reports that touching the output terminals of the generator only causes a slight tingling sensation.

Open-circuit voltage generated from a single AA cell is about 200 V, but that voltage drops rapidly under any kind of load. Even regular LEDs can be safely lit with the circuit, with less than a milliamp being supplied at the two to three volts at which most regular LEDs operate.

[The LED Artist] fit the device into a two-AA battery holder, with a single AA cell on one side and the circuit in the other, and says it’s one of the more useful tools they’ve ever made. LED filaments are fairly common nowadays, but if they intrigue you, don’t forget that [Mike Harrison] covered everything you need to know about experimenting with them.