We’re not completely sure why [Fraens] needs to label so many glass bottles at home. Perhaps he’s brewing his own beer, or making jams. Whatever the reason is, it was justification enough to build an absolutely incredible labeling machine that you could mistake for a piece of industrial gear…if it wasn’t for the fact that majority of the device is constructed out of orange 3D printed plastic.
As we’ve come to expect, [Fraens] has documented the build with a detailed write-up on his site — but in this case, you’ve really got to watch the video below to truly appreciate how intricate the operation of this machine is. Watching it reminded us of an episode of How It’s Made, with the added bonus that you not only get to see how the machine functions, but how it was built in the first place.
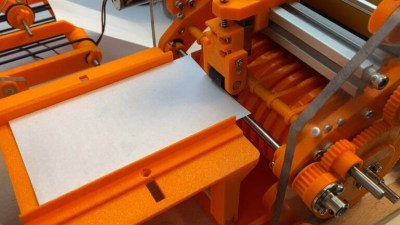 Nearly every part of the machine, outside the fasteners, smooth rods, a couple of acrylic panels, and a few sections of aluminum extrusion, were 3D printed. You might think this would result in a wobbly machine with sloppy tolerances, but [Fraens] is truly a master of knowing when and where you can get away with using printed parts. So for example, while the glue rollers could be done in printed plastic, they still needed metal rods run through the middle for strength and proper bearings to rotate on.
Looking at the totality of this build, it’s hard to imagine how it could have been accomplished via traditional methods. Sure you could have sourced the rollers and gears from a supplier to save some plastic (at an added expense, no doubt), but there’s so many unique components that simply needed to be fabricated. For example, all the guides that keep the label heading in the right direction through the mechanism, or the interchangeable collars which let you select the pattern of glue which is to be applied. Maybe if you had a whole machine shop at your disposal, but that’s a lot more expensive and complex a proposition than the pair of desktop 3D printers [Fraens] used to crank out this masterpiece.
If the name (and penchant for orange plastic) seems familiar, it’s because we’ve featured several builds from [Fraens] in the past. This one may be the most technically impressive so far, but that doesn’t diminish the brilliance of his vibratory rock tumbler or cigarette stuffing machine.
Continue reading “3D Printing A Bottle Labeling Assembly Line” →