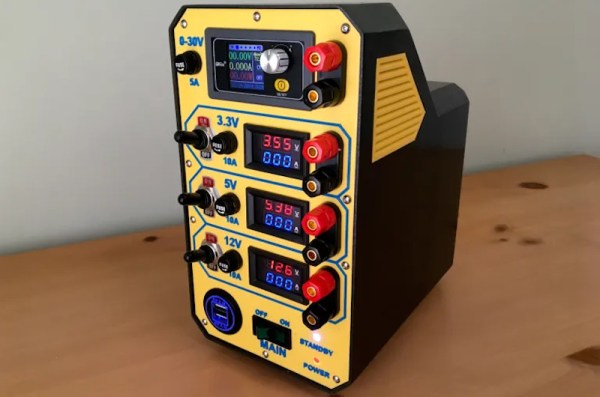
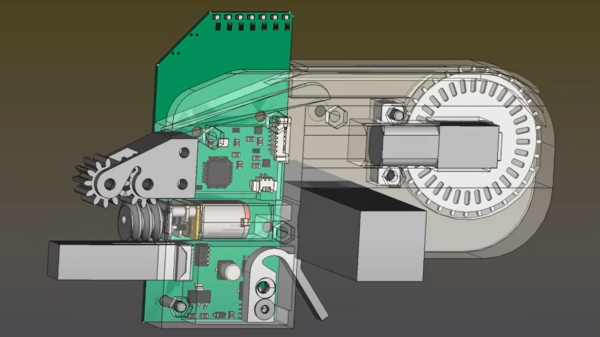
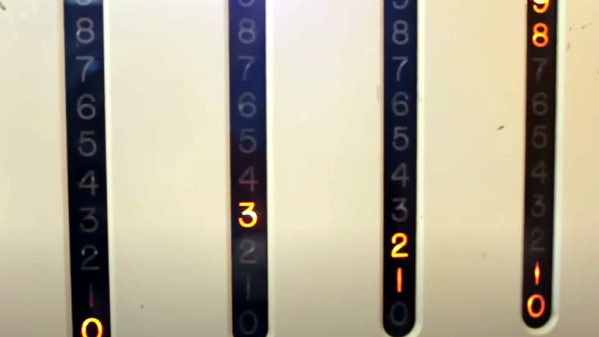
Toothbrush Goes From Mouth-Whitening To Room-Brightening

Some of the hacks we see make us wonder why they aren’t already a commercial product, and this electric toothbrush turned rechargeable flashlight is one of them. Sure, these things exist, but we haven’t seen one with a dedicated charging stand. They usually just take micro USB or whatever, so it’s on you to remember to plug it in. How great would it be to have a fully-charged flashlight always at the ready, especially one in a position to illuminate the room? Although [wannabemadsci] makes it look easy, this conversion took quite a bit of doing.

Perhaps the most amazing part is that [wannabemadsci] found a halfway decent flashlight at the dollar store. Better than average, this thing has a main light, a side light, and takes 3xAAs instead of a couple of AAAs. The only issue is that the toothbrush batteries don’t quite put out enough voltage for the flashlight’s LED, so [wannabemadsci] used a booster board.

Of course, there’s a lot more to this hack than sawing off the USB connector from the boost converter so it fits. The toothbrush handle had to be modified to accept the flashlight guts, and the threads relocated from the flashlight. Since the battery charge indicator shines through the momentary button on the toothbrush, [wannabemadsci] wanted to reuse it, but it required a small board that converts it to a latching push button. Finally, the flashlight bezel had to be painted white. Paint is such an easy thing to do, and this detail makes all the difference in how professional this looks.

There’s a lot you can do with a functioning electric toothbrush as your base, like brute-forcing the pins of a lock with vibration.

A Nicely Accurate PCB Drill Press You Can Build Yourself

Making PCBs isn’t always just about getting nice copper traces on a lovely fiberglass board. There’s often lots of drilling to be done! This PCB drill press from [w_k_fay] should help you do just that with the finesse and accuracy of a pro.

The design isn’t particularly fancy or pretty, but just simply focuses on doing a simple job well. There’s a basic DC motor, sitting on a linear rail so that it has minimal deflection in the X and Y axes as it moves up and down. Special care was taken to ensure the linear rail was mounted perfectly perpendicular to the base to ensure the drill doesn’t wander or splay off target.

A collet chuck is used to center the bit as well as possible for a good price. The build also includes a bright LED in order to give you the best possible view of your work. Power is via a variable bench supply which allows for variable speed as necessary. There’s a foot pedal to activate the drill which allows both hands to be used for positioning the work for added ease of use.

The total build came in at under $50 spend by the time [w_k_fay] was done. Alternatively, you could use this 3D printed design to build your own as well. If you’ve been whipping up your own useful tools for the home shop, though, don’t hesitate to drop us a line!

Resulting tweezer assembly, with a 3D printed replacement case for both of the probes

Hackaday Prize 2022: Glue-Hindered Smart Tweezer Repair Involves A Rebuild

[Dan Julio] owns a pair of Miniware multimeter tweezers, a nifty helper tool for all things SMD exploration. One day, he found them broken – unable to recognize any component between the two probes. He thought it could be a broken connection problem, and decided to take them apart. Presence of some screws on their case fooled him – in the end, it turned out that the case was glued together, and could only be opened destructively. For an entry in the “Reuse, Recycle, Revamp” round of 2022 Hackaday Prize, he tells us how he brought these tweezers back from the dead.

During the disassembly, he broke a custom flexible PCB, which wasn’t reassuring either. However, that was no reason to give up – he reverse-engineered the connections and the charging circuitry, then assembled parts of the broken tweezers together using a small generic protoboard as a base. Indeed, it was likely a broken connection between probes, because the reassembled tweezers worked!

Of course, having exposed PCBs wouldn’t do, and from the very start, assembling these tweezers back together was not an option. Instead, he developed a replacement case in OpenSCAD, bringing the tweezers back to life as his trusty tool – and still leaving repairability on the table. If you’re interested in the details, he goes more into how these tweezers are designed when it comes to charging and connectivity, and we recommend that you give his write-up a read!

We’ve been seeing smart tweezers around for over a decade now, from reviews and hacks of commercially made ones, to DIY chopstick-based and PCB-based ones. If you already own a pair of tweezers you’ve grown attached to, you can neatly retrofit them with a capacitance sensing function!

Expedient Jig Lets You Crank Out Chain Link Fence

After the zombie apocalypse or whatever is coming, folks like us will be in high demand as the people who know how to fix things, generate electricity, and scavenge parts. But keeping out marauding zombies and neighbors requires fencing. Can you make your own chain link fence? If you watch [Diamleon]’s recent video, you might be able to. Admittedly, the bulk of the video is about fabricating the jig and you should expect to do some welding and cutting.

However, you might be able to make a similar jig with a little less work. The jig is essential a spool on a shaft with a crosswise cut to guide the wire. The whole thing is powered by an electric drill turning a sprocket much like a bicycle.

One pass through the machine makes a nice twisty wire. Once you’ve run off a few lengths of twisty wire it is relatively easy to interlace them into fencing panels. It is one of those things that is hard to visualize until you see it. We were impressed with the drill drive and immediately thought about modifying the design to wind large coils. There are probably many other uses for such a thing. So even if you don’t want to build a fence, you might want to check it out.

As for us, we’ll probably just make our fence out of wood. Or do something electric. Oddly enough, we saw a hand-crank version of this same type of machine last year.

Continue reading “Expedient Jig Lets You Crank Out Chain Link Fence”

Square Cuts On Aluminum Extrusion, No Mill Required

If you’re looking for the perfect excuse to buy that big, beautiful Bridgeport mill, we’ve got some bad news: it’s not going to be making perfectly square end cuts on aluminum extrusion. Sadly, it’s much more cost-effective to build this DIY squaring jig, and search for your tool justification elsewhere.

There’s no doubting the utility of aluminum extrusion in both prototyping and production builds, nor that the versatile structural members often add a bit of class to projects. But without square cuts, any frames built from them can be seriously out of whack, leading to misery and frustration down the road. [Midwest Cyberpunk]’s mill-less solution uses a cheap Harbor Freight router as a spindle for a carbide endmill, riding on a laser-cut acrylic baseplate fitted with wheels that ride in the V-groove of — you guessed it — aluminum extrusions. A fence and clamping system holds the extrusion firmly, and once trammed in, the jig quickly and easily squares extrusions that have been rough cut with a miter saw, angle grinder, or even a hacksaw. Check out the video below for a peek at the build details.

We love the simplicity and utility of this jig, but can see a couple of areas for improvement. Adding some quick-throw toggle clamps would be a nice touch, as would extending the MDF bed and fence a bit for longer cuts. But even as it is, this tool gets the job done, and doesn’t break the bank like a mill purchase might. Still, if your heart is set on a mill, who are we to stand in the way?

Continue reading “Square Cuts On Aluminum Extrusion, No Mill Required”

Flexible Grip For Hammer Made With 3D Printing Pen

When it comes to putting a flexible grip on a tool, you might reach for a self-fusing silicone tape or other similar product. However, [Potent Printables] has discovered you can easily create a flexible grip using a 3D-printing pen and some flex filament.

In this case, a hammer first gets a layer of blue painters tape wrapped around its wooden handle. This serves as a base layer to promote good adhesion. A simple paper template was then printed as a guide for creating the graphics on the flexible grip. Flexible filament was fed through the 3D pen, with the red and black details of the graphics printed first. Then, white flex filament was used to make the rest of the flexible grip. A wood burning tool was then used to smooth out the first layer of flex filament, before a second layer was added on top.

The result is a flexible white grip on the hammer which is stuck fast, likely due to shrinkage as the plastic cooled after printing. We’ve seen some other creative grips made with 3D printing before, too. Video after the break.

Continue reading “Flexible Grip For Hammer Made With 3D Printing Pen”

Nanovolt Meter Requires Careful Design For Accuracy’s Sake

Measuring voltages is fairly straightforward most of the time. Simply grab any old cheap multimeter, hook up the probes, and read off the answer. If, however, you need to measure very tiny voltages, the problem gets more complex. [Jaromir-Sukuba] designed a nanovoltmeter specifically to deal with this difficult case.

The nanovoltmeter is exactly what it sounds like: a voltmeter that is sensitive and stable enough to measure and report voltages on the scale of nanovolts. Having a tool that can do this reliably can be very useful when it comes to measuring very small resistances or working with ever-so-slight differential voltages. Continue reading “Nanovolt Meter Requires Careful Design For Accuracy’s Sake”