SAMD11 Provides Two Serial Ports For Price Of One

While the average computer user likely hasn’t given much thought to the lowly serial port in decades, the same can’t be said for the hardware hacker. Cheap serial-to-USB adapters are invaluable for snooping debug ports or programming chips, and if you ask us, you can never have too many laying around the bench. [Quentin Bolsée] loves them so much that he’s even figured out how to build a dual-port adapter with a SAMD11C14 microcontroller.

As [Quentin] explains in the write-up, this isn’t just some kind of Y-cable. When connected to the host computer, the adapter shows up as two distinct serial ports, each with independent settings for things like baud rate and parity. This handy little gadget will let you tap into the serial ports of two devices simultaneously if you’re looking to do some Hollywood-style hacking, but more practically, it allows you to establish a debug and programming interface to the same board using just one USB connection.

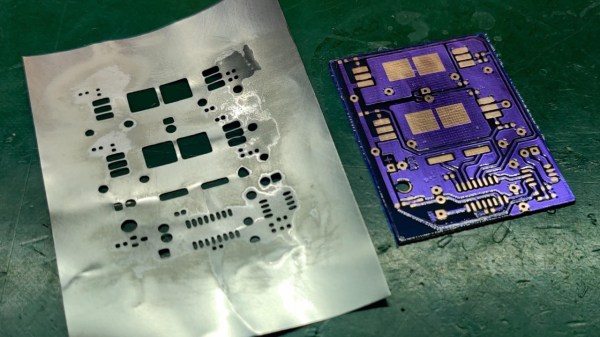
[Quentin] milled a custom PCB for his adapter, which we have to say looks phenomenal, but those with more limited equipment at home should be able to send the MIT licensed board files off for production. He’s also provided the source code for the SAMD11C14’s firmware, so you’ve got everything you need to spin up your own version of this neat tool.

Two ports not enough for your parallel hacking needs? Believe it or not, we’ve also seen a quad USB-to-serial adapter that you can put together, though it’s a considerably more complex circuit.

The BluePill board used for this hack, wired to the DYMO RFID reader, after all the wires for this hack have been soldered onto the BluePill board.

#FreeDMO Gets Rid Of DYMO Label Printer DRM

DYMO 550 series printer marketing blurb says “The DYMO® LabelWriter® 550 Turbo label printer comes with unique Automatic Label Recognition™”, which, once translated from marketing-ese, means “this printer has DRM in its goshdarn thermal stickers”. Yes, DRM in the stickers that you typically buy in generic rolls. [FREEPDK] didn’t like that, either, and documents a #FreeDMO device to rid us of yet another consumer freedom limitation, the true hacker way.

The generic BluePill board and two resistors are all you need, and a few extra cables make the install clean and reversible – you could definitely solder to the DYMO printer’s PCBs if you needed, too. Essentially, you intercept the RFID reader connections, where the BluePill acts as an I2C peripheral and a controller at the same time, forwarding the data from an RFID reader and modifying it – but it can also absolutely emulate a predetermined label and skip the reader altogether. If you can benefit from this project’s discoveries, you should also take a bit of your time and, with help of your Android NFC-enabled phone, share your cartridge data in a separate repository to make thwarting future DRM improvements easier for all of us. Continue reading “#FreeDMO Gets Rid Of DYMO Label Printer DRM”

Non-Contact Probe Works Better With A Little More Complexity

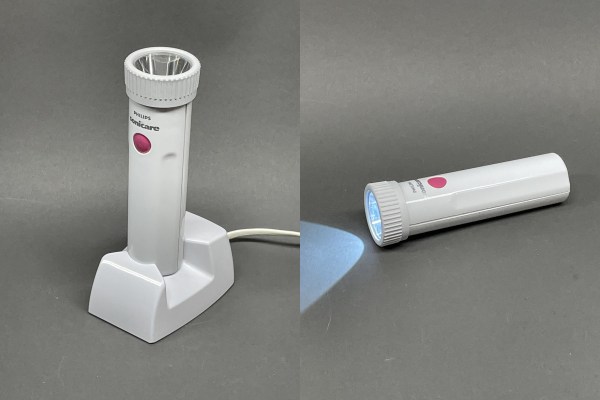
Non-contact voltage probes have been around a while and some test equipment now has them built-in. This is one of those things that you probably don’t think about much, but surely it isn’t that hard to detect AC voltage. Turns out there are a lot of circuits floating around that can do it and [nsievers51] tried a bunch. Many didn’t work very well, but the best used a 4069 CMOS hex inverter. A dollar store flashlight provided power, a case, and an LED and the result was a good-looking and effective probe.

The circuit came from the Electronics Library website and is fairly complex for this sort of device. The CMOS inverters have a high input impedance so they pick up the weak signal. Instead of directly driving an LED, two inverters form a ring oscillator that generate pulses around 1 kHz. At that frequency, the LED appears to be on, but battery consumption is less severe. A single 2N2222-style transistor drives the LED.

We’ve seen a number of variations on this tool in the past. Many of them only use transistors.

Continue reading “Non-Contact Probe Works Better With A Little More Complexity”

3D Printed Forge For Recycling

If you own a CNC and have kept tabs on metal prices these past few years (honestly months), you might shed a small tear as you watch chips fly off your work and into the trash. With a sigh, these flecks and pieces are consigned to be the cost of machining a part. Thankfully, the fine folks at [ActionBox] have been working on a 3d printed plaster forge for recycling their metal scraps.

The team ordered some graphite crucibles of a few sizes from a large online bookstore and started 3D printing some molds for crucible holders. They started with a smaller version to try the method. While the walls were too thin in that initial version, the approach was proven. With slightly thicker walls, the medium-sized version worked much better. The goal of the forge was to smelt copper as they had a lot of thick copper wire lying around. Armed with several propane torches, they started melting aluminum and brass, which worked reasonably well. However, the melting point of copper continued to elude them (1984°F or 1085°C).  To counter this, the [ActionBox] team bought some new torches that provided significantly higher BTU output, while still fitting the holes in the mold. This did the trick!

The mold to accommodate the large crucible was massive and printed in four sections. The team did melt copper successfully and had four ingots to show off. We want to stress how dangerous molten copper and other metals are, particularly regarding things you might not realize have moisture soaked up inside. Proper PPE is essential to use these things without getting hurt. [ActionBox] has some helpful pointers in that area, but they admit they are relatively new to forging and casting themselves. Perhaps version two can incorporate a flip lid for added safety.

Video after the break.
Continue reading “3D Printed Forge For Recycling”

Label Your SMD Tapes With An Inkjet Printer

If you’ve ever had to use SMD components on tape outside the realm of the automated assembly machines for which they were designed, you’ll know that one tape looks very like another and it can be very annoying to keep track of which is which. We can’t help admiring [Yvo de Haas’] inkjet printer for SMD tapes then, which efficiently prints whatever identifying marks you need on the back of your tapes.

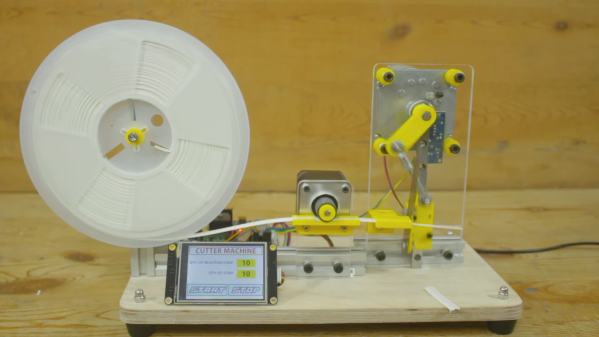
The printer uses the venerable HP45 inkjet cartridge, and teams it with a 3D printed mechanism and [Yvo]’s self-designed driver board. A worm gear motor and a sprocket take care of advancing the tape through the mechanism past the printhead, and there is a well-assembled piece of software to drive it all. With extremely comprehensive build instructions it should be within the reach of anyone who handles component tape, and from our experience of hand-labeling tape for kits we can see that it could be a Godsend. Take a look at it in action in the video below.

So far the tape-handling machinery we’ve seen has mostly been for cutting sections rather than labeling. We can see that this printer paired with a tape cutter should be essential equipment for anyone starting a kit business.

Continue reading “Label Your SMD Tapes With An Inkjet Printer”

Quick Hacks: Using Staples When Recapping Motherboards

[Marcio Teixeira] needed to recap an old Apple Macintosh motherboard, and came across a simple hack to use common paper staples as a temporary heat shield (video, embedded below) during hot air rework. The problem with hot air rework is minimizing collateral damage; you’re wielding air at a temperature hot enough to melt solder, and it can be take quite a lot of experience to figure out how best to protect the more delicate parts from being damaged. Larger items take longer to heat due to their thermal mass but smaller parts can be very quickly damaged from excess heat, whilst trying to remove a nearby target.

The sharp edges of plastic connectors are particularly prone, and good protection is paramount. Sticky tapes made from polyimide (Kapton), PET, as well as metallic options (aluminium tape is useful) are often used to temporarily mask off areas in danger of getting such collateral overheat. But they can cause other problems. Kapton tape, whilst great at withstanding the heat, tends to distort and buckle up a little when under the blast of the rework pencil. Not to mention that some brands of tape leave a nasty sticky transfer residue all over the board when exposed to heat, which needs additional cleanup.

Maybe a box or two of staples might be worth adding to one’s bag of tricks, after all more options is always good. If you’re less interesting in hacking with a hot air work station and much more in hacking a hot air rework station, here you go, and whilst we’re on reworking duff computers, here’s what happens when a Hackaday writer tries his hand at fixing his son’s Xbox.

Continue reading “Quick Hacks: Using Staples When Recapping Motherboards”

Tune Your Dish Antenna Like A Pro

It’s a problem we all have at one time or another: your five-meter radio astronomy dish gets out of calibration and you don’t have a ridiculously expensive microwave holography rig on hand to diagnose it. OK, maybe this isn’t your problem, but when [Joe Martin]’s parabolic antenna got out of whack, he set out to diagnose and repair it, and then wrote up how he did it. You can download the PDF from his radio astronomy articles collection.

At the heart of the measurement rig is a laser rangefinder connected to a Porcupine Labs interface that passes the data on to a Pi 4. This is placed on the end of a two-degree-of-freedom servo gimbal that scans over the surface of the dish, measuring its shape. After measuring and math, [Joe] found out that it’s a little bit long here and short there, he attached two cables with turnbuckles to the front of the dish and pulled it back into shape — the sort of thing that you should probably only do if you’ve got a measurement rig already set up.

The Fluke rangefinder and Porcupine labs interface combo is pretty sweet, but it comes with a fairly hefty price tag. (Nothing compared to a professional dish measurement rig, we presume.) We’ve seen a few attempt at hacking into el-cheapo laser rangefinders, but other than [iliasam]’s heroic effort where he ended up writing his own firmware, it doesn’t seem like there are any successes. A shame, because applications like [Joe]’s prove that there’s a need for one. Let us know if there’s anything we missed?

Thanks [Ethan] for the tip!