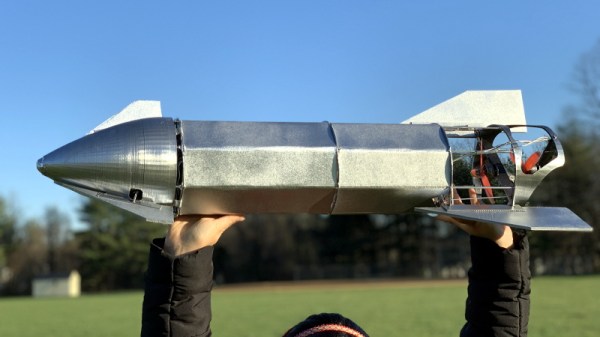
There’s a good chance you already saw SpaceX’s towering Starship prototype make its impressive twelve kilometer test flight. While the attempt ended with a spectacular fireball, it was still a phenomenal success as it demonstrated a number of concepts that to this point had never been attempted in the real world. Most importantly, the “Belly Flop” maneuver which sees the 50 meter (160 foot) long rocket transition from vertical flight to a horizontal semi-glide using electrically actuated flight surfaces.
Finding himself inspired by this futuristic spacecraft, [Nicholas Rehm] has designed his own radio controlled Starship that’s capable of all the same aerobatic tricks as the real-thing. It swaps the rocket engines for a pair of electric brushless motors, but otherwise, it’s a fairly accurate recreation of SpaceX’s current test program vehicle. As you can see in the video after the break, it’s even able to stick the landing. Well, sometimes anyway.
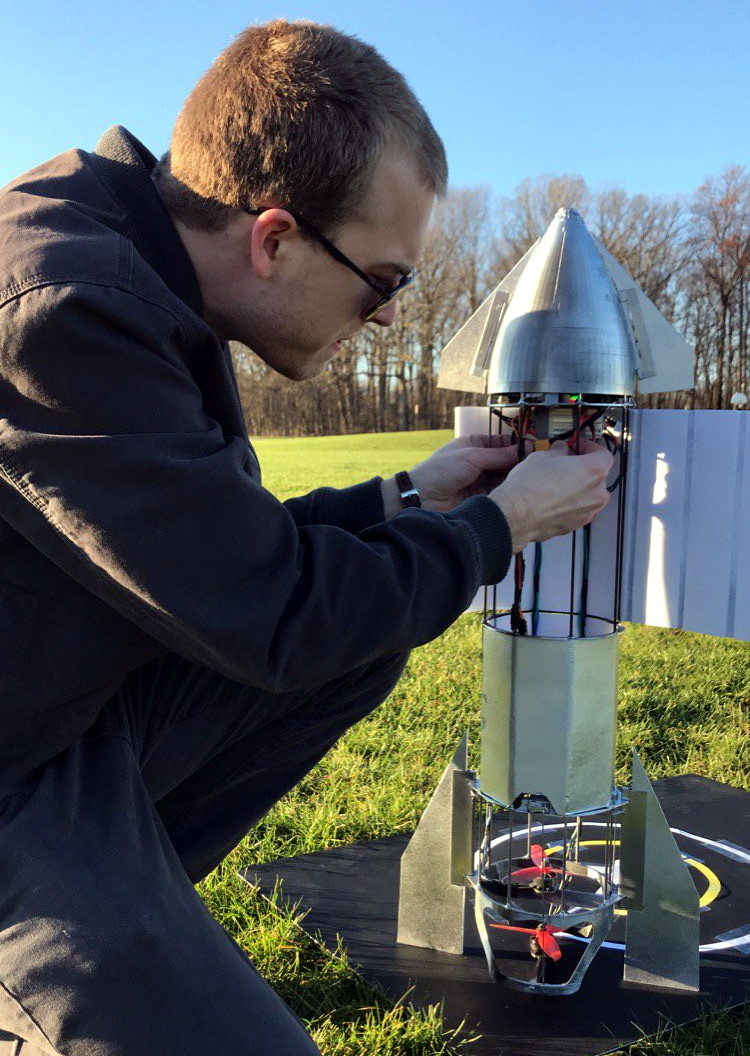 Just like the real Starship, vectored thrust is used to both stabilize the vehicle during vertical ascent and help transition it into and out of horizontal flight. Of course, there are no rocket nozzles to slew around, so [Nicholas] is using servo-controlled vanes in the bottom of the rocket to divert the airflow from the motors. Servos are also used to control the external control surfaces, which provide stability and a bit of control authority as the vehicle is falling.
As an interesting aside, Internet sleuths looking through pictures of the Starship’s wreckage have noted that SpaceX appears to be actuating the flaps with gearboxes driven by Tesla motors. The vehicle is reportedly using Tesla battery packs as well. So while moving the control surfaces on model aircraft with battery-powered servos might historically have been a compromise to minimize internal complexity, here it’s actually quite close to the real thing.
Unfortunately, the RC Starship made a hard landing of its own on a recent test flight, so [Nicholas] currently has to rebuild the craft before he can continue with further development. We’re confident he’ll get it back in the air, though it will be interesting to see whether or not he’s flying before SpaceX fires off their next prototype.
Continue reading “RC Starship Perfects Its Skydiving Routine”