Custom Built 12-Port A/V Switch Keeps CRT Well Fed

Classic gaming aficionados who prefer to play on real hardware know the struggle of getting their decades-old consoles connected to a modern TV. Which is why many gamers chose to keep a contemporary CRT TV around for when they want to take a walk down memory lane. Unfortunately those old TVs usually didn’t offer more than a few A/V ports on the back, so you’ll probably need to invest in a A/V switch to keep them all hooked up at once.

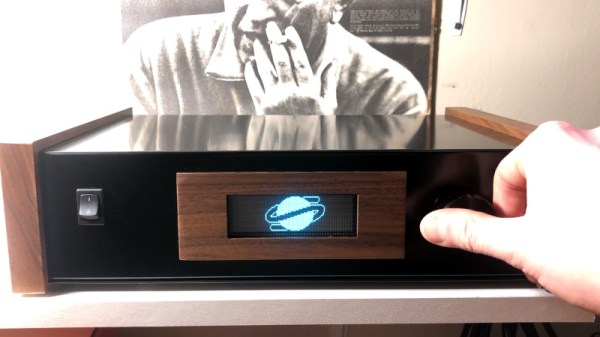
That’s the situation [Thomas Sowell] found himself in, except he couldn’t find one with enough ports. Rather than chain switches together, he decided to build his own custom 12-port console selector. With an integrated amplifier to keep everything looking sharp, a handsome walnut and metal enclosure, and a slick graphical interface that shows the logo of the currently selected console on a Vacuum Fluorescent Display (VFD), the final product is a classic gamer’s dream come true.
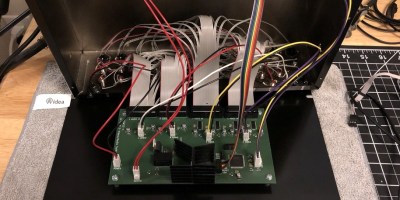
A peek under the hood.

To switch the audio [Thomas] is using a pair of ADG1606 16-channel analog multiplexers, while video is shuffled around with four MAX4315 8-channel video multiplexer-amplifiers. The math might seem a bit off at first, but he’s using one ADG1606 for each stereo channel and since the switch is for S-Video, each device has a luminance and color signal that needs to be handled separately. The multiplexers are flipped with a ATmega2561 microcontroller, which is also responsible for reading user input from a rotary encoder on the front of the case and displaying the appropriate console logo on the 140×32 Noritake VFD.

You may be surprised to find that [Thomas] considered himself an electronics beginner when he started this project, and that this is only the second PCB he’s ever designed. Was this a bold second project? Sure. But it also speaks to how far DIY electronics has come over the last years. Powerful open source tools, modular components, and of course a community of creative folks willing to share their knowledge and designs, has gone a long way towards redefining whats possible for the individual hacker and maker.

Continue reading “Custom Built 12-Port A/V Switch Keeps CRT Well Fed”

Smart Station Runs Entertainment, Is Entertainment

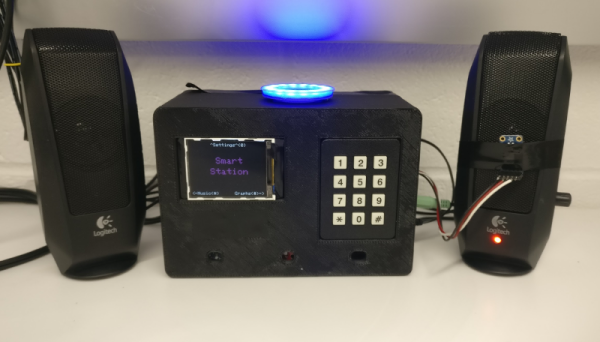
It’s that special time of year—time for the parade of student projects from [Bruce Land]’s embedded microcontroller design course at Cornell. [Timothy], [Dhruv], and [Shaurya] are all into remote sensing and control applications, so they built a smart station that combines audiovisual entertainment with environmental sensing.

As with the other projects in this course, the smart station is built on a PIC32 dev board. It does Bluetooth audio playback via RN-52 module and has a beat-matching light show in the form of a NeoPixel ring mounted atop the 3D-printed enclosure. But those blinkenlights aren’t just there to party. They also provide visual feedback about the environment, which comes from user-adjustable high and low trigger values for the mic, an accelerometer, a temperature and humidity sensor, and a luminosity sensor.

The group wanted to add an ultrasonic wake-up feature, but it refused to work with the 3.3V from the PIC. The NeoPixel ring wanted 5V too, but isn’t as picky. It looks to be plenty bright at 3.3V. Another challenge came from combining I²C, UART, analog inputs, and digital outputs. They had to go to the chip’s errata to verify it, but it’s there: whenever I²C1 is enabled, the first two analog pins are compromised, and there’s no official solution. The team got around it by using a single analog pin and a multiplexer. You can check out those blinkenlights after the break.

Maybe you prefer working in wood. If so, you might like this hexagonal take on audio-visualization.

Continue reading “Smart Station Runs Entertainment, Is Entertainment”

How To MIDI Interface Your Toys

There’s a great number toys in the world, many of which make all manner of pleasant or annoying noises for the entertainment of children. If you’re a musician, these toys may be of interest due to their unique or interesting sounds. However, due to their design being aimed at play rather than performance, it may be difficult to actually use the toy as a musical instrument. One way around this is to record the sounds of the toy into a sampler, but it’s not the only way. [little-scale] is here to demonstrate how to MIDI interface your toys. 

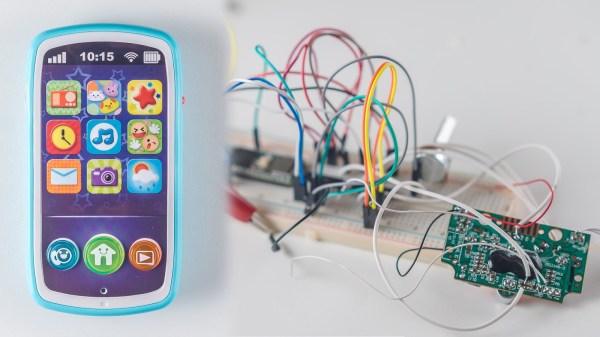
[little-scale] starts out by discussing the many ways in which one can interface with a toy. The article discusses how a simple button can be replaced with a relay, or a multiplexer, and be interfaced to all manner of other devices to control the toy. This is demonstrated by using a mobile phone toy which makes sounds when buttons are pressed.

A Teensy 3.6 is used to run the show, acting as a USB-MIDI interface so the toy can be controlled by music software like Abelton. It’s connected to the toy’s buttons through a multiplexer. The toy’s speaker is cut off and used as an audio output instead, allowing the toy to be easily connected to other audio hardware for performance or recording. It’s also fed through a digital pot so MIDI commands can control the volume. A resistor is used to control pitch in the toy, so this too was replaced with a digital pot as well, to allow sample pitch to be controlled.

The project is incredibly well documented, with [little-scale] first tearing down the toy and highlighting the points of interest, before stepping through each stage of interfacing the toy to the digital world. We’ve seen some of [little-scale]’s work before, too – namely, this MIDI DAC for controlling vintage synthesizers. Video after the break. Continue reading “How To MIDI Interface Your Toys”

A Few Of Our Favorite Chips: 4051 Analog Mux

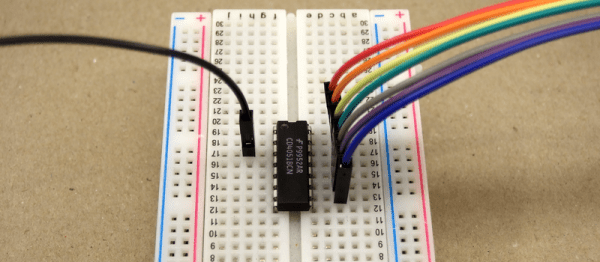
Raindrops on roses, and whiskers on kittens? They’re alright, I suppose. But when it comes down to it, I’d probably rather have a bunch of 4051, 4052, and 4053 analog multiplexers on the component shelf. Why? Because the ability to switch analog signals around, routing them at will, under control of a microcontroller is tremendously powerful.

Whether you want to read a capacitive-sensing keyboard or just switch among audio signals, nothing beats a mux! Read on and see if you agree.

Continue reading “A Few Of Our Favorite Chips: 4051 Analog Mux”

A 16-voice Homebrew Polyphonic Synth

Homebrew synths – generating a waveform in a microcontroller, adding a MIDI interface, and sending everything out to a speaker – are great projects that will teach you a ton about how much you can do with a tiny, low power uC. [Mark] created what is probably the most powerful homebrew synth we’ve seen, all while using a relatively low-power microcontroller.

The hardware for this project is an LPC1311 ARM Cortex M3 running at 72 MHz. Turning digital audio into something a speaker can understand is handled by a Wolfson WM8762, a stereo 24-bit DAC. Both of these chips can be bought for under one pound in quantity one, something you can’t say about the chips used in olde-tyme synths.

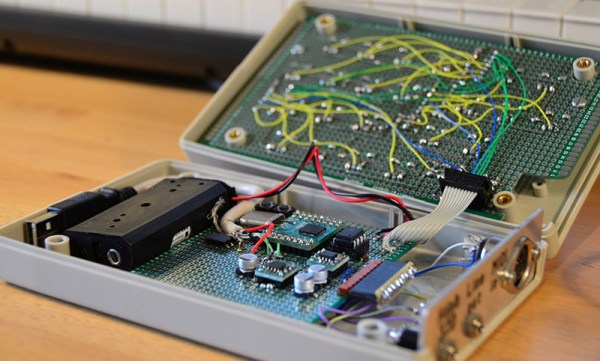
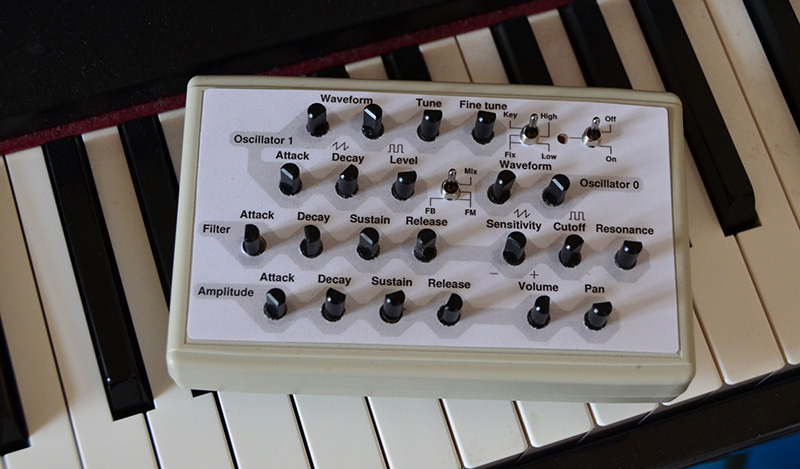
The front panel, shown below, uses 22 pots and two switches to control the waveform, ADSR, filter, volume, and pan. To save pins on the microcontroller, [Mark] used a few analog multiplexers. As far as circuitry goes, it’s a fairly simple setup, with the only truly weird component being the optocoupler for the MIDI input.

goom2

The software for the synth is written mostly in assembly. In a previous version where most of the code was written in C, everything was a factor of two slower. Doing all the voice generation in assembly allowed for twice as many simultaneous voices.

It’s a great project, and compared to some of the other synth builds we’ve seen before, [Mark]’s project is at the top of its class. A quick search of the archives says this is probably the most polyphonic homebrew synth we’ve seen, and listening to the sound sample on the project page, it sounds pretty good, to boot.

Upgrade A Toy Keyboard’s Tone Production

hacking-a-toy-keyboard

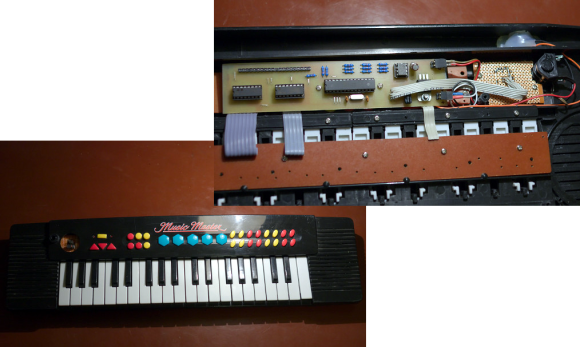
[Jan] was given this toy keyboard and decided to make it the subject of his next project. In addition to having three octaves of keys it’s got a ton of buttons used to select different modes. He gave it an upgrade by installing his own tone production circuitry seen in the upper right.

His preliminary investigation of the stock components yielded a mystery uC encased in a blob of black epoxy. He wasn’t going to be getting anywhere with that, so he started by figuring out how to use 4051 multiplexers to read all of the keys. Outputs for that were routed to a 20 pin header for easy connection to the synthesizer board he would build in the next part of the project. He based it around an ATmega8, which we know can produce some killer chiptunes audio. Once he had everything working he laid out a circuit board in Kicad to ensure the transplanted circuitry would hold up inside of the toy keyboard. You can hear all of different effects it’s capable of in the clip after the break.

Continue reading “Upgrade A Toy Keyboard’s Tone Production”

Disco Planet, A Massive RGBW LED Array In A 6′ Globe

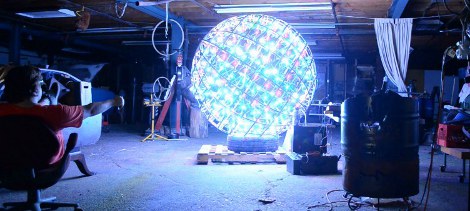
About half a year ago [John] over at Frank’s Kitchens came to me with an idea for a giant lighting project. He had this 6ft diameter aluminum frame globe rescued from the Philadelphia Theater Company and wanted it to be an interactive display of sorts. After a few discussions we got together and somehow managed to order 800 3 watt LEDs in red, green, blue, and white. We had a system that worked great on paper, and managed to get it built by Valentines day for a big show. It failed miserably and hardly even illuminated the LEDs. I, naturally, took this far too personally and set out for a complete redesign, looking in the direction of digitally addressable LED strips.

In addition to building a crazy turbo charged LED array I also spent a lot (a whole lot) of time coding a nice clean fully functioning RGB LED strip controller using an Arduino Pro Mini (5V 16 MHz), the MSGEQ7 audio frequency multiplexer (PDF) , and an IR remote. I plan on using this for other projects so the code can be easily reconfigured to use many different LED strips and a whole slew of IR remotes.

The schematic of the globe is here. The top half  of that schematic be catered to other projects using a variety of pre-built LED strips. The pastebin with code is here,  fastSPI_LED and IRRemote here and here. Some code jockeying was required to get IRRemote.h and FastSPI_LED to play nicely together, so check the code comments.

Continue reading “Disco Planet, A Massive RGBW LED Array In A 6′ Globe”