MicroLab reactor setup

Little Pharma On The Prairie

Let’s get the obvious out of the way first — in his DEFCON 32 presentation, [Dr. Mixæl Laufer] shared quite a bit of information on how individuals can make and distribute various controlled substances. This cuts out pharmaceutical makers, who have a history of price-gouging and discontinuing recipes that hurt their bottom line. We predict that the comment section will be incendiary, so if your best argument is, “People are going to make bad drugs, so no one should get to have this,” please disconnect your keyboard now. You would not like the responses anyway.

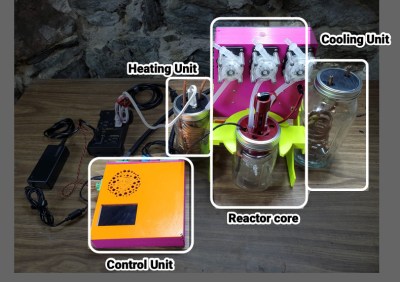
Let’s talk about the device instead of policy because this is an article about an incredible machine that a team of hackers made on their own time and dime. The reactor is a motorized mixing vessel made from a couple of nested Mason jars, surrounded by a water layer fed by hot and cold reservoirs and cycled with water pumps. Your ingredients come from three syringes and three stepper-motor pumps for accurate control. The brains reside inside a printable case with a touchscreen for programming, interaction, and alerts.

It costs around $300 USD to build a MicroLab, and to keep it as accessible as possible, it can be assembled without soldering. Most of the cost goes to a Raspberry Pi and three peristaltic pumps, but if you shop around for the rest of the parts, you can deflate that price tag significantly. The steps are logical, broken up like book chapters, and have many clear pictures and diagrams. If you want to get fancy, there is room to improvise and personalize. We saw many opportunities where someone could swap out components, like power supplies, for something they had lying in a bin or forego the 3D printing for laser-cut boards. The printed pump holders spell “HACK” when you disassemble them, but we would have gone with extruded aluminum to save on filament.

Several times [⁨Mixæl] brings up the point that you do not have to be a chemist to operate this any more than you have to be a mechanic to drive a car. Some of us learned about SMILES (Simplified Molecular Input Line Entry System) from this video, and with that elementary level of chemistry, we feel confident that we could follow a recipe, but maybe for something simple first. We would love to see a starter recipe that combines three sodas at precise ratios to form a color that matches a color swatch, so we know the machine is working correctly; a “calibration cocktail,” if you will.

If you want something else to tickle your chemistry itch, check out our Big Chemistry series or learn how big labs do automated chemistry.

Continue reading “Little Pharma On The Prairie”

Let The Solder Scroll Take Care Of Your Feed Needs

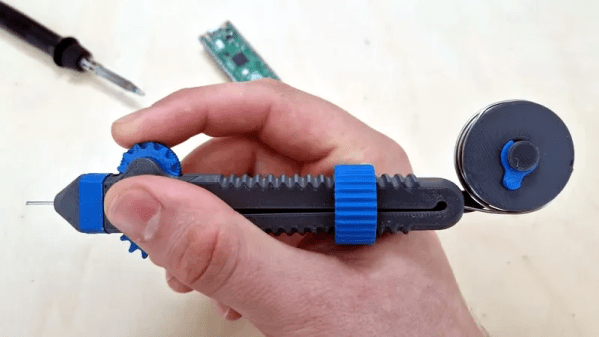
[Victor]’s nifty tool the Solder Scroll is a handheld device that lets one feed solder out simply by turning something a little like a scroll wheel. It looks like an intuitive and comfortable design that can adapt to a wide variety of solder thicknesses, and is entirely 3D printed.

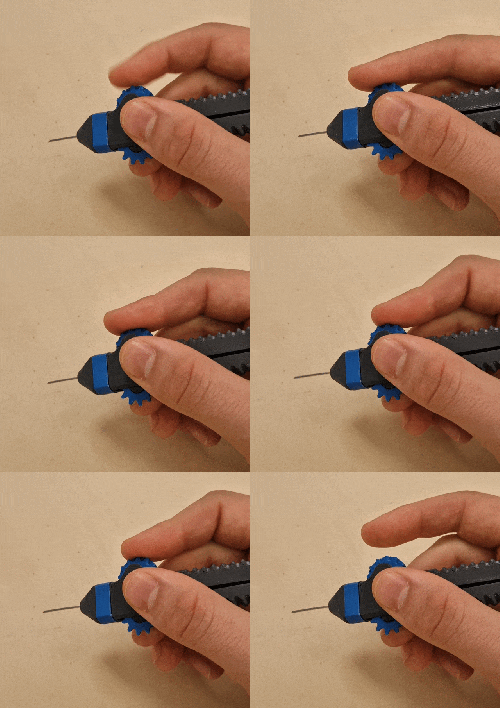
One part we particularly like is the feed system. One rolls a wheel which feeds solder out using a mechanism a lot like extrusion gears in many 3D printer hot ends. Both wheels have ridged surfaces that grip and feed the solder; their gears mesh with one another so that moving one moves both in unison.

Solder feed tools like this have seen all kinds of interesting designs, because while the problem is the same for everyone, there are all kinds of different ways to go about addressing it. We love this one, and we have seen many other takes that range from a powered, glove-mounted unit to an extremely simple tool with no moving parts. We’ve even seen a method of hacking a mechanical pencil into a new role as a solder feeder.

Get A Fresh Build Plate At The Push Of A Button

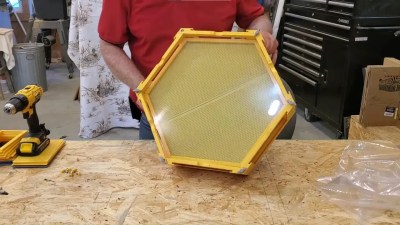
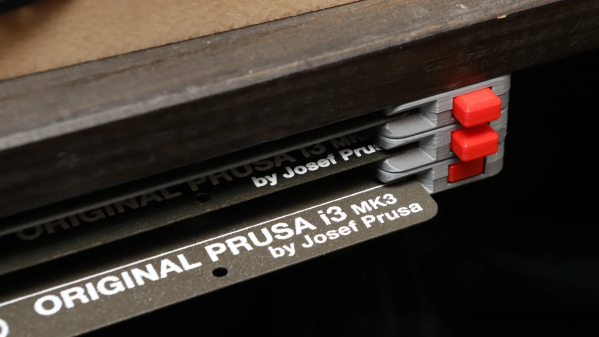
For best results, a build sheet for a 3D printer’s print bed should be handled and stored by the edges only. To help make that easier, [Whity] created the Expandable Steel Sheet Holder system that can store sheets efficiently without touching their main surfaces, and has a clever mechanism for ejecting them at the push of a button.

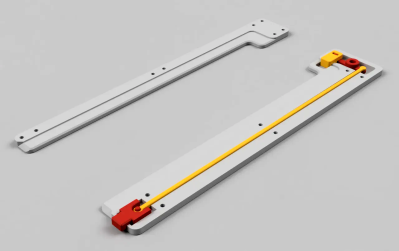
Pushing the button (red, bottom left) pivots the section at the top right, ejecting the plate forward for easy retrieval.

The design is 3D printable and made to be screwed to the bottom of a shelf, which is great for space saving. It can also be extended to accommodate as many sheets as one wishes, and there’s a clever method for doing that.

Once the first unit is fastened to a shelf, adding additional units later is as simple as screwing them to the previous one with a few M3 bolts, thanks to captive nuts in the previously-mounted unit. It’s a thoughtful feature that makes it easy to expand after the fact. Since build sheets come in a variety of different textures and surfaces for different purposes, one’s collection does tends to grow.

Interested, but want it to fit some other manufacturer’s sheets? The design looks easy to modify, but before you do that, check out the many remixes and you’re likely to find what you’re looking for. After all, flexible magnetic build sheets are useful in both resin and filament-based 3D printing.

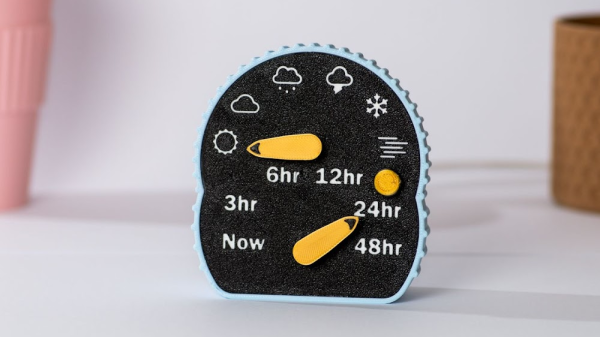
A desktop weather display, with two yellow pointers, one for the time frame (Now, 3hr, 6hr, 12hr, 24hr, 48hr) and the other pointing to an iconographic description of the weather (sunny, cloudy, cloud with rain, cloud with lightning, snowflake and fog)

Let This Minimal Desktop Weather Display Point The Way

Much of the Northern Hemisphere is currently in the middle of winter, so what better way to brighten a potentially gloomy day than to put this charming, minimalist weather display on your desk.

[Joe] has created a weather gauge that uses two servo motors to position mechanical pointers to indicate weather symbols and time ranges. The electronics consists of a push button and two SG90 servos driven by a Raspberry Pi Zero W 2. The case is 3D printed including the pointers attached to the servos and the button brim of the switch. The Raspberry Pi Zero W 2 is programmed to automatically connect to the OpenWeather API to retrieve the latest weather conditions, with the latitude and longitude being configured into the update script during the configuration and assembly stages.

[Joe] has provided extensive documentation about the build and software setup, in addition to releasing the source code and STL files for anyone wanting to make their own. [Joe] even offers kits for those who don’t want to go through the trouble of putting one together themselves — not that we imagine many in this particular audience would fall into that category.

We love to see these delightful weather builds and we’ve featured others in the past, like a converted weather house for weather prediction or a weather reporting diorama.

Continue reading “Let This Minimal Desktop Weather Display Point The Way”

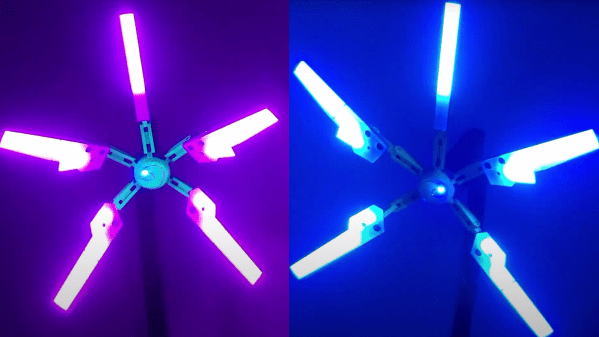
A montage of a "death stranding" lamp in two different color modes, purple on the left and blue on the right

Illuminate Your Benched Things With This Death Stranding Lamp

[Pinkman] creates a smart RGB table lamp based off of the “Odradek device” robot arm from the video game “Death Stranding”.

[Pinkman] adds a XIAO BLE nRF52840 Sense device, with Bluetooth support, microphone and TinyML capability. The nRF52840 is used to push data to the five WS2812 strips, one for each “blade” of the lamp, and also connects to a TTP223 capacitive touch controller to add touch input detection. The TinyML portion of the nRF52840 allows for custom keyword training to turn on the lamp with voice commands ([Pinkman] uses “Bling Bling”). [Pinkman] has also provided Bluetooth control, allowing the color and pattern to be changed from a phone application.

The lamp is 3D printed with the build being based off of [Nils Kal]’s Printables files. Each of the five blades has a white 3D-printed diffusor plate to help ease out the hot spots for the LED strip. The lamp is fully adjustable in addition to having cavities, channels and access points for “invisible” wiring. [Pinkman] has also upgraded the original 3D files to allow for the three wires needed to drive the WS2812, instead of the two wires that [Nils] had allotted in the original.

[Pinkman] has all of the code, STL files and training data available for download, so be sure to check it out. Lamps are a favorite of ours and we’ve featured our fair share, including 3D printed Shoji lamps and RGB wall lamps.

Video after the break!

Continue reading “Illuminate Your Benched Things With This Death Stranding Lamp”

3D Printed Sorter Separates Spare Hex Nuts With A Shake

Got a pile of mixed hex nuts? Sort them in no time by printing [jonafriendj]’s nut sorter, which has options for pretty much any nut size you’d be after (it’s labeled metric, but actually includes Imperial sizes as well.)

Something to admire about the design is the handy little raised labels on each of the sieves, and the fact that all the parts print entirely without supports. Designing a part to play to a manufacturing method’s strengths (and avoid its weaknesses) is good DFM, or Design for Manufacturing.

With 3D printing being the boon that it is to workshops and hobbyists everywhere, it certainly pays to strive for good DFM, especially for designs meant to be shared with others. Sometimes good DFM takes a page from other manufacturing methods like injection molding, and we end up with things like using crush ribs on printed parts.

Want to see a demonstration of [jonafriendj]’s nut sorting design? Check out the short video embedded below the page break. If that leaves you wanting, take a look at a motorized, automated DIY solution.

Continue reading “3D Printed Sorter Separates Spare Hex Nuts With A Shake”

3D Printer Upcycles Computer Case To DAS

Storage technologies are a bit of an alphabet soup, with NAS, SAN, and DAS systems being offered. That’s Network Attached Storage, Storage Area Network, and Direct Attached Storage. The DAS is the simplest, just physical drives attached to a machine, usually in a separate box custom made for the purpose. That physical box can be expensive, particularly if you live on an island like [Nicholas Sherlock], where shipping costs can be prohibitively high. So what does a resourceful hacker do, particularly one who has a 3d printer? Naturally, he designs a conversion kit and turns an available computer case into a DAS.

There’s some clever work here, starting with the baseplate that re-uses the ATX screw pattern. Bolted to that plate are up to four drive racks, each holding up to four drives. So all told, you can squeeze 16 drives into a handy case. The next clever bit is the Voronoi pattern, an organic structure that maximizes airflow and structural strength with minimal filament. A pair of 140mm fans hold the drives at a steady 32C in testing, but that’s warm enough that ABS is the way to go for the build. Keep in mind that the use of a computer case also provides a handy place to put the power supply, which uses the pin-short trick to provide power.

Data is handled with 4 to 1 SATA to SAS breakout cables, internal to external SAS converters, and an external SAS cable to the host PC. Of course, you’ll need a SAS card in your host PC to handle the connections. Thankfully you can pick those up on ebay for $20 USD and up.

If this looks good, maybe check out some other takes on this concept!