If you want a simple and easy introduction to stepper motors, check out the [IMSAI Guy]’s short video where he designs a very basic stepper motor controller and packs in a lot of quick lessons along the way. (Embedded below.)
He first goes over the fundamentals of a stepper motor in a practical, hands-on approach, and also shows us how to ring out the connections if the pinout is unknown. Next he demonstrates stepping the motor manually and then makes a simple FET driver circuit. Just when you’re expecting a small microcontroller to appear, the [IMSAI Guy] instead digs deep into his junk box and explains how to drive the motor with a 22V10 GAL (an electrically erasable PAL) and a 555 timer module. Based on a clearly-explained logic table for driving the coils, a sneaky way to introduce Karnaugh maps, he proceeds to write the output equations in WinCUPL.

WinCUPL is the modern version of CUPL (Compiler for Universal Programmable Logic) originally written by a company called Assisted Technology, now owned by Altium. CUPL and peers like PALASM from Monolithic Memories, Inc. (MMI) and ABEL from Data I/O Corporation were basic Hardware Description Languages specifically designed for PALs, GALs, and CPLDs. PALs were small arrays of logic gates with fusible interconnections, and your design is “burned” into the fuses much like a (EE)PROM. When designing with PALs, you could clearly visualize the connections in your mind, something that has since been remedied by the advent of modern FPGAs.
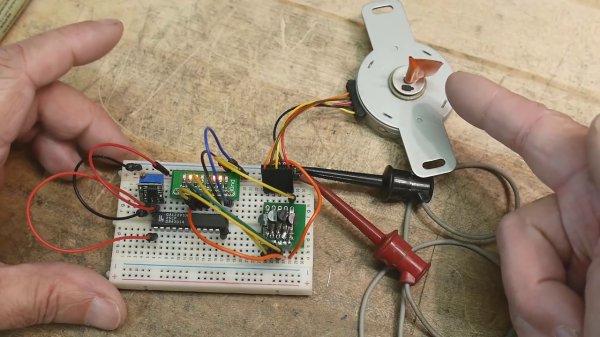
Alas, he cuts out the part where the source code is compiled and the 22V10 is programmed, and jumps directly into testing the circuit on a breadboard. Spoiler alert — it does work. Zooming in close and squinting, the nifty 555 timer breadboard module that he points out is called a TP353, which you can find from your favorite online supplier.
There is a lot to learn in this tutorial, and the [IMSAI Guy] does a great job at making the subject approachable to hobbyists and novices. We also covered another of his tutorials a couple of weeks ago on image sensors. Thanks to [itsevilbert] for the tip.