Rental Home Thermostat Gets Smart Upgrade Without Modifying The Dumb Controller

A problem facing those who live in rental properties comes with two prongs: that such properties rarely have up-to-date facilities such as heating controllers, and that landlords tend to take a dim view of tenants installing their own alternatives. [Andy] wanted to upgrade the heating controller in his home and was in this situation, so he came up with a smart controller add-on for the existing mechanical timer that does not irreversibly modify anything and is easily removable when he moves on.

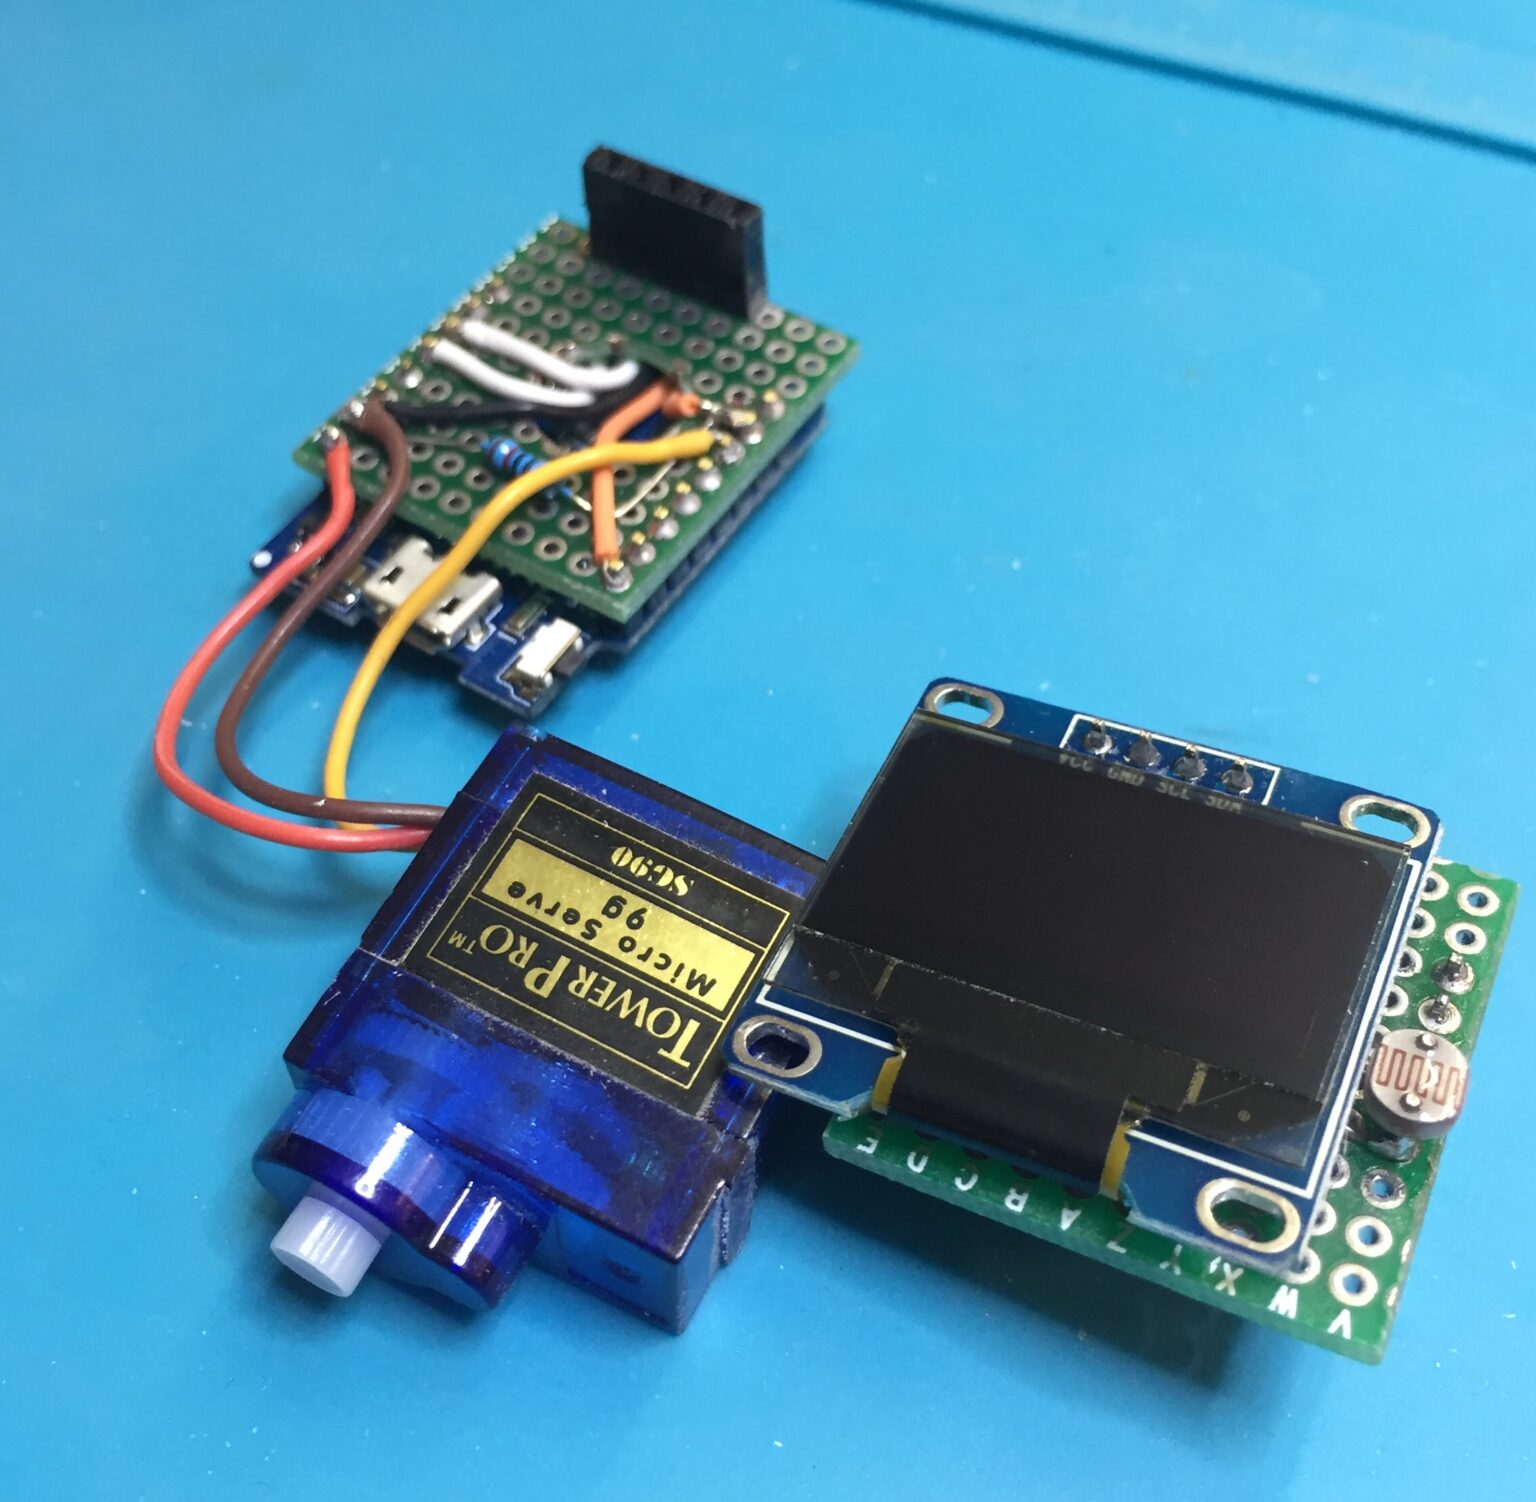
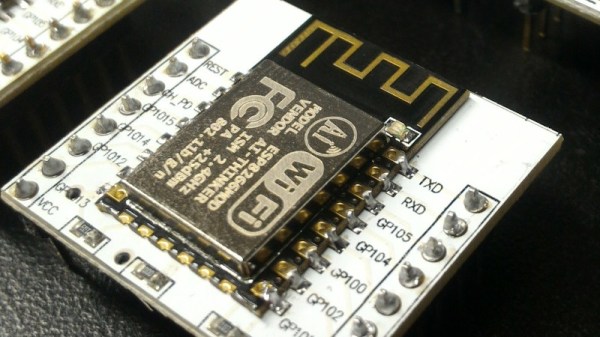
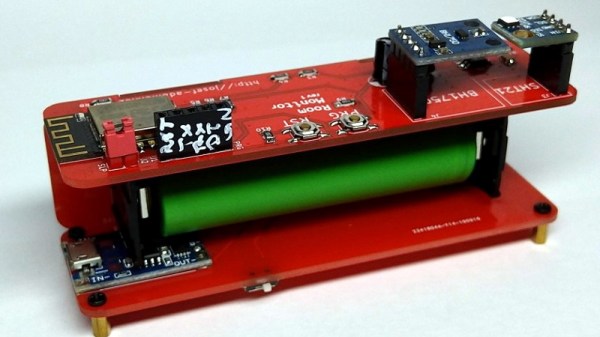
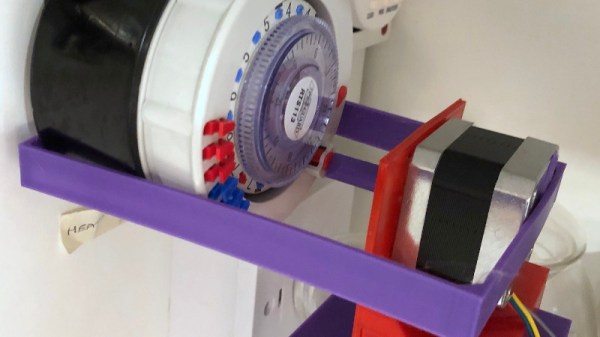
This sounds like an impossible task, but it’s one he’s done very well by mounting a stepper motor on a 3D-printed frame over the timer switch. It’s the type with a motorised ring onto which plastic fingers can be placed to flip a switch on or off; he’s simply removed the plastic fingers and designed a shaft extension for the motor that simulates their passing the switch. He can now turn his heating on and off at will from an ESP8266, in this case on an Adafruit Feather Huzzah.

Behind it all lies Adafruit IO with a custom dashboard — Hackaday’s [Sean Boyce] took this service for a trial run if you’d like his take on it’s features. For this project, Adafruit IO delivered exactly what [Andy] was after but still left a few teething troubles. The stepper needed to be told not to try to hold its position, and moving a stepper very slowly generated wait periods long enough to trigger the ESP’s watchdog timers. Adding in IFTTT gave him the ability to schedule, as well as Alexa control. All in all he’s replicated some commercial offerings with a lot less cost and all without annoying his landlord. You can see it in action in the video below the break.

Continue reading “Rental Home Thermostat Gets Smart Upgrade Without Modifying The Dumb Controller”

Stylish Thermometer Is DIY Hardware Perfection

Over the last few years, we’ve seen a steady improvement in the sort of custom hardware a dedicated individual can produce. With affordable desktop 3D printers and PCB fabrication services, the line between store bought and home built can get very blurry. This slick MQTT-connected thermometer created by [Martin Cerny] is a perfect example.

The case for the device, which [Martin] calls Temper, is printed in a stone-look PLA filament and has been carefully designed so that LEDs shining behind it illuminate perfect square “pixels” on the front. There’s a living hinge button on the left side, and on the right, an opening for the SHT30 temperature and humidity sensor. Some may say that the look of the sensor aperture could be improved with a printed grille, but there was likely a concern about reduced airflow.

Inside the case is a 13×7 array of SMD LEDs, a few 74HC595 shift registers, a TP4054 charging chip to keep the internal 250 mAh battery topped off via USB, and some passives to round out the party. The ESP-12E module that brings it all together and the battery are on the flip side of the PCB. At a press of the button, the display fires up for 5 seconds and Temper publishes temperature, humidity and battery percentage through MQTT. If you’re looking for more granular data, it can also be configured to publish regular updates at the cost of increased energy consumption.

The physical product is gorgeous on its own, but we’re happy to report that the firmware and documentation have been handled with a similar attention to detail. The project’s GitHub repo has a Wiki to help others build and configure their very own Temper, and the device’s web configuration portal is easily just as nice as anything you’d find in a piece of modern consumer electronics (if not moreso).

We’ve seen plenty of ESP8266-based environmental monitoring devices here at Hackaday, but we think this one really pushes the state-of-the-art forward. This is a device that wouldn’t be out of place on the shelf at a Big Box electronics retailer, and while [Martin] says he has no interest in building and selling them himself, we don’t doubt that folks out there will be spinning up their own Temper clones before too long.

Clock Uses Custom LED Displays To Keep Myst Time

The Myst fans in the audience will love this project because it displays the 25-hour timekeeping system of the D’ni. The hardware hackers will lean a little closer to their screen because it does so with custom made 25-segment LEDs, and the precision obsessed will start breathing heavily when they hear it maintains an accuracy of 0.001 seconds. As for which of those camps creator [Mike Ando] most identifies with, we can’t say. But we definitely respect his style.

We’ll spare you the in-depth description of the base-25 number system apparently used in the Myst franchise. If you’re interested enough you can click on through to the project’s Hackaday.io page and learn how to actually read the clock. Presumably you’ll then come back here and leave your comment in Klingon.

Let’s instead jump right to the part that really gets us excited, those custom displays. To create them, [Mike] cut the face out of black acrylic with a laser, and filled each void with a mixture of clear resin and very fine gypsum plaster. Getting the mix right can be a little finicky as the plaster can clump up, but the end result diffuses the light nicely. The acrylic front panel and a couple of cardboard “gaskets” to keep the light from leaking onto adjacent segments is then stacked on top of a PCB with corresponding 0603 SMD LEDs.

Beyond the soul-crushing number of wires required to hook everything up internally, the rest of the project is relatively straightforward. It uses a WeMos D1 Mini to connect to the WiFi network and pull the current time down from the geographically closest NTP server every couple of hours. Rather than putting a temperature controlled oscillator on the board, [Mike] has decided to pin his accuracy on a constantly on Internet connection and aggressive synchronizations.

From impressive curved bar graph modules to displays segmented with household items, we’ve seen our fair share of custom indicators. But we have to admit that building 25-segment LED displays for the alphabet of a fictional interstellar species sets the bar pretty high.

Continue reading “Clock Uses Custom LED Displays To Keep Myst Time”

Light The Way To Every Component

How do you organize your stock of components and modules? If an unruly pile of anti-static bags and envelopes from China stuffed into a cardboard box sounds familiar, then you need help from [Dimitris Tassopoulos]. He’s organized his parts into drawers and created a database, then linked it via an ESP8266 and a string of addressable LEDs to light up the individual drawer in which any given component resides. It’s a genius idea, as you can see in action in the video below the break.

Behind the scenes is a web server sitting atop an SQL database, with a PHP front end. It’s running on a Banana Pi board, but it could just as easily be running on any other similar SBC. The ESP8266 has a REST API to which the webserver connects when a component is sought, and from that it knows which LED to light.

The LED strip is not the tape with which most readers will be familiar, but a string of the type we might be more used to as Christmas lights. These have a 100mm spacing between LEDs, allowing them to be easily positioned behind each drawer. The result is a very effective parts inventory system. We’re not entirely sure that it would entirely banish the tide of anti-static bags here, but we’re impressed nevertheless.

Continue reading “Light The Way To Every Component”

Lovebox Gives Infinite Treats Sweeter Than Chocolate

Want to make a special Valentine’s Day gift that keeps on giving well past the holiday? We do too, especially if it’s something as cute as [Marcel Stör]’s Lovebox. This is a relatively simple build, but it’s the kind that lets you make someone’s day over and over again.

The sender composes their love note in a secret GitHub gist, either as a text message or a binary image, and updates the gist. Whenever the Wemos D1 mini inside the box receives a new message, a micro servo slowly wiggles the hearts up and down to notify the recipient.

Once they remove the lid to read it, a light-dependent resistor senses the flood of light on its face and tells the servo it can stop wiggling. We think it’s neat that the heart nudges upwardly at the box lid a bit as it moves, because it increases the cuteness factor.

Everybody loves to hear from that special someone throughout the day. The idea of sending an intimate message remotely is quite romantic, and there’s something thrilling and urgent about a physical notification. Show the break button a little love, and you’ll see a truffle-sized demo featuring both an incoming image and a text message.

[Marcel] was happy to ply his woodworking skills rather than use a laser cutter. If you have neither of these, hit up a craft store or two and you’ll find unfinished wooden boxes and pre-cut hearts galore. Or, you could just say it with copper.

Continue reading “Lovebox Gives Infinite Treats Sweeter Than Chocolate”

One ESP8266, One Battery, One Year… And Counting.

There are times when a sensor is required that does its job without the need for human attention over a long period, and for those applications a minimal power drain is a must. [Dave Davenport] had an EPS8266-based moisture sensor, and became disappointed in having to replace its AA batteries every few months. With an 18650 Li-ion cell and a bunch of power-saving tricks that time has been extended so far to over a year and still going, so he’s written a blog post detailing how he did it.

Some of his techniques such as turning off the sensor or using a better LDO regulator than the stock Wemos one are straightforward. Others though are unexpected, such as using the memory associated with the on-board RTC to store the WiFi connection info and channel number during sleep. The normal ESP8266 connection sequence involves a network scan, by hanging onto what it found last time the extra time and thus power expended by it can be avoided. Similarly switching from a DHCP lease to a fixed IP address cuts the time the device waits for a lease and thus the time it has to stay awake.

We might not all have ESP8266 moisture sensors to build, but we’re many of us on a quest to sip less power in our projects. Let us help you with a previous sojourn into that arena.

ESP8266 image: connorgoodwolf [CC BY-SA 4.0].

A Slightly Bent ESP8266 Sensor Platform

The ability to get professionally manufactured PCBs, at least small ones, for dirt cheap has had a huge impact on the sort of projects we see around these parts. It’s getting to the point where experimenting with PCB enclosures is not only a way to make your next project stand out, but an economical choice.

Which is how this ESP8266 sensor gadget from [Josef Adamčík] got its unique “folded over” look. The top panel is where the microcontroller and headers for various sensors live, the bottom panel is home to the TP4056 USB charging module, and the center panel provides mechanical support as well as holds the single 18650 cell. Rather than close the whole thing up with a fourth panel, he decided to leave it open so the battery can easily be removed. Plus, of course, it looks cooler this way.

Could [Josef] have fit all his electronics on a single 100 x 100 PCB and then put the whole thing into a 3D printed enclosure? Well, sure. But that’s been done to death at this point, and besides, he was looking for an excuse to get more comfortable doing PCB design. We think it also makes for a considerably more visual appealing final product than simply taking the “normal” way out.

Currently [Josef] has an SHT21 humidity/temperature sensor and a BH1750 light sensor slotted into the headers on the top side of the device, but they could just as easily be swapped out with something else if you wanted to do something a bit more exciting. We notice that homebrew air quality monitors are becoming increasingly popular.

Building bespoke enclosures from PCBs is a fantastic trick that frankly we’d love to see more of. It’s somewhat of an artform in itself, but if you’re willing to put the effort in to do it right the results can be truly phenomenal.