Talking To A Lamp

Barking commands at furniture seems a bit odd but with voice controlled home automation platforms becoming the norm, you may be spending more time talking to your light fixtures than your kids. In one such project, [Becky Stern] used an Alexa Dot and an ESP8266 respond to voice commands.

The design uses the Alexa Dot to interpret voice commands such as ‘Alexa turn the light ON’. The ESP8266 with a relay feather wing is used to switch the actual lamp ON and OFF. The glue between the two is the fauxmoESP library that allows the ESP8266 to receive commands from the Alexa API.

The best part of the project is the lamp itself which has a wooden base and is perfect for such experiments. [Becky Stern] does a wonderful job at carving out enough space and filling it with the electronics. The additional sanding and wood staining make the project more impressive and worthy of a living room. The idea could be easily extended to other own household items. Check out the video of the project below and for more inspiration, take a look at Theia IoT Light-Switch. Continue reading “Talking To A Lamp”


Hackaday Prize Entry: Hydroponic Garden Control

[Todd Christell] grows tomatoes in hydroponic buckets in his backyard, and recently he suffered a crop loss when a mechanical timer failed to dispense the nutrient flow as directed. He decided the solution was to add a sensor array to his home network.

[Todd]’s home automation setup runs on a Raspberry Pi loaded with Jessie OS and Node-Red, with Mosquitto as his MQTT message broker. With a sensor network in place, [Todd] would get updates on his phone alerting him if there was a problem with the pumps or if the nutrient bath was getting too low.

The proposed hydroponic setup would consist of an ESP8266-12 equipped with a DS18B20 waterproof temperature sensor, a reed sensor detecting nutrient levels, and a relay board triggering one pump to fill the grow buckets from the main sump and another to top off the sump with the solution from a reserve tank. One early problem he encountered was the electric fence (pictured above) that he employs to keep squirrels away from his tomatoes, interfered with the ESP8266’s signal.

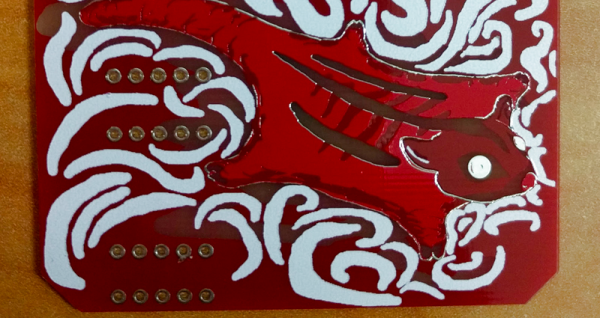
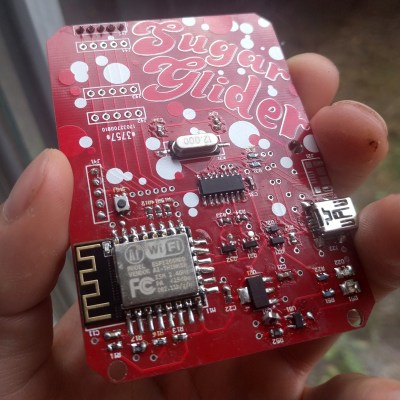
ESP8266 Dev Board Sports Flying Squirrel PCB Art

[Jarrett] has a box of Nokia phone batteries and decided to use them in a project. He designed and built WiFi throwies— these consist of ESP8266 WiFi chips attached to custom PCBs and powered by Nokia phone batteries. The board charges LiPoly/Li-Ion batteries over USB with the help of a MCP73831 charger chip and has USB-serial on-board. It’s much more of a powered ESP8266 dev board than a throwie, but we’ll give [Jarrett] the benefit of the doubt.

The PCB ended up larger than [Jarrett] would have liked, because of the size requirements of the phone battery connected to it. However, this gave him the canvas to create some fun PCB art. After designing the board he imported the Gerbers into Adobe Photoshop and converted each layer into a monocolor image based on the material of that layer—purple for OSHPark’s stencil mask, beige for DirtyPCB’s FR4, and so on. One challenge [Jarrett] encountered was how to get the art back into Altium Circuit Maker, his layout program of choice. After playing around with different methods for a few days, he wrote a tutorial sharing what he found out.

HaD has covered WiFi throwies before. We also appreciate a beautiful circuit board. Check out our posts on turning PCBs into art and making lapel pins out of circuit board fiberglass.

ESP To Wireshark

Everyone’s favorite packet sniffing tool, Wireshark, has been around for almost two decades now. It’s one of the most popular network analysis tools available, partially due to it being free and open source. Its popularity guaranteed that it would eventually be paired with the ESP32/8266, the rising star of the wireless hardware world, and [spacehuhn] has finally brought these two tools together to sniff WiFi packets.

The library that [spacehuhn] created uses the ESP chip to save Pcap files (the default Wireshark filetype) onto an SD card or send the data over a serial connection. The program runs once every 30 seconds, creating a new Pcap file each time. There are many example scripts for the various hardware you might be using, and since this is written for the ESP platform it’s also Arduino compatible. [spacehuhn] has written this as a proof-of-concept, so there are some rough edges still, but this looks very promising as a network analysis tool.

[spacehuhn] is no stranger to wireless networks, either. His YouTube channel is full of interesting videos of him exploring various exploits and testing other pieces of hardware. He’s also been featured here before for using an ESP8266 as a WiFi jammer.

Continue reading “ESP To Wireshark”

Hacking An Inspection Microscope

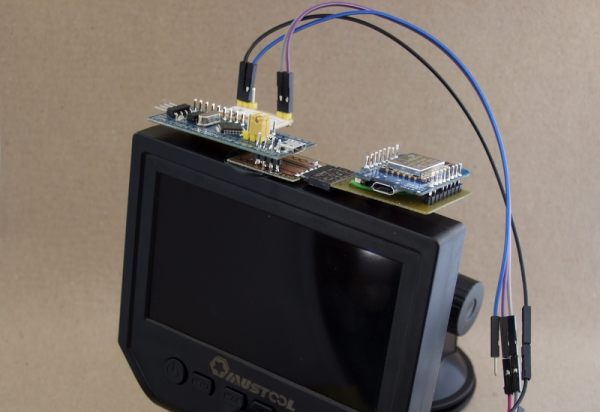
Sometimes I need to be able to take photographs of very small things, and the so-called macro mode on my point-and-shoot camera just won’t cut it. And it never hurts to have an inspection scope on hand for tiny soldering jobs, either, though I prefer a simple jeweler’s loupe in one eye for most tasks. So I sent just over $40 off to my close friend Alibaba, and a few weeks later was the proud owner of a halfway usable inspection scope that records stills or video to an SD card.

Unfortunately, it’s only halfway useable because of chintzy interface design and a wobbly mount. So I spent an afternoon, took the microscope apart, and got it under microcontroller control, complete with WiFi and a scripting language. Much better! Now I can make microscope time-lapses, but much more importantly I can take blur-free photos without touching the wiggly rig. It was a fun hack, so I thought I’d share. Read on!

Continue reading “Hacking An Inspection Microscope”

Hackaday Prize Entry: 3D Printed Linear Actuator Does 2kg+

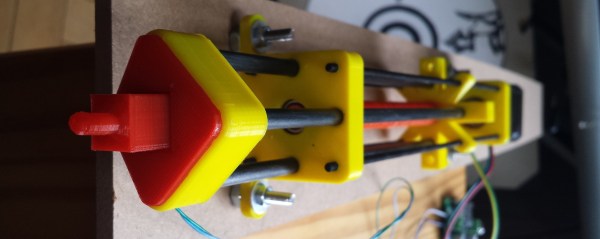
The rabbit hole of features and clever hacks in [chiprobot]’s NEMA17 3D Printed Linear Actuator is pretty deep. Not only can it lift 2kg+ of mass easily, it is mostly 3D printed, and uses commonplace hardware like a NEMA 17 stepper motor and a RAMPS board for motion control.

The main 3D printed leadscrew uses a plug-and-socket design so that the assembly can be extended easily to any length desired without needing to print the leadscrew as a single piece. The tip of the actuator even integrates a force sensor made from conductive foam, which changes resistance as it is compressed, allowing the actuator some degree of feedback. The force sensor is made from a 3M foam earplug which has been saturated with a conductive ink. [chiprobot] doesn’t go into many details about his specific method, but using conductive foam as a force sensor is a fairly well-known and effective hack. To top it all off, [chiprobot] added a web GUI served over WiFi with an ESP32. Watch the whole thing in action in the video embedded below.

Continue reading “Hackaday Prize Entry: 3D Printed Linear Actuator Does 2kg+”

Practical IoT Cryptography On The Espressif ESP8266

The Espressif ESP8266 chipset makes three-dollar ‘Internet of Things’ development boards an economic reality. According to the popular automatic firmware-building site nodeMCU-builds, in the last 60 days there have been 13,341 custom firmware builds for that platform. Of those, only 19% have SSL support, and 10% include the cryptography module.

We’re often critical of the lack of security in the IoT sector, and frequently cover botnets and other attacks, but will we hold our projects to the same standards we demand? Will we stop at identifying the problem, or can we be part of the solution?

This article will focus on applying AES encryption and hash authorization functions to the MQTT protocol using the popular ESP8266 chip running NodeMCU firmware. Our purpose is not to provide a copy/paste panacea, but to go through the process step by step, identifying challenges and solutions along the way. The result is a system that’s end-to-end encrypted and authenticated, preventing eavesdropping along the way, and spoofing of valid data, without relying on SSL.

We’re aware that there are also more powerful platforms that can easily support SSL (e.g. Raspberry Pi, Orange Pi, FriendlyARM), but let’s start with the cheapest hardware most of us have lying around, and a protocol suitable for many of our projects. AES is something you could implement on an AVR if you needed to.

Continue reading “Practical IoT Cryptography On The Espressif ESP8266”