The Internet Of Soldering Irons

The Internet of Things needs — well — things. Do you really need your paper shredder hooked up to the Internet? Maybe. But [Vegard Paulsen] put something on the network that every hacker can relate to: his soldering iron.

In typical hacker fashion, fixing a broken digital display on the soldering station turned into a development project that allows [Vegard] to monitor the temperature of his soldering iron on his phone. He found a handy source of power on the station’s PC board and connected a NodeMCU WiFi device (that uses the ubiquitous ESP8266 and an onboard Lua interpreter).

internet-of-soldering-irons-meterThe data pushes out to the Thingspeak server which handles pushing data out to the bigger network, and data representation (like the cool Google gauge in the picture). The best part: [Vegard] gets a phone notification when he accidentally leaves his soldering iron on. How perfect is that?

One unique challenge he faced was soldering the power wires to the soldering station. This could be a problem because the iron tip is grounded so making the joint while the iron was energized would probably blow a fuse (or worse). Luckily, [Vegard] thought ahead and devised a plan that apparently worked.

We’ve seen other examples of how easy NodeMCU and Thingspeak work to put the mundane on the Internet. It seems particularly appropriate to hack a soldering iron, though.

Hackaday Prize Entry: Controlling Relays Over WiFi

It’s been less than a year since the ESP8266 WiFi Module was released. This is a chip whose original data sheets were only available in Chinese, could only be controlled through AT commands, and was (originally) only sold through Seeed Studio and other various Chinese retailers. It had one thing going for it: it was five dollars. For the price of a crappy sub, you can blink an LED from the Internet. Needless to say, the ESP8266 is now very popular.

There are a lot of ESP8266 projects in The Hackaday Prize this year, and [David]’s project is making great use of the relatively meager pinout of this module. He’s built an 8-channel relay controller with a WiFi interface to control industrial equipment. It’s a great project, but just of many ESP projects in the prize this year.

The ESP doesn’t have a huge number of pins, but there are enough for some serious work with the right hardware. He’s using the ESP-12 module to get the most pins, and using an SPI port expander to drive an octet of relays. It’s a simple board, but everything you need to control a bunch of relays over WiFi is right there: LEDs, reset buttons, and RS232 level conversion.

You can check out a pair of very satisfying videos of relays clicking below.


The 2015 Hackaday Prize is sponsored by:

Continue reading “Hackaday Prize Entry: Controlling Relays Over WiFi”

Wirelessly Weighing Plants With The ESP8266

There’s a good number of hacks, and commercial products, for telling you when a plant needs watering. Most of them use an ADC to measure the resistance in the soil. As the soil’s moisture content drops, the resistance increases. High impedance, dead plant.

[squix]’s Thirsdee takes a different approach to plant health monitoring. Instead of measuring resistance, it simply weighs the plant. As the soil dries up, it gets lighter. By measuring the change in weight, the amount of water in the pot can be estimated.

Thirsdee uses a load cell to measure the weight. It’s read using an HX711 ADC, which is controlled by a NodeMCU. This development board is based on the ESP8266 chip. Since Thirsdee has WiFi, it can push notifications to your phone and log data on ThingSpeak. If you’re looking at the plant, an OLED shows you the current status of the plant. For us viewing from home, we can see a graph of [squix]’s plant drying out in real time.

[squix] provides us with a list of suppliers for the parts, and all the source code on Github.

Tracking Bitcoin With The ESP8266

[Kendrick] was looking for something to do with an ESP8266 WiFi module, and since he loves Bitcoin and Arduino, the obvious solution was to make a Bitcoin price tracker.

The ESP8266 is a complete microcontroller with a WiFi chip and a few pins for a serial connection. It’s certainly possible to write some firmware for the ESP to get the current conversion rate of Bitcoin, but for simplicity’s sake, [Kendrick] chose to use an Arduino for this project. He’s using a 5V Arduino, and the ESP operates on 3.3V logic, but a few Zeners take care of the logic level conversion.

The code running on the Arduino checks the CoinDesk API minute, parses the JSON coming from the API, and prints the current Bitcoin price to the serial port. For tracking the current conversion rate of Bitcoin, it’s vastly overkill. This project could have a few interesting applications, from hooking up a few seven-segment displays, to an RGB LED mood lamp that keeps track of this magic Internet money.

DIY ESP8266 Development Board

Those small, super-cheap, ESP8266 modules are being installed everywhere, creating all sorts of frivolous internet connected thingamajigs. But consider this period as a training ground of sorts, as hackers smarten their chops on figuring out how to get the best out of this IoT gravy train. Right now, getting the ESP8266 to work requires a fair amount of work and to make things easier, [Abdulgafur] built a ESP8266 development board.

The dev board lets the user connect the ESP8266 to a PIC micro controller as well as to a host PC. In addition, it hosts several peripherals such as a 2×16 LCD display, 4 push buttons, couple of indicator LEDs and some GPIO’s broken out to a header. PC communication is via a FT232RL USB-UART converter over a Mini-USB connector. There’s also a few bi-directional level converters to translate between 5V and 3.3V and pull-up resistors for the ESP8266.

As of now, the dev board only supports the ESP8266-01 module. A nice upgrade would be to add support for other ESP8266 modules too. Maybe a separate, 3d printed, pogo pinned, test fixture for the other modules. If you plan to build you own version, [Abdulgafur] has the schematic, PCB and BoM available for download, although we couldn’t spot the PIC code, so you might have to ask for that. And it would be a good idea to remove the GND copper pour from under the ESP8266 footprint.

IOT Lawnmower

World’s First Internet Connected Lawnmower

Okay so this IOT is getting a bit out of hand. Introducing the world’s first(?) tweeting, internet connected, lawnmower.

[Michel] recently bought one of those new-fangled cordless lawn mowers by EGO. It runs off a 56V lithium ion battery pack, and apparently, works pretty well. Since it has plenty of on-board power, he decided to strap a 64MHz PIC18F25K22 to a ESP8266 and connect it to the internet. That part number has been taking the world by storm and it’s totally freaking awesome. The ESP8266 is a tiny WiFi module that is controllable over a serial port — and it only costs $5. Hello IOT-everything.

Anyway, to avoid voiding his warranty, [Michel] using non-invasive sensors to collect data — A series of hall effect sensors and magnets to be exact. One detects when the cutting system is engaged, and another magnet and sensor pair counts wheel revolutions. In the end, this gives you data on how far you pushed the mower, how long you spent cutting, and how long you were out there. When the job is done, you have the option to push a tweet with your stats. Woo!

He does admit, the tweeting feature is more there just to annoy his friends.

ESP8266 As A Networked MP3 Decoder

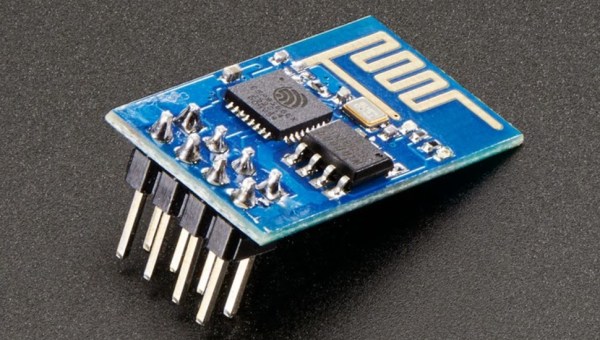
Support libraries, good application notes, and worked examples from a manufacturer can really help speed us on our way in making cool stuff with new parts. Espressif Systems has been doing a good job with their ESP8266 product (of course, it doesn’t hurt that the thing makes a sub-$5 IOT device a reality). Only recently, though, have they started publishing completed, complex application examples. This demo, a networked MP3 webradio player, just popped up in Github, written by the man better known to us as Sprite_tm. We can’t wait to see more.

The MP3 decoder itself is a port of the MAD MP3 library, adapted for smaller amounts of SRAM and ported to the ESP8266. With a couple external parts, you can make an internet-connected device that you can point to any Icecast MP3 stream, for instance, and it’ll decode and play the resulting audio.

What external parts, you ask? First is something to do the digital-to-analog conversion. The application, as written, is build for an ES9023 DAC, but basically anything that speaks I2S should be workable with only a little bit of datasheet-poking and head-scratching. Of course, you could get rid of the nice-sounding DAC chip and output 5-bit PWM directly from the ESP8266, but aside from being a nice quick demo, it’s going to sound like crap.

The other suggested external IC is an SPI RAM chip to allow for buffering of the incoming MP3 file. WiFi — and TCP networks in general — being what they are, you’re going to want to buffer the MP3 files to prevent glitching. As with the dedicated DAC, you could get away without it (and there are defines in the “playerconfig.h” file to do so) but you’ll probably regret it.

In sum, an ESP8266 chip, a cheap I2S DAC, and some external RAM and you’ve got a webradio player. OK, maybe we’d also add an amplifier chip, power supply, and a speaker. Hmmm…. and a display? Or leave it all configurable over WiFi? Point is, it’s a great worked code example, and a neat DIY device to show your friends.

The downsides? So far, only the mono version of the libMAD decoder / synth has been ported over to ESP8266. The github link is begging for a pull request, the unported code is just sitting there, and we think that someone should take up the task.

Other Resources

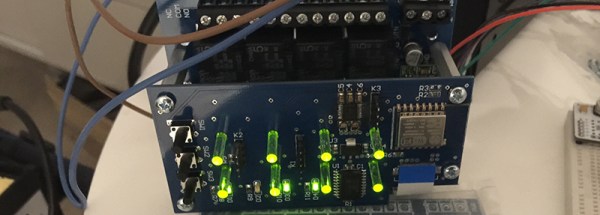
In our search for other code examples for the ESP8266, we stumbled on three repositories that appear to be official Espressif repositories on Github: espressif, EspressifSystems, and EspressifApp (for mobile apps that connect to the ESP8266). The official “Low Power Voltage Measurement” example looks like a great place to start, and it uses the current version of the SDK and toolchain.

There’s also an active forum, with their own community Github repository, with a few “Hello World” examples and a nice walkthrough of the toolchain.

And of course, we’ve reported on a few in the past. This application keeps track of battery levels, for instance. If you’ve got the time, have a look at all the posts tagged ESP8266 here on Hackaday.

You couldn’t possibly want more resources for getting started with your ESP8266 project. Oh wait, you want Arduino IDE support?

Thanks [Sprite_tm] for the tip.
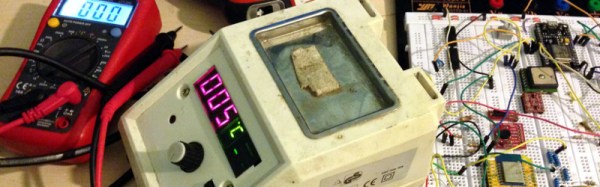