Building An SDR Lab With Wheels

With the incredibly low cost of software defined radio (SDR) hardware, and the often zero cost of related software, there’s never been a better time to get into the world of radio. If you’ve got $30 burning a hole in your pocket, you’re good to go. But as with any engrossing hobby that’s cheap to get into, you run the risk of going overboard eventually.

For example, if the radio gear inside your car approaches parity with the Kelly Blue Book value of said vehicle, you may have been bitten by the radio bug. In the video after the break, [Corrosive] gives us a tour of his antenna festooned Hyundai Accent, that features everything he needs to receive and analyze a multitude of analog and digital radio signals on the go.

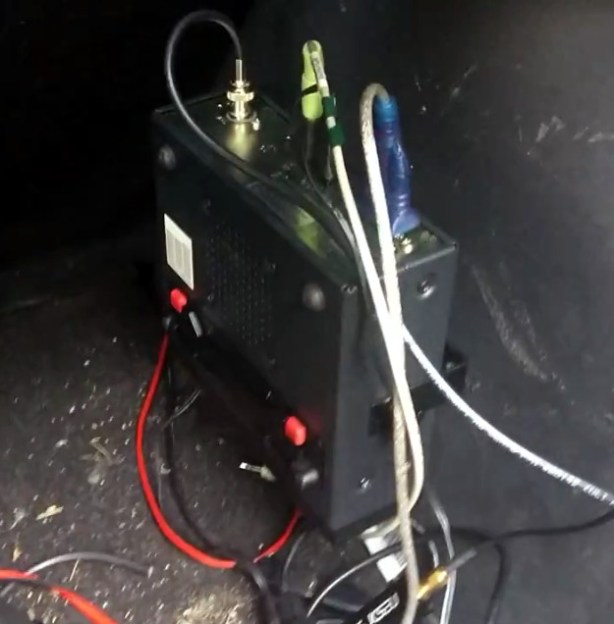
He starts with the roof of the car, which is home to five whip antennas (not counting the one from the factory installed AM/FM radio) and two GPS receivers. The ones on the rear of the car feed down into the trunk, where a bank of Nooelec NESDR RTL-SDR receivers will live in a USB hub. He’s only got one installed for test purposes, but he’ll need more for everything he’s got planned. Also riding in the back is a BCD780XLT scanner, which he got cheap on eBay thanks to the fact it had a dead display.

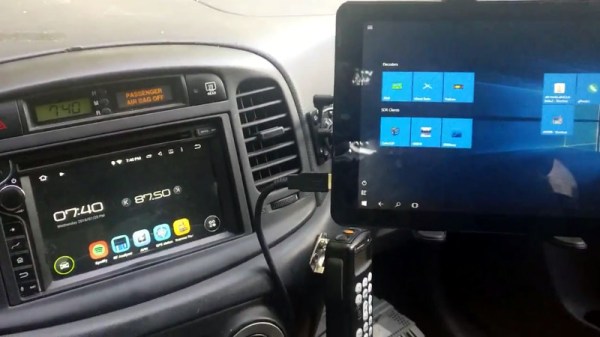
Luckily, where [Corrosive] is going, he won’t need displays. The SDR receivers and the scanner are all controlled from the driver’s seat by way of a Windows 10 tablet. This runs the ProScan software that provides a virtual interface to the BCD780XLT, as well as various SDR interfaces. He’s also got Gpredict for tracking satellites and ADS-B programs like Virtual Radar.

The car’s head unit has been replaced by a rooted Android entertainment system which supports USB host mode. [Corrosive] says it isn’t hooked up yet, but in the future the head unit is going to get its own SDR receiver so he can run programs like RF Analyzer right in the dashboard. We’re willing to bet that this will be the only car in the world that has both a waterfall display and the “Check Engine” light on at the same time.

Even if you aren’t ready to install it in your car, you might like to read up on using multiple SDR receivers for trunked radio or setting up your own ADS-B receiver to get a better idea of what [Corrosive] has in mind once everything is up and running.

Continue reading “Building An SDR Lab With Wheels”

Cat Compels Raspberry Pi Flight Tracker

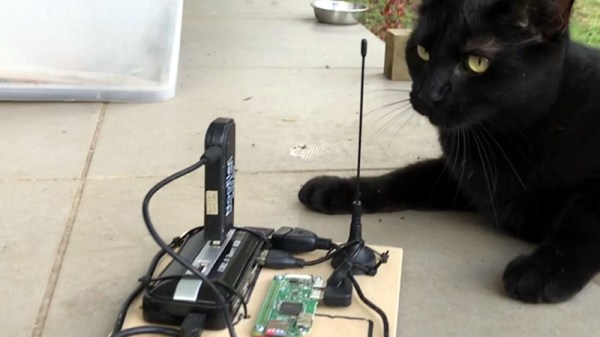
[Simon Aubury] owns a cat. Or perhaps it is the other way around, we can never really tell. One morning around 6AM, the cat — we don’t know its name — heard a low-flying aircraft and to signal its displeasure at the event, decided to jump onto [Simon’s] face as he slept. Thanks to the well-known mind control abilities of cats, [Simon] decided he had to know what plane was causing this scenario to recur. So he did what any of us what do. He used a Raspberry Pi and a software defined radio dongle to decode the ADS-B signals coming from nearby aircraft.

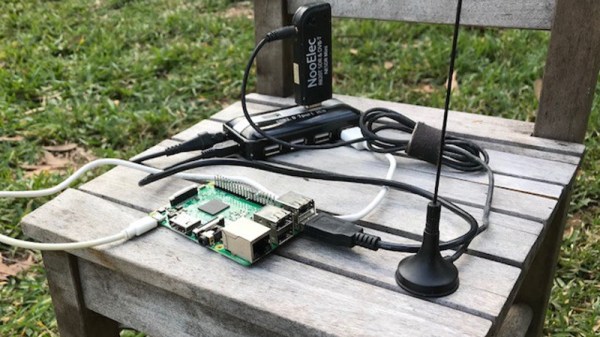
Picking up the signals and capturing them is easy thanks to the wide availability of USB radios and a program called Dump1090. However, the data is somewhat jumbled and not in a cat-friendly format. [Simon] turned to Apache Kafka — a tool for building real-time data pipelines — to process the data.

Continue reading “Cat Compels Raspberry Pi Flight Tracker”

An ADS-B Antenna Built From Actual Garbage

With the advent of low-cost software defined radio (SDR), anyone who’s interested can surf the airwaves from the FM band all the way up to the gigahertz frequencies used by geosynchronous satellites for about $20 USD. It’s difficult to overstate the impact this has had on the world of radio hacking. It used to be only the Wizened Ham Graybeards could command the airwaves from the front panels of their $1K+ radios, but now even those who identify as software hackers can get their foot in the door for a little more than the cost of a pizza.

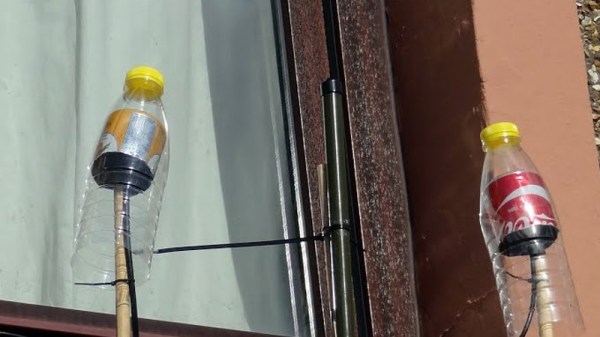
But as many new SDR explorers find out, having a receiver is only half the battle: you need an antenna as well. A length of wire stuck in the antenna jack of your SDR will let you pick up some low hanging fruit, but if you’re looking to extend your range or get into the higher frequencies, your antenna needs to be carefully designed and constructed. But as [Akos Czermann] shows on his blog, that doesn’t mean it has to be expensive. He shows how you can construct a very capable ADS-B antenna out of little more than an empty soda can and a bit of wire.

He makes it clear that the idea of using an old soda can as an antenna is not new, another radio hacker who goes by the handle [abcd567] popularized their own version of the “cantenna” some time ago. But [Akos] has made some tweaks to the design to drive the bar even lower, which he has dubbed the “coketenna”.

The primary advantages of his design is that you no longer need to solder anything or even use any special connectors. In fact, you can assemble this antenna with nothing more than a pocket knife.

You start by cutting the can down to around 68 mm in length, and cutting an “X” into the bottom. Then strip a piece of coax, and push it through the X. The plastic-coated center conductor of the coax should emerge through the bottom of the can, while the braided copper insulation will bunch up on the other side. If you want to make it really fancy, [Akos] suggests cutting a plastic drink bottle in half and using that as a cover to keep water out of the “coketenna”.

How well does it work? He reports performance being very similar to his commercial ADS-B antenna which set him back $45 USD. Not bad for some parts of out the trash.

We’ve covered the math of creating an ADS-B antenna in the past if you’d like to know more about the science of how it all works. But if you just want an easy way of picking up some signals, this “coketenna” and an RTL-SDR dongle will get you started in no time.

Aireon Hitchhikes On Iridium To Track Airplanes

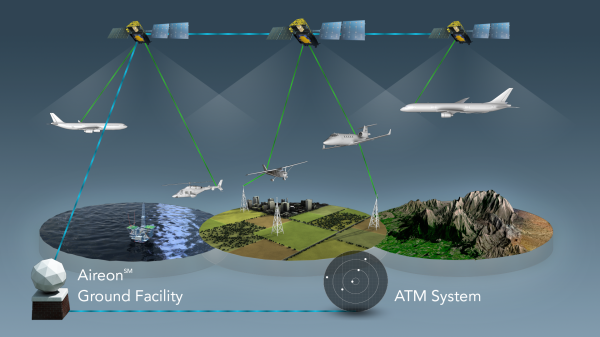
SpaceX just concluded 2017 by launching 10 Iridium NEXT satellites. A footnote on the launch was the “hosted payload” on board each of the satellites: a small box of equipment from Aireon. They will track every aircraft around the world in real-time, something that has been technically possible but nobody claimed they could do it economically until now.

Challenge one: avoid adding cost to aircraft. Instead of using expensive satcom or adding dedicated gear, Aireon listen to ADS-B equipment already installed as part of international air traffic control modernization. But since ADS-B was designed for aircraft-to-aircraft and aircraft-to-ground, Aireon had some challenges to overcome. Like the fact ADS-B antenna is commonly mounted on the belly of an aircraft blocking direct path to satellite.

Challenge two: hear ADS-B everywhere and do it for less. Today we can track aircraft when they are flying over land, but out in the middle of the ocean, there are no receivers in range except possibly other aircraft. Aireon needed a lot of low-orbit satellites to ensure you are in range no matter where you are. Piggybacking on Iridium gives them coverage at a fraction of the cost of building their own satellites.

Continue reading “Aireon Hitchhikes On Iridium To Track Airplanes”

19 RTL-SDR Dongles Reviewed

Blogger [radioforeveryone] set out to look at 19 different RTL-SDR dongles for use in receiving ADS-B (that’s the system where airplanes determine their position and broadcast it). Not all of the 19 worked, but you can read the detailed review of the 14 that did.

Granted, you might not want to pick up ADS-B, but the relative performance of these inexpensive devices is still interesting. The tests used Raspberry PI 3s and a consistent antenna and preamp system. Since ADS-B is frequently sent, the tests were at least 20 hours in length. The only caveat: the tests were only done two at a time, so it is not fair to directly compare total results across days.

Continue reading “19 RTL-SDR Dongles Reviewed”

“Alexa, What Plane Is That?”

We’ve all probably done it — gazed up at a passing jetliner and wondered where it was going and what adventures its passengers were embarked upon. While the latter is hard to answer, the former just got a bit easier: just ask Alexa what the plane is.

Granted, [Nick Sypteras]’s Echo Dot isn’t quite omniscient enough to know exactly what plane you’re looking at. His system benefits from the constraints offered by the window of his Boston apartment — from the video below, we’d guess somewhere in Beacon Hill or the West End — that offers a view of the approach to Logan Airport. An RTL-SDR dongle receives the ADS-B transmissions from all aircraft in the vicinity, and a Raspberry Pi does a lookup, picks the closest plane, and scrapes the departure and arrival airports from FlightRadar24. Alexa does the rest, but we have to confess that hearing “Boeing seven hundred eighty-seven” rather than “seven eighty-seven” would drive us nuts.

If you don’t have the limited view of an airport approach that makes [Nick]’s hack workable, maybe a plane-spotting robot camera would work better for you.

Continue reading ““Alexa, What Plane Is That?””

Tracking Planes With An ESP8266

While there are apps that will display plane locations, [squix] wanted to build a dedicated device for plane spotting. The ESP8266 PlaneSpotter Color is a standalone device that displays a live map with plane data on a color TFT screen. This device expands on his PlaneSpotter project, adding a color display and mapping functions.

First up, the device needs to know where planes are. The ADS-B data that is transmitted from planes contains useful data including altitude, velocity, position, and an identifier unique to the aircraft. While commercial services exist for getting this data, the PlaneSpotter uses ADS-B Exchange. You can set up a Raspberry Pi to record this data, and provide it to ADS-B Exchange.

With the plane data being received from the ADS-B Exchange API, it’s time to draw to the screen. The JPEGDecoder fork for ESP8266 is used for drawing images, which are fetched from the MapQuest API as JPEGs.

Finally, geolocation is needed to determine where in the world the PlaneSpotter is. Rather than adding a GPS module, [squix] went with a cheap solution: WiFi geolocation. This uses identifying information and signal strengths from nearby WiFi access points to determine location. This project uses a public API by [Alexander Mylnikov], which returns a JSON object with longitude and latitude.

This project demonstrates what the ESP8266 is capable of, and brings together some neat techniques. If you’re looking to geolocate or display maps on an ESP8266, the code is available on Github.

Continue reading “Tracking Planes With An ESP8266”