An Easy Camera Slider Build

As smartphone cameras improve with each new generation, making quality video content is getting easier all the time. This means it takes a little more to stand out, so it pays to get creative with your cinematography. A slider is a great way to get some different shots, and you can build one pretty cheaply too (Youtube link, embedded below).

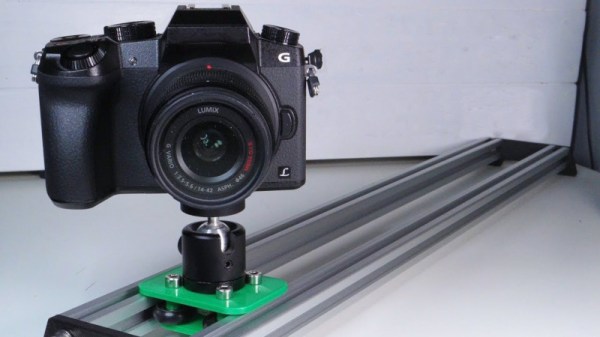
For smooth motion, [Nikodem Bartnik] used aluminium extrusion for the rails, along with some roller bearing wheels designed to suit. The wheels are built into a 3D printed carriage, which is also fitted with a spherical clamping camera mount. It’s all wrapped up with some socket head cap screws and 3D printed brackets to tie it all together.

Dimensional accuracy is key to the smooth operation of a slider, so you’ll want to have your printer set up well if you’re going to attempt this one. [Nikodem] demonstrates the slider is capable of taking the weight of an mid-range SLR with a tastefully sized lens, but if you’re going for something telephoto, you might want to go for something bigger. You could also consider a motorized rig instead. Video after the break.

Continue reading “An Easy Camera Slider Build”

K40 Gets A Leg Up With Open Source Z Table

If you’ve done even the most cursory research into buying a laser cutter, you’ve certainly heard of the K40. Usually selling for around $400 USD online, the K40 is not so much a single machine as a class of very similar 40 watt CO2 lasers from various Chinese manufacturers. As you might expect, it takes considerable corner cutting to drive the cost down that low, but the K40 is still arguably the most cost-effective way to get a “real” laser cutter into your shop. If you’re willing to do some modifications on the thing, even better.

One of the shortcomings of the K40 is that it lacks a Z axis, and with thick material that needs multiple cuts at increasingly deeper depths, this can be a hassle. [Aaron Peterson] decided to take it upon himself to design and build an adjustable Z table for the K40 at his local makerspace (River City Labs), and being the swell guy that he is, has made it available under an open source license so the rest of the K40-owning world can benefit from his work.

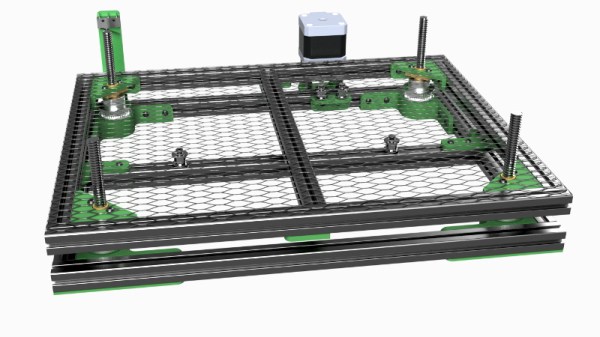
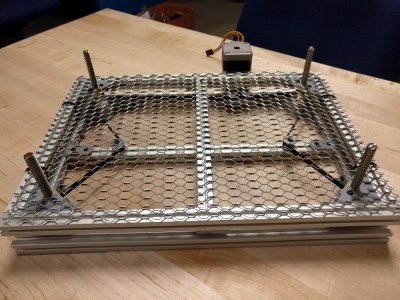
[Aaron] started the design with a number of goals which really helped elevate the project from a one-off hack to a sustainable community project. For one, he only wanted to use easily available commodity hardware to keep the cost down. The most complex components should all be 3D printable so the design would be easy to replicate by others, and finally, he wanted the user to have the ability to scale it in all dimensions. The end result is a electronically controlled lifting platform that anyone can build, for any laser cutter. It doesn’t even have to be limited to laser cutters; if you have a need for precisely raising or lowering something, this design might be exactly what you’re looking for.

The table is primarily constructed out of 15×15 aluminum extrusion, and uses standard hardware store expanded wire mesh as a top surface. Height is adjusted by rotating the four 95 mm T8 leadscrews with a GT2 belt and pulleys, which prevents any corner from getting out of sync with the others. Connected to a standard NEMA 17 stepper motor, this arrangement should easily be capable of sub-millimeter accuracy. It looks as though [Aaron] has left controlling the stepper motor as an exercise for the reader, but an Arduino with a CNC shield would likely be the easiest route.

We’ve seen a lot of hacking around the K40 over the last couple of years, from spring loaded beds to complete rebuilds which are hardly recognizable. If you’re looking for a cheap laser with a huge catalog of possible hacks and modifications, you could do a lot worse than starting with this inexpensive Chinese machine.

How To Make Your Own Springs For Extruded Rail T-Nuts

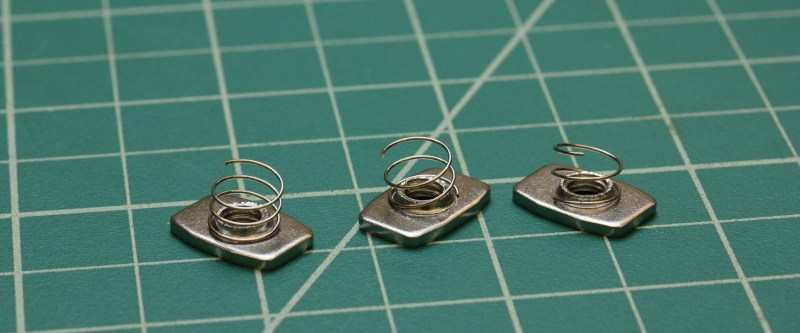
Open-Source Extruded Profile systems are a mature breed these days. With Openbuilds, Makerslide, and Openbeam, we’ve got plenty of systems to choose from; and Amazon and Alibaba are coming in strong with lots of generic interchangeable parts. These open-source framing systems have borrowed tricks from some decades-old industry players like Rexroth and 80/20. But from all they’ve gleaned, there’s still one trick they haven’t snagged yet: affordable springloaded T-nuts.

I’ve discussed a few tricks when working with these systems before, and Roger Cheng came up with a 3D printed technique for working with T-nuts. But today I’ll take another step and show you how to make our own springs for VSlot rail nuts.

Continue reading “How To Make Your Own Springs For Extruded Rail T-Nuts”

Scratch-Building A Supersized Laser Cutter

Now that 3D printers have more or less hit the mass market, hackers need a new “elite” tool to spend their time designing and fiddling with. Judging by the last couple of years, it looks like laser cutters will be taking over as the hacker tool du jour; as we’re starting to see more and more custom builds and modifications of entry-level commercial models. Usually these are limited to relatively small and low powered diode lasers, but as the following project shows, that’s not always the case.
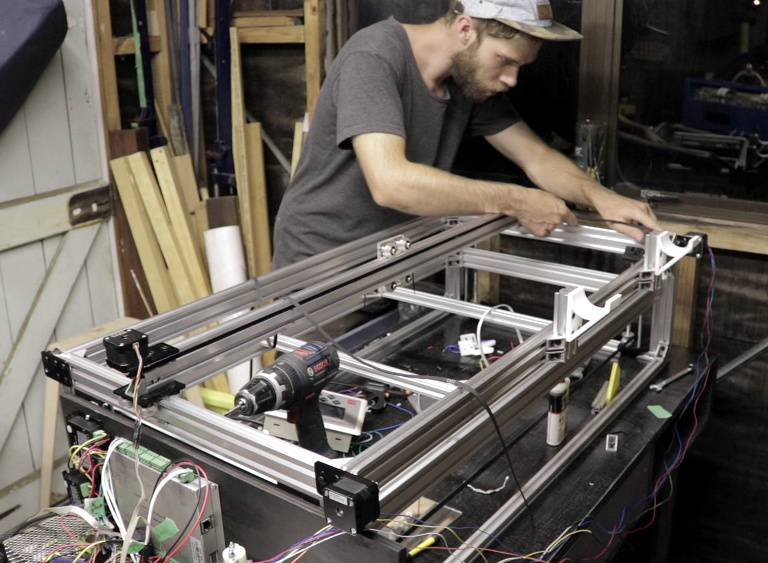
This large format laser cutter designed and built by [Rob Chesney] is meticulously detailed on his blog, as well as in the in the video after the break. It’s made up of aluminium profile and a splattering of ABS 3D printed parts, and lives in an acrylic enclosure that’s uniquely isolated from the laser’s internal gantry. All told it cost about $2,000 USD to build, but considering the volume and features of this cutter that’s still a very fair price.

[Rob] carefully planned every aspect of this build, modeling the entire machine in CAD before actually purchasing any hardware. Interestingly enough his primary design constraint was the door to his shed: he wanted to build the largest possible laser cutter that could still be carried through it. That led to the final machine’s long and relatively shallow final dimensions. The design was also guided by a desire to minimize material waste, so when possible parts were designed to maximize how many could be cut from a one meter length of aluminum extrusion.

The laser features a movable Z axis that’s similar in design to what you might see in a Prusa-style 3D printer, with each corner of the gantry getting an 8 mm lead screw and smooth rod which are used in conjunction to lift and guide. All of the lead screws are connected to each other via pulleys and standard GT2 belt, but as of this version, [Rob] notes the Z axis must be manually operated. In the future he’ll be able to add in a stepper motor and automate it easily, but it wasn’t critical to get the machine running.

He used 3D printed parts for objects which had a relatively complex geometry, such as the laser tube holders and Z axis components, but more simplistic brackets were made out of cut acrylic. In some components, [Rob] used welding cement to bond two pieces of acrylic and thereby double the thickness. Large acrylic panels were also used for the laser’s outer enclosure, which was intentionally designed as a separate entity from the laser itself. He reasoned that this would make assembly easier and faster, as the enclosure would not have to be held to the same dimensional tolerances as it would have been if it was integrated into the machine.

[Rob] gives plenty of detail about all the finer points of water cooling, laser control electronics, aligning the mirrors, and really anything else you could possibly want to know about building your own serious laser cutter. If you’ve been considering building your own laser and have anything you’re curious or unsure about, there’s a good chance he addresses it in this build.

Short of having the fantastically good luck to find a laser cutter in the trash that you can refurbish, building your own machine may still be the best upgrade path if you outgrow your eBay K40.

Continue reading “Scratch-Building A Supersized Laser Cutter”

How To Build Anything Out Of Aluminum Extrusion And 3D Printed Brackets

The real power of 3D printing is in infinite customization of parts. This becomes especially powerful when you combine 3D printing with existing materials. I have been developing a few simple tricks to make generic fasteners and printed connectors a perfect match for aluminum extrusion, via a novel twist or two on top of techniques you may already know.

Work long enough with 3D printers, and our ideas inevitably grow beyond our print volume. Depending on the nature of the project, it may be possible to divide into pieces then glue them together. But usually a larger project also places higher structural demands ill-suited to plastic.
Those of us lucky enough to have nice workshops can turn to woodworking, welding, or metal machining for larger projects. Whether you have that option or not, aluminum extrusion beams provide the structure we need to go bigger and to do it quickly. And as an added bonus, 3D printing can make using aluminum extrusion easier and cheaper.

Continue reading “How To Build Anything Out Of Aluminum Extrusion And 3D Printed Brackets”

If 3D Printer, Then Custom Aluminum Extrusion Brackets

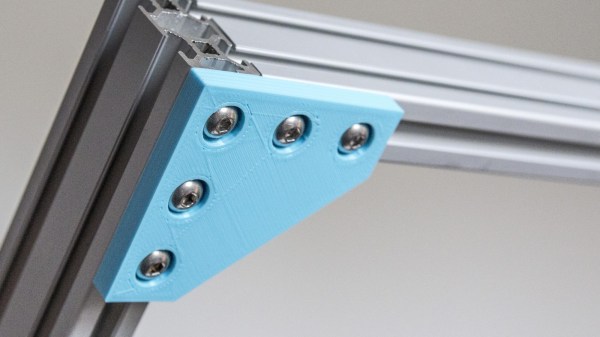
Aluminum extrusions are a boon for mechanical assemblies, but they require a stock of brackets and other hardware to be kept on hand. [mightynozzle] has decided to make things a little easier for prototyping and low-stress assemblies by creating a collection of 3D printable brackets for aluminum extrusions. 3D printing your own bracket hardware means faster prototyping, and if the assemblies don’t need the extra strength and rigidity of metal brackets you can just stick with the 3D printed versions.

The files are on Thingiverse, and include STL files of common brackets as well as an OpenSCAD script for customizing. Not familiar with OpenSCAD? No problem, we have a quick primer with examples.

This project showcases two things well. The first is that while brackets are not particularly expensive or hard to obtain, it can still be worth 3D printing them to reduce the overall amount of hardware one needs to keep on hand to make prototyping faster. The other is that 3D printing can shine when it comes to the creation of things like brackets: a few dimes’ worth of plastic can be turned into precise yet geometrically simple objects that would be a pain to make by other means. It certainly beats sitting on one’s hands waiting for parts to be delivered.

Hackaday Prize Entry: Customizable Linear Actuators

The current state of robotics, 3D printers, and CNC machines means any shade tree roboticist has the means to make anything move. Do you want a robotic arm? There are a dozen designs already available. Need an inverted powered pendulum? There are a hundred senior projects on that every semester. There is, however, one type of actuator that is vastly underutilized. Linear actuators aren’t ‘maker’ friendly, and building a customized linear actuator is an exercise in pain.

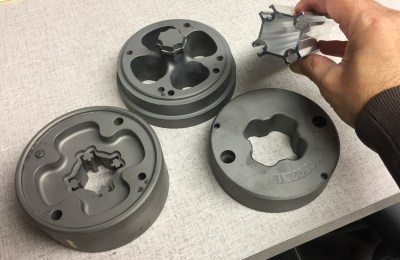
A die for aluminum extrusion

For their Hackaday Prize entry, the folks at Deezmaker are changing the state of linear actuators. They’ve created ‘Maker Muscle’, a linear actuator that’s fully customizable to nearly any length, power, speed, motor, or any other spec you could think of.

There were a few design goals for Maker Muscle. It must be modular, customizable, low-cost, and must allow for a lot of mounting options for use with t-slot aluminum extrusion. The answer to this is a completely custom aluminum extrusion. Basically, the motor mounts at one end, the actuator itself pokes out the other, and you can mount this device via the t-slot tracks around the edge of the extrusion. Think of it as the linear actuator version of MakerSlide, except instead of using this extrusion in CNC machines, it’s designed for moving shafts back and forth.

Already, Deezmaker has a working prototype and they’ve already moved onto a Kickstarter campaign for Maker Muscle. It’s a great idea, and we can’t wait to see what this neat product will be used for. You can check out a short demo video of Maker Muscle in action below.

Continue reading “Hackaday Prize Entry: Customizable Linear Actuators”