TV Stick Out-Raspberries Raspberry Pi

Android-based TV sticks should be in more projects. They are readily available and inexpensive. They have a lot of horsepower for the price, and they can even boot a mainline Linux kernel, unlike some single-board computers we know. They’re smaller than the Pi Zero, so they’ll fit almost anywhere.

The one thing they don’t have, though, is I/O. Sure, it’s got a USB port, but that’s just about it. [Necromant] considered these problems and created a carrier board that fixes all that.

  • On-board 3A DC-DC. You can power the whole thing with anything from 7 to 24 volts DC
  • A 4-Port USB hub
  • An ATtiny 2313, connected to the hub via the V-USB stack
  • 2 USB ports on the back, with power control via GPIO lines
  • One USB port on the front (with power always on)
  • 3 relays
  • Fits a common anodized aluminum enclosure

The ATtiny code is on GitHub and allows for full I/O control, saving the state of the pins in EEPROM, and providing up to eight channels of servo control. The device connects through the USB port (consuming one port on the hub).

Repurposing consumer gear for embedded service is nothing new. We’ve seen it with phones. We’ve even seen remotes used as a mouse. But this is such a nice template for adding cheap and easy computing power to your projects that we’re surprised we don’t see it more often. Why aren’t you hacking a TV stick into your projects?

Add Bluetooth To A Cheap Electronic Lock

[James] works from home. His office is filled with objects that can be described with adjectives such as, “expensive,” and, “breakable.” His home, however, is filled with professional object-breakers known as children. To keep these two worlds from colliding, he installed a keypad lock on his office door. The potential side-effect of accidentally training his children to be master safe-crackers aside, the system seems to work so far.

However, being a hacker, the tedium of entering a passcode soon grew too heavy for him. Refusing to be a techno-peasant, he set out to improve his lock. The first step was to reverse engineer the device. The lock is divided into two halves, one has a keypad and handle, the other actually operates the lock mechanism. They are connected with a few wires. He hooked an oscilloscope to the most likely looking candidates, and looked at the data. It was puzzling at first, until he realized one was a wake-up signal, and the other was the data. He then hooked the wires up to a Bluetooth-enabled Arduino, and pressed buttons until he had all the serial commands the door lock used.

After that it was a software game. He wrote code for his phone and the Arduino to try out different techniques and work out bugs. Once he had that sorted, he polished the app and code until he reached his goal. All of the code is available on his GitHub.

Finally, through his own hands, he elevated himself from techno-peasant to wizard. He need but wave his pocket oracle over the magic box in front of his wizard’s lair, and he will be permitted entry. His wizardly trinkets secure from the resident orcs, until they too begin their study of magic.

Nanocounter: Frequency Counter With An Android UI

Have you ever started a project, run into an issue, started a new project to solve the issue, and completely forgot about the original project? [Andy] went down a rabbit hole of needing a tool to calibrate an MCU oscillator, but not having an accurate way to measure frequency. Most people would just buy a frequency counter and be done with it, but [Andy] decided to build his own.

The Nanocounter is an accurate, open source frequency counter that uses an Android phone as its display. It’s based on a high accuracy temperature compensated crystal oscillator (TCXO) fed into a phase locked loop (PLL) to create a high frequency, accurate reference clock.

This reference clock, along with the signal to be measured, are sent into a Xilinx FPGA which uses a method called equal precision measurement to determine the frequency. A STM32F072 microcontroller uses a SPI interface to get this data out of the FPGA, and controls the whole system. Finally, a cheap HC-06 Bluetooth module facilitates communication with an Android device.

The project achieves the goal of frequency counting, though [Andy] doesn’t remember what project sparked the idea to build it. (Classic yak shaving!) But the result is a great read of a detailed writeup, and you can watch a video of the Nanocounter in action after the break. That’s a win in our book.

Continue reading “Nanocounter: Frequency Counter With An Android UI”

App Control With Ease Using Blynk

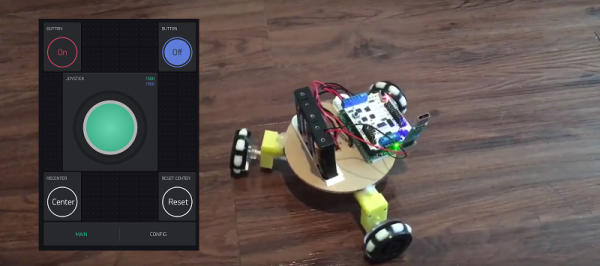
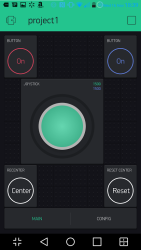
App development is not fun for everyone, and sometimes you just want to control a device from your phone with minimal work. Blynk appears to be a fairly put-together library for not only hooking up any Arduino or esp8266 to a phone through WiFi, but also through the net if desired.

Install the app onto your iPhone or Android device. Install the libraries on your computer. Next, modify your Arduino source to either pass direct control of a pin to Blynk, or connect Blynk to a virtual pin inside your code for more advanced control. If you want to go the easy route, create an account, log into the app, and drag and drop the interface you’d like. If the idea of letting some corporation host your Arduino project sends shivers down your spine, there is also an option to host your own server. (Editorial snark: Yes, it requires a server. That’s the cost of “simplicity”.)

There have been a few times where we’ve wished we could add app control to our projects, but installing all the libraries and learning a new language just to see a button on a screen didn’t seem worth it. This is a great solution. Have any of you had experience using it?

Broken Android Tablet Mini-MAME Cabinet

Everyone’s got an unused or even quasi-broken tablet lying around these days. [sairuk] has three kids, and somehow ended up with three broken tablets in short order. We’re not saying that correlation implies causality…

The digitizers were shattered, and since they were relatively cheap tablets to begin with, [sairuk] started thinking what could be done with a tablet that doesn’t have touch sensing anymore. He tried making an e-book reader for his kids, but somehow the idea of a MAME “cablet” (get it?) won out in the end. We’re not surprised: simple woodworking, gaming, and electronic hacking. What’s not to love?

This writeup goes into a lot more detail, so check that out too. He and his sons built up cardboard prototypes first (we love cardboard!) and then transferred their plans over to wood for the final “rough cut”. A PS1 controller reads out the joystick and buttons, and a PS1 -> USB adapter plus a USB-OTG cable connects that to the tablet. They also removed the batteries and built in a permanent power supply. Everything is simple and cheap, but the results are still impressive. Although they claim their build isn’t finished to the utmost, it looks pretty darn good to us.

We’re all frackers, so it’s satisfying to see a “junk” tablet put to good use. We’re wondering what [sairuk] is going to do with his other two tablets — we’ve got a suggestion for what he should do if he had twenty kids.

Continue reading “Broken Android Tablet Mini-MAME Cabinet”

Open Sesame, From A Galaxy Far, Far Away.

[TVMiller]’s description of his project is epic enough to deserve a literal copy-paste (something our readers often praise us about). In his own words,  “Having discovered several spare Midichlorians in my liquor cabinet, I trained and applied them to opening a large cumbersome gate. The FORCE motion travels through my inner what-nots and is translated by the Pebble Classic accelerometer toggling a command sent to the (Particle) Cloud (City) which returns to the Particle Photon triggering a TIP120 to fire a button on an existing RF transceiver. May the ridiculous hand gestures be with you, always.” Thus was born the Gate Jedi , and you’ll need exactly 47 Midichlorians, and some other trivial parts, to build one.

The Pebble watch hooks up to his android smart phone. A Pebble (android) app sends the accelerometer data to the Particle (previously called Spark) cloud service. From there, the data is pushed to the Photon IoT board which runs a few lines of code. Output from the Photon turns on a TIP120 power transistor, which in turn triggers the existing RF trans receiver that opens the Gate.

This looks way cooler than the Light Sabre hacks. Check out the video of him summoning the Force. And if you’d like to do more, try integrating gesture controls with this Pebble Watch hack that turns it into a home automation controller.

Continue reading “Open Sesame, From A Galaxy Far, Far Away.”

Hack Mobile With A Bus Pirate GUI For Your Phone

You need to get an SPI bus on something right now, but you left your laptop at home. No problems, because you’ve got your Bus Pirate and cellphone in your pocket. And a USB OTG cable, because you’re going to need one of those. And some probes. And maybe a soldering iron for tacking magnet wire onto those really small traces. And maybe a good magnifying glass. And…

OK, our fantasy of stepping away from the party for a quick JTAG debugging session is absurd, but what’s not at all absurd is the idea of driving your Bus Pirate from a nice GUI app on your Android phone. [James Newton] wrote DroidScriptBusPirate so that he wouldn’t have to hassle with the Bus Pirate’s nested single-character menu system, and could easily save complete scripts to do common jobs from pleasant menus on his phone.

The setup depends on downloading DroidScript, a free Javascript and HTML5 IDE, and then pasting and saving [James]’ code. He’s written up full instructions to help you with the install. It’s not so hard, and once you’re done you’ll be ready to drive the Pirate from the comfort of your phone.

In fact, now that we think of it, we’re missing a Bus Pirate GUI for our desktop as well. Whenever we have complex tasks, we end up scripting something in Python, but there ought to be something more user-friendly. Anyone know of a good GUI solution?