We see all manner of electronics enclosures pass through these hallowed pages. Lasercut wooden builds with fancy kerf bending, expertly prepared acrylic boxes, and even the occasional device cast in concrete. [Mike Kohn] decided that all of these were too permanent, however, and chose a different material – ice.
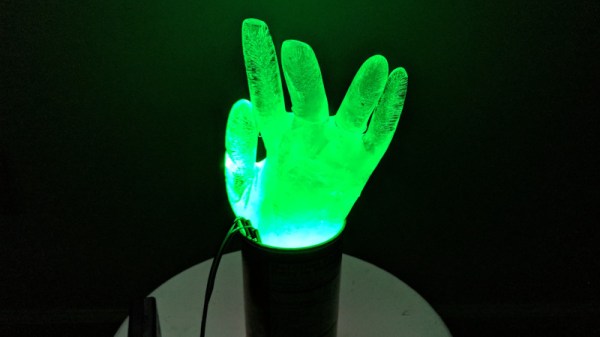
[Mike] shares the ups and downs of his experiments with electronics and frozen water. Initial tests with a circuit sealed in DAP Ultra Clear were largely successful. A tilt sensor was installed to allow the batteries to remain undrained during the freezing process, and once freed after a few hours of thawing, the circuit was operational. Later builds required some more work – the RC car in particular took a few attempts to avoid the mold leaking. The ice hands are a particular highlight, though – created with rubber gloves, these would be a remarkably spooky decoration come Halloween.
It’s a study in the techniques required to work with this ephemeral material, and there’s a few lessons to learn. Sealing electronics is good, and the best results are with simple circuits with a few LEDs that make everything glow nicely.
If you’re looking for other ideas, you could always create a frozen lens for photographical purposes. Video after the break.