[George Stagg] recently found himself stung by the burden of free time while in lockdown. Needing a project to keep him occupied, he decided to upgrade his 90s Casio CFX-9850G calculator to run custom machine code.
All [George] really wanted was for his vintage calculator to understand Reverse Polish Notation (RPN). The calculator in question can already run its own version of BASIC, however the bespoke Hitachi CPU struggles performance-wise with complex programs, and wouldn’t be a realistic way of using RPN on the calculator. An RPN interpreter written in assembly language would be much faster.
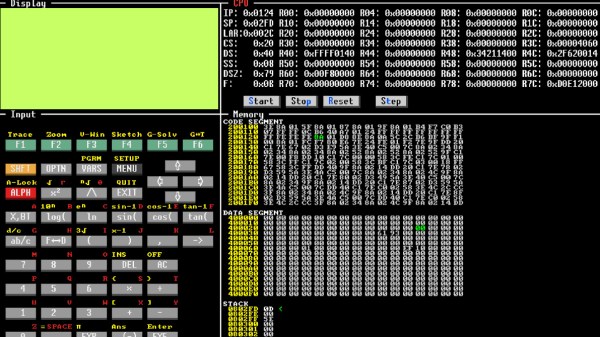
The first step in cracking this calculator wide open was a ROM dump, followed by writing a disassembler. Incredibly, the MAME framework already featured a ‘partial implementation’ of the calculator’s CPU, which was a much needed shot in the arm when it came time to write a full-featured emulator.
With the entire calculator emulated in software, the plan from here involved replacing one of the BASIC commands in ROM with new code that would jump to an address in RAM. With 32KB of RAM there ended up being plenty of room for experimentation, and uploading a program into RAM was simplified by using Casio’s original backup software to dump the RAM onto a PC. Here, the contents of RAM could be easily modified with custom code, then uploaded back into the calculator.
With RAM to burn, new routines were created to write custom characters to the screen, and a new font was created to squeeze more characters onto the display than normal. [George] ended up porting a Forth interpreter, which defaults to RPN style, to finally achieve his humble objective. He also managed to get a version of Conway’s Game Of Life running, check out the video after the break.
We can’t get enough of our calculator hacks here, so make sure to check out the CPU transplant on this vintage Soviet calculator.