Build Your Own Avionics Suite, If You Dare

If you’re really interested in aircraft and flying, there are many ways to explore that interest. There are models of a wide range of sizes and complexities that are powered and remote-controlled, and even some small lightweight aircraft that can get you airborne yourself for a minimum of expense. If you’re lucky enough to have your own proper airplane, though, and you’re really into open source projects, you can also replace your airplane’s avionics kit with your own open source one.

Avionics are the electronics that control and monitor the aircraft, and they’re a significant part of the aircraft’s ability to fly properly. This avionics package from [j-omega] (who can also be found on hackaday.io) will fit onto a small aircraft engine and monitor things like oil temperature, RPM, coolant temperature, and a wide array of other features of the engine. It’s based on an ATmega microcontroller, and has open-source schematics for the entire project and instructions for building it yourself. Right now it doesn’t seem like the firmware is available on the GitHub page yet, but will hopefully be posted soon for anyone who’s interested in an open-source avionics package like this.

The project page does mention that this is experimental as well, so it might not be advised to use in your own personal aircraft without some proper testing first. That being said, if you’ve heard that warning and have decided just to stay on the ground, it’s possible to have a great experience without getting in a real airplane at all.

Building Badges The Hard Way

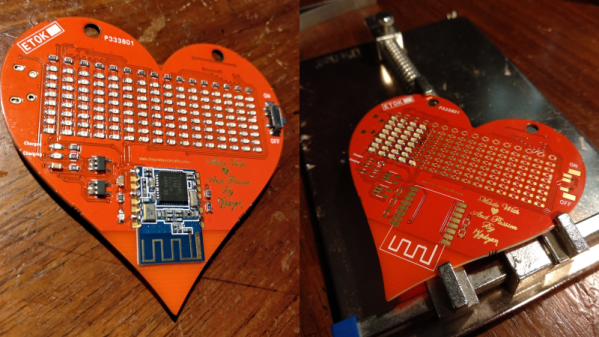
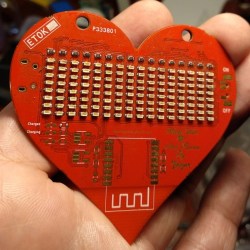
What’s a hacker to do to profess his love for his dearest beloved? [Nitesh Kadyan] built his lady-love this awesome LED pendant – the LED BLE Hearty Necklace Badge.

The hardware is pretty vanilla by today’s hacker standards. An ATMega328p  does most of the heavy lifting. An HM-11 BLE module provides connection to an Android mobile app. Two 74HC595 shift registers drive 16 columns of red LEDs and a ULN2803 sinks current from the 8 rows. The power section consists of a charger for the 320mAh LiPo and an LDO for the BLE module. All the parts are SMD with the passives mostly being 0603, including the 128 LEDs.

128 LEDs soldered wrong way around

[Nitesh] didn’t get a stencil made for his first batch of boards, so all the parts were painstakingly soldered manually and not in a reflow oven. And on his first board, he ended up soldering all of the LED’s the wrong way around. Kudos to him for his doggedness and patience.

The Arduino code on the ATmega is also quite straightforward. All characters are stored as eight bytes each in program memory and occupy 8×8 pixels on the matrix. The bytes to be displayed are stored in a buffer and the columns are left shifted fast enough for the marquee text effect. The Android app is built by modifying a demo BLE app provided by Google. The firmware, Android app, and the KiCAD design files are all hosted on his Github repository.

[Nitesh] is now building a larger batch of these badges to bring them to hillhacks – the annual hacker-con for making and hacking in the Himalayas. Scheduled for later this month, you’ll have to sign up on the mailing list for details and if you’d like to snag one of these badges. To make it more interesting, [Nitesh] has added two games to the code – Tetris and Snakes. Hopefully, this will spur others to create more games for the badge, such as Pong.

Continue reading “Building Badges The Hard Way”

Business On The Outside, Electronics Workstation On The Inside

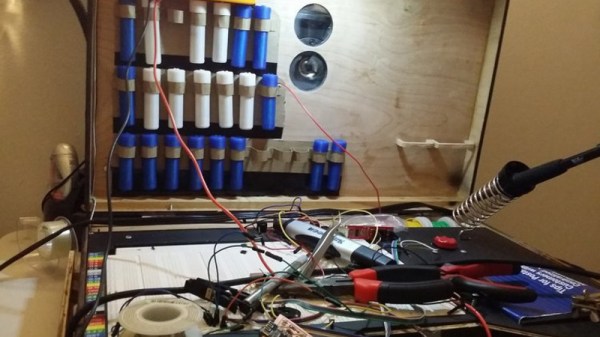
As an electrical engineering student, [Brandon Rice] had the full suite of electronics tools you’d expect. Cramming them all into a dorm room was doable — but cramped — a labour to square everything away from his desk’s top when he had to work on something else. To make it easier on himself, he built himself a portable electronics workstation inside the dimensions of a briefcase.

Built from scratch, the workstation includes a list of features that should have you salivating by the end. Instead of messing with a bunch of cables, on-board power is supplied by a dismantled 24V, 6A power brick, using a buck converter and ATmega to regulate and display the voltage, with power running directly to  12V and 5V lines of a breadboard in the middle of the workstation. A wealth of components are stored in two dozen 3d printed 1″ capsules setting them in loops pinned to the lid.

If all this was not already enough, there’s more!

Continue reading “Business On The Outside, Electronics Workstation On The Inside”

New Part Day: ATMegas With Programmable Logic

Since Microchip acquired Atmel, the fields of battle have fallen silent. The Crusaders have returned home, or have been driven into the sea. The great microcontroller holy war is over.

As with any acquisition, there is bound to be some crossover between two product lines. Both Atmel’s AVR platform and Microchip’s PICs have their adherents, and now we’re beginning to see some crossover in the weird and wonderful circuitry and design that goes into your favorite microcontroller, whatever that might be. The newest part from Microchip is an ATMega with a feature usually found in PICs. This is a Core Independent Peripheral. What is it? Well, it’s kinda like a CPLD stuck in a chip, and it’s going to be in the new Arduino board.

The ATMega4809 is the latest in a long line of ATMegas, and has the features you would usually expect as the latest 8-bit AVR. It runs at 20MHz, has 48 K of Flash, 6 K of SRAM, and comes in a 48-pin QFN and TQFP packages. So far, everything is what you would expect. What’s the new hotness? It’s a Core Independent Peripheral in the form of Configurable Custom Logic (CCL) that offloads simple tasks to hardware instead of mucking around in software.

So, what can you do with Configurable Custom Logic? There’s an application note for that. The CCL is effectively a look-up table with three inputs. These inputs can be connected to I/O pins, driven from the analog comparator, timer, UART, SPI bus, or driven from internal events. The look-up table can be configured as a three-input logic gate, and the output of the gate heads out to the rest of the microcontroller die. Basically, it’s a tiny bit of programmable glue logic. In the application note, Microchip provided an example of debouncing a switch using the CCL. It’s a simple enough example, and it’ll work, but there are a whole host of opportunities and possibilities here.

Additionally, the ATMega4809, “has been selected to be the on-board microcontroller of a next-generation Arduino board” according to the press release I received. We’re looking forward to that new hardware, and of course a few libraries that make use of this tiny bit of custom programmable logic.

Interfacing With A Digital Speedometer

After swapping the engine out in his scooter, [James Stanley] made an unfortunate discovery. The speedometer was digitally controlled, and while the original engine had a sensor which would generate pulses for it to interpret, his new engine didn’t. Learning that the original sensor would pull the signal wire to ground each time it detected a tooth of one of the spinning gears, [James] reasoned he needed to find a way to detect the scooter’s speed and create these pulses manually.

To find the scooter’s speed, he installed a magnet on the front wheel and a hall effect sensor on the fork to detect each time it passed by. Since the wheel is of a known circumference, timing the pulses from the sensor allows calculation of the current speed. A GPS receiver could be used if you wanted fewer wires, but the hall effect sensor on the wheel is simple and reliable. With the speed of the scooter now known, he needed to turn that into a signal the speedometer understands.

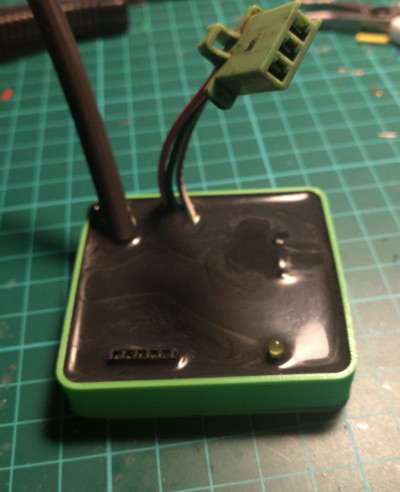
Speedometer controller potted with resin.

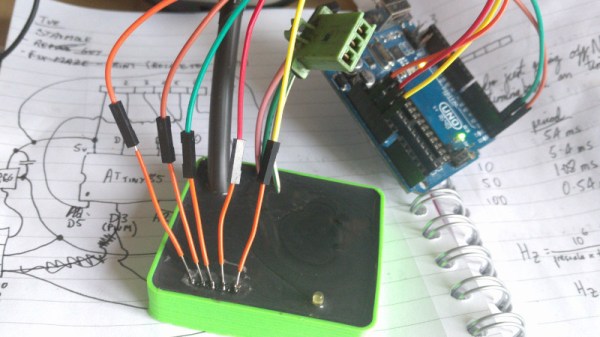
[James] wrote a program for an ATmega that would take the input from the wheel sensor and use it to create a PWM signal. This PWM signal drives a transistor, which alternates the speedometer sensor wire between low and floating. With a bit of experimentation, he was able to come up with an algorithm which equated wheel speed to the gearbox speed the speedometer wanted with accuracy close enough for his purposes.

While the software side of this project is interesting in its own right, the hardware is an excellent case study in producing robust electronic devices suitable for use on vehicles. [James] 3D printed a shallow case for the circuit board, and potted the entire device with black polyurethane resin. He even had the forethought to make sure he had a debugging LED and programming connector before he encapsulated everything (which ended up saving the project).

While the specific scenario encountered by [James] is unlikely to befall others, his project is an excellent example of not only interfacing with exiting electronics but producing rugged and professional looking hardware without breaking the bank. Even if scooters aren’t your thing, there are lessons to be learned from this write-up.

For all you two wheeled hackers out there, we’ve covered similar projects designed for bicycles, as well as some very slick digital speedometer mods for motorcycles.

Micro-ATX Arduino Is The Ultimate Breakout Board

If you’ve been hanging around microcontrollers and electronics for a while, you’re surely familiar with the concept of the breakout board. Instead of straining to connect wires and components to ever-shrinking ICs and MCUs, a breakout board makes it easier to interface with the device by essentially making it bigger. The Arduino itself, arguably, is a breakout board of sorts. It takes the ATmega chip, adds the hardware necessary to get it talking to a computer over USB, and brings all the GPIO pins out with easy to manage header pins.

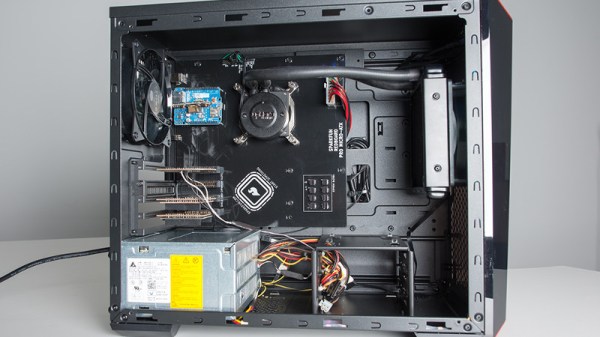
But what if you wanted an even bigger breakout board for the ATmega? Something that really had some leg room. Well, say no more, as [Nick Poole] has you covered with his insane RedBoard Pro Micro-ATX. Combining an ATmega32u4 microcontroller with standard desktop PC hardware is just as ridiculous as you’d hope, but surprisingly does offer a couple tangible benefits.

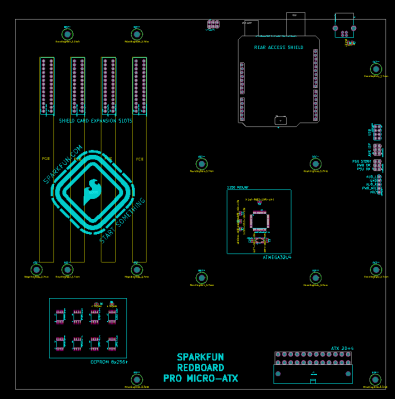
RedBoard PCB layout

The RedBoard is a fully compliant micro-ATX board, and will fit in pretty much any PC case you may have laying around in the junk pile. Everything from the stand-off placement to the alignment of the expansion card slots have been designed so it can drop right into the case of your choice.

That’s right, expansion slots. It’s not using PCI, but it does have a variation of the standard Arduino “shield” concept using 28 pin edge connectors. There’s a rear I/O panel with a USB port and ISP header, and you can even add water cooling if you really want (the board supports standard LGA 1151 socket cooling accessories).

While blowing an Arduino up to ATX size isn’t exactly practical, the RedBoard is not without legitimate advantages. Specifically, the vast amount of free space on the PCB allowed [Nick] to add 2Mbits of storage. There was even some consideration to making removable banks of “RAM” with EEPROM chips, but you’ve got to draw the line somewhere. The RedBoard also supports standard ATX power supplies, which will give you plenty of juice for add-on hardware that may be populating the expansion slots.

With as cheap and plentiful as the miniITX and microATX cases are, it’s no surprise people seem intent on cramming hardware into them. We’ve covered a number of attempts to drag other pieces of hardware kicking and screaming into that ubiquitous beige-box form factor.

FrankenKorg: The Modern Remote Keyboard

On a dreary night in November, [Smecher] collected the instruments of electronic life around him to infuse a musical spark into FrankenKorg — a resurrected keytar.

This hack is a “re-braining” of a RK-100 Korg Keytar, replacing the original circuits with an ATMega32 — the original functionality and appearance are preserved allowing any restored version of the original boards to be seamlessly re-integrated. In light of that, the original boards were ditched after a brief investigation, and a haphazard building process on a protoboard began. Three LS138 3-8 demuxers that accompany the ATMega handle scanning the keys since there weren’t enough pins on the ATMega alone for all the Korg’s features. Check out [Smecher]’s breakdown of his process in the video after the break!

Continue reading “FrankenKorg: The Modern Remote Keyboard”