After seeing [Dimitry] build the most minimal Linux computer ever, [Kyle] decided he needed one for himself. In true hacker fashion, he decided to take this build for the worst Linux PC one step further: he would add I2C to his version, making it somewhat useful, considering the number of I2C peripherals out there.
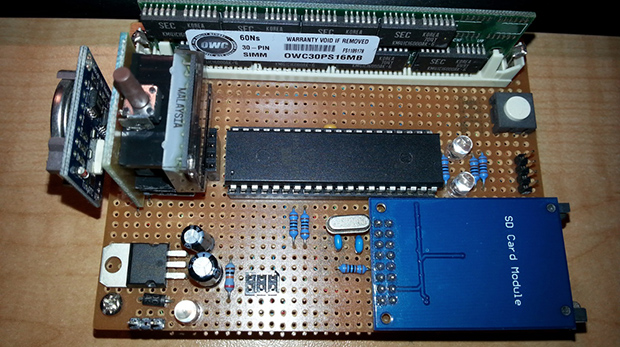
This build is based on [Dmitry]’s ARM Linux computer emulated on an 8-bit AVR. It’s a full-blown Linux computer with 16 MB of RAM courtesy of a 30-pin SIMM, a lot of storage provided by an SD card, all running on an emulated ARM processor inside a lowly ATMega1284p. [Kyle] built this clone over the course of a few months, but from the outset decided he wanted to implement an I2C protocol on this terribly under specced computer.
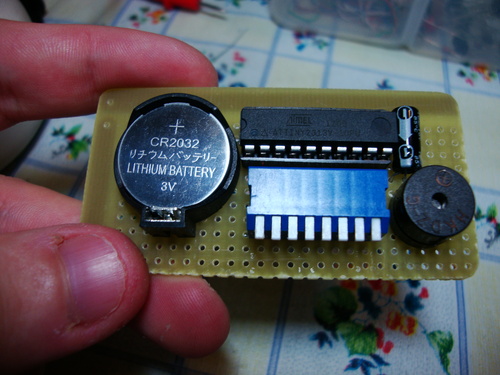
After booting his computer, [Kyle] eventually got an I2C module loaded by the kernel. With an I2C module and a few spare GPIO pins, he set out to create something to attach to this terribly slow computer – an ancient LED dot matrix display. With a real-time clock, this display became a clock with the help of a homebrew program written in C. Considering the speed of the emulated processor, the program takes nearly three seconds to read the RTC and display the current time to the display. We’re thinking it was a wise choice to only implement hours and minutes in this clock.
If having a useful computer running at about 10 kilohertz isn’t enough, [Kyle] also compiled the classic text-based adventure Zork. It actually runs, proving you don’t need Megahertz of power to do something useful and fun.