Low-Power Challenge: Making An Analog Clock Into A Calendar With A 50-Year Life

You have to be pretty ambitious to modify a clock to run for 50 years on a single battery. You also should probably be pretty young if you think you’re going to verify your power estimates, at least in person. According to [Josh EJ], this modified quartz analog clock, which ticks off the date rather than the time, is one of those “The March of Time” projects that’s intended to terrify incentivize you by showing how much of the year is left.

Making a regular clock movement slow down so that what normally takes an hour takes a month without making any mechanical changes requires some clever hacks. [Josh] decided to use an Arduino to send digital pulses to the quartz movement to advance the minute hand, rather than let it run free. Two pulses a day would be perfect for making a 30-day month fit into a 60-minute hour, but that only works for four months out of the year. [Josh]’s solution was to mark the first 28 even-numbered minutes, cram 29, 30, and 31 into the last four minutes of the hour, and sort the details out in code.

As for the low-power mods, there’s some cool wizardry involved with that, like flashing the Arduino Pro Mini with a new bootloader that reduces the clock speed to 1 MHz. This allows the microcontroller and RTC module to run from the clock movement’s 1.5 V AA battery. [Josh] estimates a current draw of about 6 μA per day, which works out to about 50 years from a single cell. That’s to be taken with a huge grain of salt, of course, but we expect the battery will last a long, long time.

[Josh] built this clock as part of the Low-Power Challenge contest, which wrapped up this week. We’re looking forward to the results of the contest — good luck to all the entrants!

Trojans Can Lurk Inside AVR Bootloaders

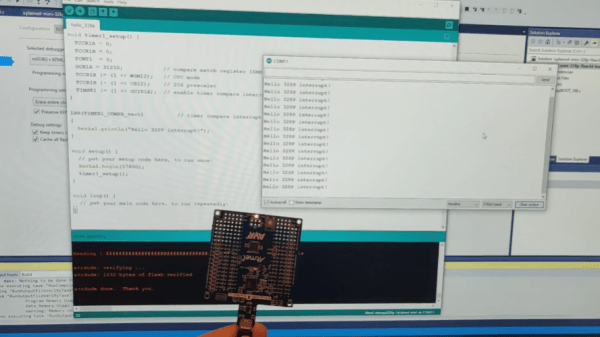
If there’s one thing we’ve learned over the years, it’s that if it’s got a silicon chip inside, it could be carrying a virus. Research by one group focused on hiding a trojan inside an AVR Arduino bootloader, proving even our little hobbyist microcontrollers aren’t safe.

The specific aim of the research was to hide a trojan inside the bootloader of an AVR chip itself. This would allow the trojan to remain present on something like a 3D printer even if the main firmware itself was reinstalled. The trojan would still be able to have an effect on the printer’s performance from its dastardly hiding place, but would be more difficult to notice and remove.

The target of the work was the ATmega328P, commonly used in 3D printers, in particular those using the Marlin firmware. For the full technical details, you can dive in and read the research paper for yourself. In basic terms, though, the modified bootloader was able to use the chip’s IVSEL register to allow bootloader execution after boot via interrupt. When an interrupt is called, execution passes to the trojan-infected bootloader’s special code, before then returning to the program’s own interrupt to avoid raising suspicion. The trojan can also execute after the program’s interrupt code too, increasing the flexibility of the attack. Continue reading “Trojans Can Lurk Inside AVR Bootloaders”

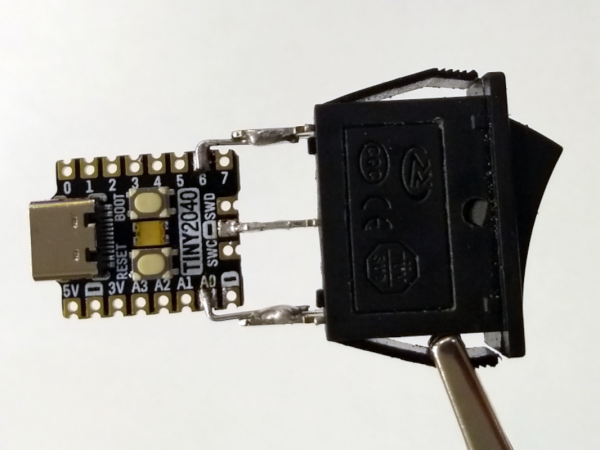
The TinyPICO board and the rocker switch soldered together showing a complete device, shown being held in the air by a crocodile clip

Simple Hardware Switch For OS Dualbooting, Thanks To RP2040

Dualbooting your computer can be a chore, the more switching between OSes you have to do – which is why virtualization or having separate computers are the go-to for many. Failing that, we have no choice but to smooth over our dualbooting experience with various workarounds and helpers. [William Somsky] shares one such helper tool with us – an elegant device made with a RP2040-sporting TinyPICO board and a three-way rocker switch, directing GRUB to boot into either Windows or Linux automatically, or leave us with the usual boot menu. This way, you can just flip the switch, hit “reboot” and walk away, coming back to your PC booted into OS of your choice, instead of timing your presence just so that you can catch the boot menu on time.

All you need to do is to solder a rocker switch to your RP2040 board of choice, then flash the RP2040 with code that detects the state of the switch, and creates a mass storage device hosting a file setting a Grub variable to either one of the 0, 1 or 2. [William] describes his journey, fighting mysterious caching problems, but tells us he got it working in the end. Sadly, [William] hasn’t shared the RP2040-side code with us, but he has at least put the Grub’s custom.cfg file in the ‘Files’ section of the Hackaday.io project.

Readily accessible microcontrollers with mass storage functions sure help make such hacks simple – earlier, we’ve seen dualboot switching like this done by modifying assembly code of the MBR. Dualbooting is a hacker’s rite of passage, and certain OSes of late can make it harder than other ones. Even if you don’t want to dualboot your PC, however, you sure can dualboot an Arduino!

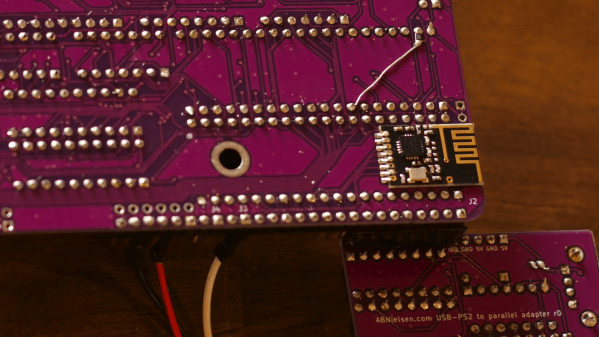
An NRF24L01 module soldered onto a 6502 single-board computer

Wireless Bootloader Saves You From Swapping ROM Chips

Flashing your code into an Arduino, an ESP32 or any other modern microcontroller platform is pretty straightforward: connect the device through USB, fire up the appropriate software platform, and press “program”. But those who followed embedded programming classes in the ’80s and ’90s will remember a more complicated procedure that consists of swapping EPROM chips between a programmer, a target board and a UV eraser. Veterans of that era might even remember how you could overwrite a previous program with NOPs and place new code behind it, to save yourself a trip to the “blank chips” bin.

If you’re a retrocomputer enthusiast and would like to have the easy programming of modern tools, but the authenticity of a self-contained ROM-loading computer, you might want to check out [Anders Nielsen]’s latest design of a wireless boot loader for a 6502 single board computer. The target platform for this project is a beautiful custom-made 6502-based retrocomputer that [Anders] documented in detail on his Hackaday.io page.

The basic idea here is to have a wireless receiver on the target system that receives data from a transmitter connected to a modern PC. When you click “program”, the object code is sent to the 6502 machine, stored in RAM and executed. The wireless link is implemented with a pair of nRF24L01 2.4 GHz modules that communicate through SPI. Since [Anders]’s Mac Mini doesn’t come with GPIO ports he hooked up the transmitter to a Raspberry Pi which he controlled through a network link.

On the 6502 side he wrote a bootloader in assembly language, which bit-bangs the SPI protocol to communicate with the wireless module. A simple user interface is included to allow the user to control the loading and running of programs. All code and hardware documentation is available on Github for use by anyone with a similar 6502 system.

Those nRF24L01s are versatile little things: we’ve seen them being used to transfer anything from MIDI data to TCP/IP links, as well as code for other microcontroller platforms.

Continue reading “Wireless Bootloader Saves You From Swapping ROM Chips”

DOOM On A Bootloader Is The Ultimate Cheat Code

Porting DOOM to run on hardware never meant to run it is a tradition as old as time. Getting it to run on embedded devices, ancient computers, virtual computers, and antique video game consoles are all classic hacks, but what DOOM ports have been waiting for is something with universal applicability that don’t need a bespoke solution for each piece of hardware. Something like DOOM running within a bootloader.

The bootloader that [Ahmad] works with is called Barebox and is focused on embedded systems, often those running Linux. This is the perfect environment for direct hardware access, since the bootloader doubles as a bare metal hardware bring-up toolkit. Now that DOOM runs on this bootloader, it effectively can run anywhere from embedded devices to laptops with minimal work, and although running it in a bootloader takes away a lot of the hard work that would normally need to be done during a port, it may still need some tweaking for specific hardware not otherwise supported.

For those already running Barebox, the bareDOOM code can be found on [Ahmad]’s GitHub page. For those not running Barebox, it does have a number of benefits compared to other bootloaders, even apart from its new ability to play classic FPS games. For those who prefer a more custom DOOM setup, though, we are always fans of DOOM running within an NES cartridge.

Photo: AntonioMDA, CC BY-SA 4.0 via Wikimedia Commons

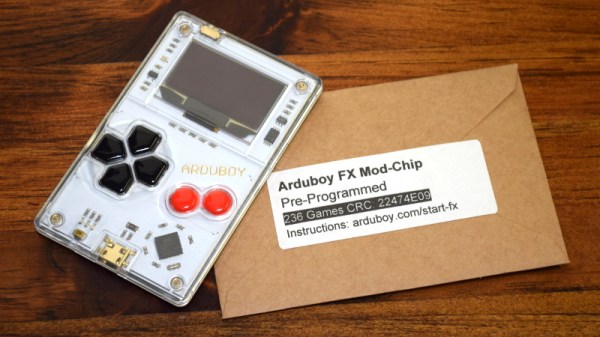
Arduboy FX Mod-Chip: Now You’re Playing With Power

Traditionally, a forum full of technical users trying integrate their own hardware into a game system for the purposes of gaining unfettered access to its entire software library was the kind of thing that would keep engineers at Sony and Nintendo up at night. The development and proliferation of so called “mod chips” were an existential threat to companies that made their money selling video games, and as such, sniffing out these console hackers and keeping their findings from going public for as long as possible was a top priority.

But the Arduboy is no traditional game system. Its games are distributed for free, so a chip that allows users to cram hundreds of them onto the handheld at once isn’t some shady attempt to pull a fast one on the developers, it’s a substantial usability improvement over the stock hardware. So when Arduboy creator Kevin Bates found out about the grassroots effort to expand the system’s internal storage on the official forums, he didn’t try to put a stop to it. Instead, he asked how he could help make it a reality for as many Arduboy owners as possible.

Now, a little less than three years after forum member Mr.Blinky posted his initial concept for hanging an external SPI flash chip on the system’s test pads, the official Arduboy FX Mod-Chip has arrived. Whether you go the DIY route and build your own version or buy the ready-to-go module, one thing is for sure: it’s a must-have upgrade for the Arduboy that will completely change how you use the diminutive handheld.

Continue reading “Arduboy FX Mod-Chip: Now You’re Playing With Power”

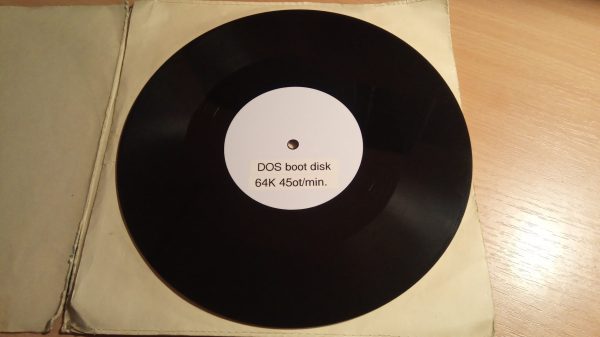
Booting A PC From Vinyl For A Warmer, Richer OS

If you’ve scrolled through the list of boot options offered on any PC’s BIOS, it reads like a history of storage technology. Up top we have the options to boot from disk, often a solid-state drive, then USB disk, optical drive, removable media, and down the bottom there’s usually an option to boot from the network. Practically no BIOS, however, has an option to boot a PC from a vinyl record — at least until now.

Clearly a project from the “Because why not?” school of hacking, [Jozef Bogin] came up with the twist to the normal booting process for an IBM-PC. As in the IBM-PC — a model 5150, with the putty-colored case, dual 5-1/4″ floppies, and one of those amazing monochrome displays with the green slow-decay phosphors. To pull off the trick, [Jozef] leverages the rarely used and little known cassette tape interface that PCs had back in the early days. This required building a new bootloader and burning it to ROM to make the PC listen to audio signals with its 8255 programmable peripheral interface chip.

Once the PC had the right bootloader, a 64k FreeDOS bootable disk image was recorded on vinyl. [Jozef] provides infuriatingly little detail about the process other than to mention that the audio was sent directly to the vinyl lathe; we’d have loved to learn more about that. Nonetheless, the resulting 10″ record, played back at 45 RPM with some equalization tweaks to adapt for the RIAA equalization curve of the preamp, boots the PC into FreeDOS just fine, probably in no more time than it would have taken to boot from floppy.

It’s may not be the first time we’ve seen software on vinyl, but it’s still a pretty cool hack. Want to try it yourself but lack a record-cutting lathe? Maybe laser-cutting your boot disc will work.

Continue reading “Booting A PC From Vinyl For A Warmer, Richer OS”