A man and a woman stand at opposite ends of a wooden-framed bicycle. It has 20" tires and a long, black seat. A rack extends over the front tire for carrying small items.

Plywood Bicycle Makes Frame Building More Accessible

Bike frames are simple on the surface, but can quickly become complicated if you want to fabricate one yourself. Brazing and welding tend to be less common skills than knowing how to bolt things together, so [Arquimaña] has brought us the OpenBike to make the process accessible to more people.

An open-source set of files designed for CNCs and 3D printers, the OpenBike uses readily available materials like sheet plywood to make a sturdy, if unconventional-looking, bicycle. Like many other consumer goods, most bike frames are currently built in Asia. This allows for economies of scale, but removes locals from the design process. By using simpler tools, OpenBike allows for more local direction of what features might be needed for a particular region.

Shifting even a small portion of trips to more active forms of transport is an important part of lowering carbon emissions, so making bikes a more attractive means of transportation is always welcome. What might be important in one region might be superfluous and expensive in another (multiple gears in a hilly region, for example). OpenBike could be especially useful as a way to rapid-prototype different feature sets for a particular region before committing to a more traditional frame-building technique for larger batches of bikes.

If you want to see some other bike hacks, why not check out this extending bicycle, this steampunk recumbent trike, or these bike hacks from around the world?


via Yanko Design

Walnut Case Sets This Custom Arduino-Powered RPN Calculator Apart From The Crowd

How many of us have an everyday tool that’s truly unique? Likely not many of us; take a look around your desk and turn out your pockets, but more often than not, what you’ll find is that everything you have is something that pretty much everyone else on the planet could have bought too. But not so if you’ve got this beautiful custom RPN calculator in a wooden case.

This one comes to us from [Shinsaku Hiura], who generally dazzles us with unique mechanical clocks and displays. This calculator solves a more practical problem — the dearth of RPN calculators on the market with the correct keyboard feel, specifically with the large keys and light touch he desired. Appropriately, the build started with a numeric keypad, which once liberated of its USB interface was reverse-engineered to figure out how the matrix was wired. Next up, a custom PCB to connect the keypad to an Arduino and a 20×4 LCD display was milled up, while a test case was designed and printed to check fitment. The final case was milled from a block of solid walnut and fitted with an acrylic window, for a sharp look with clean lines and pleasing colors.

As for the calculator itself, the demo below shows it going through its paces. The code is clever because it leverages the minimal number of keys available by hiding all the scientific and engineering functions behind a “secret silver key” that was once the equals key and obviously not needed in RPN. Hats off to [Shinsaku] for a handsome and unique addition to his desk.

Continue reading “Walnut Case Sets This Custom Arduino-Powered RPN Calculator Apart From The Crowd”

Simple CNC Gear Production With Arduino

We’ve seen plenty of people 3D printing custom gears over the years, but [Mr Innovative] decided against an additive process for his bespoke component. He ended up using a simple CNC machine that makes use of several components that were either salvaged from a 3D printer or produced on one. Using a small saw blade, the machine cuts gear teeth into some plastic material and — presumably — could cut gears into anything the saw blade was able to slice into, especially if you added a little lubrication, cooling, and dust removal.

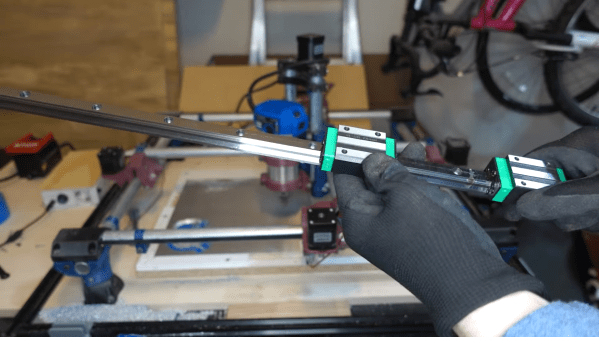
If you’ve built a 3D printer, you’ll see a lot of familiar parts. Stepper motors, aluminum extrusion, straight rods, bearing blocks, and rod holders are all used in the build. There’s also a lead screw and the associated components you usually see in a printer’s Z-axis. Naturally, an Arduino drives the whole affair.

The saw blade was custom-made from a washer, grinding an edge and using a 3D printed template to cut teeth in it. We might have been more inclined to use a cut-off wheel from a rotary tool, but this certainly did the trick. An LCD accepts the gear diameter and number of teeth. The stepper rotates the correct number of degrees and another stepper lowers the cutting head which is spinning with a common DC motor.

As impressive as this machine is, the fact remains that a 3D printer can produce more complex designs. For example, a herringbone pattern can help with alignment issues. It has been done many times. You can even use a resin printer, although you might prefer to stick with FDM.

Continue reading “Simple CNC Gear Production With Arduino”

Testing An Inexpensive CNC Spindle

The old saying “you get what you pay for” is a cautionary cliché, but is directly contrary to several other common sayings. In the case of [Spikee]’s planned CNC machine build, he took the more adventurous idiom of “no risk, no reward” to heart when he purchased these spindles for the machine from AliExpress. While the delivered product seemed fine, there were some problems that needed investigations.

Upon delivery of the spindle, everything seemed to work correctly out-of-the-box. Even the variable frequency drive, which was programmed at the factory, was working properly. But at around 8000 rpm the machine would begin shaking. The suspected part causing the vibration was the tool holder, so after checking the machine’s runout and also using a specialized vibration sensor this was confirmed to be the case.

Luckily [Spikee] was able to get a refund on the tool holders since they were out of spec, but still has a quite capable spindle on his hands for an excellent price. Without some skills in troubleshooting he might have returned the entire machine unnecessarily. If you are looking for some other ideas in setting up an inexpensive CNC machine, you might also like to look at BLDC motors from a remote control vehicle.

Jigsaw Puzzles Are Defeated

To some folx, puzzles are the ultimate single-player game, but to others, they are like getting a single Tootsie Roll on Halloween. [Shane] of Stuff Made Here must fall into the latter category because he spent the equivalent of 18 work-weeks to make a robot that solves them automatically. Shots have been fired in the war on puzzles.

The goal of this robot is to beat a hybrid idea of two devilish puzzles. The first is all-white which could be solved by taking a piece at random and then checking its compatibility with every unsolved piece. The second is a 5000-piece monster painted white. There is a Moby Dick theme here. Picking up pieces like a human with fingers is out of the question, but pick-and-place machines solved this long ago, and we learn a cool lesson about how shop-air can create negative pressure. Suction. We wonder if anyone ever repurposed canned air to create a vacuum cleaner.

The meat of this video is overcoming hurdles, like a rhomboidal gantry table, helping machine vision see puzzle pieces accurately, and solving a small puzzle. [Shane] explains the solutions with the ear of someone with a technical background but at a high enough level that anyone can learn something. All the moving parts are in place, but the processing power to decode the puzzle is orders of magnitude higher than consumer machines, so that will wait for part two.

Continue reading “Jigsaw Puzzles Are Defeated”

A 3D printed roller coaster model with light strips modelling the trains

How To Make A Model Roller Coaster Without Any Moving Parts

Roller coasters are not only great fun to ride, they’re also fascinating pieces of engineering. Building your own full-size coaster is sadly beyond most people’s means, so the average enthusiast will have to settle for simulation or modelling of their own designs. [Jon Mendenhall] is one of those who specialize in building model roller coasters and simulating their motion in intricate detail. His latest project is a scale model of VelociCoaster, a Jurassic Park-themed ride in Universal’s Islands of Adventure, that simulates the coaster’s ride without using any moving parts.

[Jon] achieves this by re-creating the trains’ motion using LED strips. A total of 3000 LEDs are spread along more than nine meters of track and make a mesmerizing light show of several trains whizzing along the track, accelerating and slowing down exactly like the real thing.

A 3D CAD model of a roller coasterIn his video, [Jon] explains the process of generating an accurate 3D model of the track starting from nothing more than an overhead view of the park as well as photos taken from various angles. The surrounding terrain and buildings are also included in his 3D model, as are the 128 supports that hold the track in place. The terrain and building were made from plywood and foam using a CNC machine, while the track and supports were 3D printed.

A Teensy microcontroller runs the whole show, with the LED strips split into five separate sections to allow a high enough frame rate for smooth animations. An infrared remote is used to start and stop the ride, as well as to adjust the speed; the model supports running the trains at a physically accurate speed, but because this looks rather dull, the regular setting is about three times as fast.

Looking for more roller coaster models? [Jon] made a similarly impressive model with a powered train before, and we’ve seen several models that actually coast along their tracks.

Continue reading “How To Make A Model Roller Coaster Without Any Moving Parts”

photo of the CNC controller, with the PLCC socket for the CPU, surrounded by driver ICs

Old CNC Brain Swapped With An Arduino

[Sebastian] and [Stefan Shütz] had a ISEL EP1090 CNC machine at home, sitting unused, and they decided to bring it to life. With pretty good mechanical specs, this CNC looked promising – alas, it was severely constrained by its controller. The built-in CPU’s software was severely outdated, had subpar algorithms for motor driving programmed in, and communication with the CNC was limited because the proprietary ISEL communications protocol that isn’t spoken by other devices.The two brothers removed the CPU from its PLCC socket, and went on to wiring a grbl-fueled Arduino into the controller box.

The interposer PCB, with an extra 74HC245 buffer on itThey reverse-engineered the motor driver connections – those go through a 74HC245 buffer between the original CPU and the drivers. Initially, they put an Arduino inside the control box of the CNC and it fit nicely, but it turned out the Arduino’s CPU would restart every time the spindle spun up – apparently, EMC would rear its head. So, they placed the Arduino out of the box, and used two CAT7 cables to wire up the motor and endstop signals to it.

For tapping into these signals, they took the 74HC245 out of its socket, and made an interposer from two small protoboards and some pin headers – letting them connect to the STEP and DIR lines without soldering wires into the original PCB. There’s extensive documentation, GRBL settings, and more pictures in their GitHub repo, too – in case you have a similar CNC and would like to learn about upgrading its controller board!

After this remake, the CNC starts up without hassles. Now, the brothers shall CNC on! Often, making an old CNC machine work is indeed that easy, and old controller retrofits have been a staple of ours. You can indeed use an Arduino, one of the various pre-made controller boards like Gerbil or TinyG, or even a Raspberry Pi – whatever helps you bridge the divide between you and a piece of desktop machinery you ought to start tinkering with.