Xerox Alto CRTs Needed A Tiny Lightbulb To Function

In the real world, components don’t work like we imagine they do. Wires have resistance, resistors have inductance, and capacitors have resistance. However, some designers like to take advantage of those imperfections, something our old friend [Ken Shirriff] noted when he was restoring the CRT of a Xerox Alto.

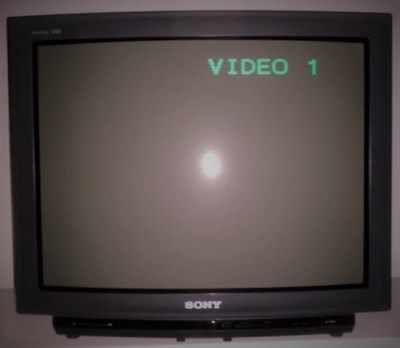
[Ken] tried to connect a Xerox monitor to the Alto and — since it was almost as old as the Alto — he wasn’t surprised that it didn’t work. What did surprise him, though, is that when he turned the monitor off, a perfect picture appeared for just a split second as the unit powered off. What could that mean?

Keep in mind this is a CRT device. So a perfect picture means you have vertical and horizontal sweep all at the right frequency. It also means you have high voltage and drive on the electron guns. If you are too young to remember all that, [Ken] covers the details in his post.

He found that the CRT grid voltage wasn’t present during operation. The voltage derived from the high voltage supply but, mysteriously, the high voltage was fine. There was a small lightbulb in the grid voltage circuit. A 28V device about like a flashlight bulb. It measured open and that turned out to be due to a broken lead. Repairing the broken lead to the bulb put the monitor back in operation.

On paper, a light bulb lights up when you put current through it. In real life, it is a bit more complicated. An incandescent filament starts off as almost a dead short and draws a lot of current for a very brief time. As the current flows, the filament gets hot and the resistance goes up. That reduces the current draw. This effect — known as inrush current — is the scourge of designers trying to turn on light bulbs with transistors or other electronic switches.

However, the unknown Xerox power supply designer used that effect as a current limiter. The short 600V pulses would hardly notice the light bulb but if too much current or time elapsed, the resistance of the bulb would rise preventing too much current from flowing for too long. With the bulb open, the negative brightness grid provided an impassible barrier to the electrons. Apparently, the brightness grid lost power a bit earlier than the rest of the circuit and with it out of the way — or perhaps, partially out of the way — the picture was fine until the rest of the circuit also lost power.

We looked at [Ken’s] efforts on this machine earlier this year. Light bulbs, by the way, aren’t the only thing that changes resistance in response to some stimulus. You might enjoy the 1972 commercial from Xerox touting the Alto’s ability to do advanced tasks like e-mail and printing.

Continue reading “Xerox Alto CRTs Needed A Tiny Lightbulb To Function”

CRT Cataract Surgery

Back in the good old days, people got their information by staring into particle accelerators that could implode at any moment, and we liked it that way, by gum! To protect against disaster, CRT monitors were equipped with a safety screen laminated to the front of the tube. Decades of use often resulted in degradation of the glue used to hold the safety glass on, leading to the dread disease of “CRT cataracts.”

Luckily for aficionados of vintage terminals, [John Sutley] has come up with a cure for CRT cataracts. The video below shows the straightforward but still somewhat fussy process from start to finish. You’ll want to follow [John]’s advice on discharging the high-voltage flyback section of any stored charge; we speak from painful experience on this. With the CRT removed from the case, removing the safety screen is as simple as melting the glue with a hot air gun and applying gentle leverage with a putty knife. We’d think a plastic tool would be less likely to scratch the glass, but [John] managed to get them apart without incident. Acetone and elbow grease cleaned off the old glue, and the restored CRT looks great when reassembled.

With its cataracts cured, [John] says his next step is to restore the wonky keyboard on his Lear Siegler ADM-3A terminal. Perhaps he should look over this VT220 keyboard repair for ideas.

Continue reading “CRT Cataract Surgery”

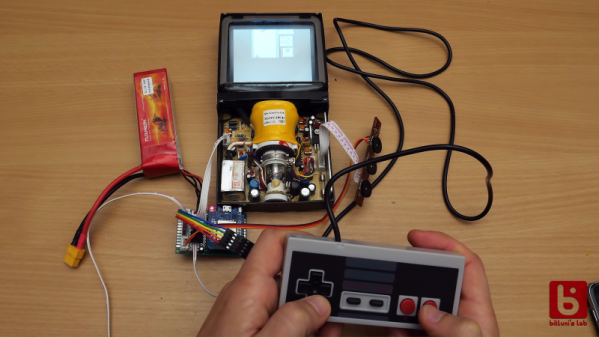
The Modern Retrocomputer: An Arduino Driven 6845 CRT Controller

[MmmmFloorPie] revived an old project to create the retro mashup of a 6845 CRT controller and a modern Arduino Uno. When it comes to chips, the Motorola 6845 is the great granddaddy of Cathode Ray Tube (CRT) interfaces. It was used in the IBM Monochrome display adapter, the Hercules graphics controller, CGA, Apple II terminal cards, and a host of other microcomputer and terminal systems.

Way back in 1989, [MmmmFloorPie] was a senior in college. His capstone project was a 68000 based computer which could record and playback audio, as well as display waveforms on a CRT. The CRT in question was ordered from a classified add in Popular Science magazine. It was a bare tube, so the heavy cardboard box it shipped in was repurposed as a case.

Fast forward to today, and  [MmmmFloorPie] wanted to power up his old project. The 68000 board was dead, and he wasn’t up to debugging the hundreds of point to point soldered connections. The CRT interface was a separate board including the 6845 and 32 KByte of RAM. It would only take a bit of hacking to bring that up. But what would replace the microprocessor?

Continue reading “The Modern Retrocomputer: An Arduino Driven 6845 CRT Controller”

Vintage Portable TV Turned Retro Gaming System

When [FinnAndersen] found an old TV set by the side of the road, he did what any self-respecting DIY/gaming enthusiast would do: He took it apart and installed a Raspberry Pi 3 running RetroPie in it in order to play retro games on a retro TV!

[Finn] took the CRT out of the TV before realizing that it actually worked. It was already too late, so [Finn] ordered a 12″ LCD screen to put in its place. He liked the idea of the curved screen the CRT had, though, so he molded a piece of acrylic around the CRT and, after some cutting and grinding, had it fitting in the screen’s space.

[Finn] also liked the idea of the TV still being able to view a television signal, so he bought a TV tuner card. After a couple of mods to it, he could control the card with the TV’s original channel changer. He used an Arduino to read the status of the rotary encoders the original TV used. After some trial and error, [Finn] was able to read the channel positions and the Arduino would send a signal to the channel up and down buttons on the tuner card in order to change the channel.

Next up was audio. [Finn] found a nicer speaker than came with the TV, so he swapped them and added an amplifier. The original volume knob is still used to control the volume. A USB Hub is hidden in the side of the TV at the bottom, to allow controllers to connect and finally, a power supply converts the mains voltage to 12V DC which runs both the Raspberry Pi and the TV Tuner.

[FinnAndersen] has built a great RetroPie cabinet reusing a great looking vintage TV. It’s unfortunate that he removed the CRT before figuring out that he could use it, but the replacement looks pretty darn good! And the added advantage? It’s portable, sort of. At least, without the CRT inside, it’s much lighter than it was. Here‘s another retro console inside an old TV, and this article is about connecting a Raspberry Pi to every display you can get your hands on.

Continue reading “Vintage Portable TV Turned Retro Gaming System”

Decimal Oscilloclock Harks Back To 1927 Movie

Metropolis is a classic, silent film produced in 1927 and was one of the very first full length feature films of the science fiction genre, and very influential. (C-3PO was inspired by Maria, the “Machine human” in Metropolis.) Within the first couple of minutes in the film, we get to see two clocks — one with a 24-hour dial and another larger one with a 10-hour dial. The human overlords of Metropolis lived a utopian 24 hour day, while the worker scum who were forced to live and work underground, were subjected to work in two ten-hour shifts during the same period.

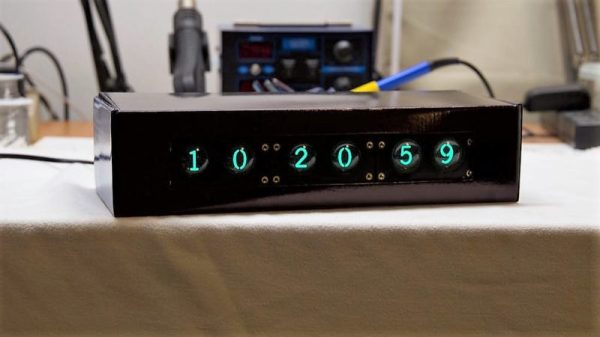
[Aaron]’s client was setting up a Metropolis themed man-cave and commissioned him to build a Metropolis Oscilloclock which would not only show the 24 hour and 10 hour clocks from the film, but also accurately reproduce the clock movements and its fonts. [Aaron]’s Oscilloclock is his latest project in the series of bespoke CRT clocks which he has been building since he was a teen.

The clock is built around a Toshiba ST-1248D vintage oscilloscope that has been beautifully restored. There are some modern additions – such as LED glow indicators for the various valves and an external X-Y input to allow rendering Lissajous figures on the CRT. He’s also added some animations derived from the original poster of the film. Doing a project of this magnitude is not trivial and its taken him almost eight months to bring it from concept to reality. We recommend looking through some of his other blog posts too, where he describes how oscilloclocks work, how he builds the HV power supplies needed to drive the CRT’s, and how he ensures vibration and noise damping for the cooling fans used for the HV power supplies. It’s this attention to detail which results in such well-built clocks. Check out some of [Aaron]’s other awesome Oscilloclock builds that we have featured over the years.

The film itself has undergone several restoration attempts, with most of it being recovered from prints which were discovered in old archives. If you wish to go down that rabbit hole, check out Wikipedia for more details and then head over to YouTube where several versions appear to be hosted.

Continue reading “Decimal Oscilloclock Harks Back To 1927 Movie”

From CRT TV To All-In-One Console

When the Raspberry Pi first appeared there was some excitement among Raspberry Jam attendees at the prospect of a computer with a video output on a board small enough to be concealed inside a TV. But while the idea is a good one the prospect of poking around among the high voltages of an older CRT model has meant that surprisingly few such ideas turned into reality.

One person who made the idea into a reality was [Jon], who took a [Dora] The Explorer branded CRT/DVD combo in a fetching shade of red and turned it into an all-in-one retro console gaming system with an embedded Raspberry Pi.

nintendo-crt-tv-thumbnailThis is however not merely a Pi stuffed inside the rear casing with a few holes for cables, instead he took away the substantial part of the DVD mechanism and mounted his Pi safely in a plastic box. Some USB extension cables bring all four USB sockets to the front panel through the DVD slot with a bit of Sugru to hold them in place. An HDMI panel-mount extension goes to the TV’s rear connector panel, as does a power switch for the Pi which is wired to a USB charger mounted on a trailing mains socket inside the case. The composite video from the Pi is wired to the TV’s AV in video socket.

We don’t blame [Jon] for not looking at the TV’s power rails to find power for his Pi, though a TV of this recent age would have safely mains-isolated rails that’s still a task fraught with hazards. The resulting unit is a high quality retro console, and as a final touch he’s given it a Nintendo logo and some storage for his gamepads on the rear.

We’ve had a few CRTs with integrated computers before here at Hackaday, but not all have been as they seemed. This Pi for instance sat in a vintage Singer TV, but the CRT was replaced with a modern LCD. Our favourite though it this Chromecast driving a 1978 GE model.

The Haunting Last Day Of Hot Metal Typesetting At The New York Times

The short film, Farewell — ETAOIN SHRDLU, produced in 1978 covers the very last day the New York Times was set for printing in the old way, using hot metal typesetting.

We’ve covered the magic of linotype machines before, but to see them used as they were in their prime is something else. They saw nearly a hundred years of complete industry dominance. Linotype machines had entire guilds dedicated to their use. Tradesmen built their lives around them. For some of us we see the rise and fall of technology as an expected thing. Something that happens normally, sometimes within spans that cover only a few short years. Yet it’s still a strange thing to see a technology so widely used shut down so completely and relatively rapidly.

To make it even stranger, the computer that replaced the linotype machines is so alien to the technology used today that even it is an oddity. In the end only the shadow of the ‘new’ technologies — showcased as state of the art in this video — are still in use. Nonetheless it’s important to see where we came from and to understand what it means to innovate. Plus, you never know when you see an old idea that’s ready for a bit of refurbishment. Who knows, maybe part of the linotype’s spirit is ready to be reborn, and all it takes is a clever hacker to see it.

Oh, and that title — ‘etaoin shrdlu‘ — is the linotype equivalent of ‘qwerty’. The first two columns of keys on the linotype machine make up those two words.

Continue reading “The Haunting Last Day Of Hot Metal Typesetting At The New York Times”