This Home-Etched ARM Dev Board Is A Work Of Art

One of the step changes in electronic construction at our level over the last ten or fifteen years has been the availability of cheap high-quality printed circuit boards. What used to cost hundreds of dollars is now essentially an impulse buy, allowing the most intricate of devices to be easily worked with. Many of us have put away our etching baths for good, often with a sigh of relief.

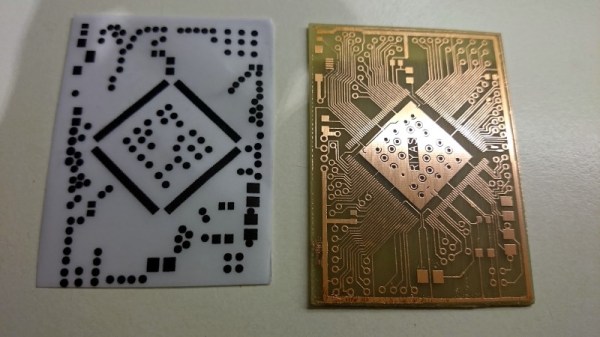
We’re pleased that [Riyas] hasn’t though, because they’ve etched an STM32 dev board that if we didn’t know otherwise we’d swear had been produced professionally. It sports a 176-pin variant of an STM32F4 on a single-sided board, seemingly without the annoying extra copper or lack-of-copper that we remember from home etching. We applaud the etching skill that went into it, and we’ll ignore the one or two boards that didn’t go entirely to plan. A coat of green solder mask and some tinning, and it looks for all the world as though it might have emerged from a commercial plant. All the board files are available to download along with firmware samples should you wish to try making one yourself, though we won’t blame you for ordering it from a board house instead.

It’s always nice to see that single board computers are not the sole preserve of manufacturers. If the RC2014 Micro doesn’t isn’t quite your style, there’s always the Blueberry Pi which features a considerably higher penguin quotient.

How A Microcontroller Hiding In A USB Port Became An FPGA Hiding In The Same

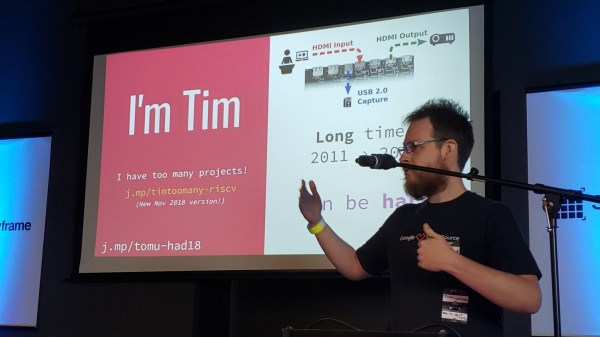
When you think of microcontroller development, you probably picture either a breadboard with a chip or a USB-connected circuit board. But Tim Ansell pictured an ARM dev board that is almost completely hidden inside of a USB port. His talk at the 2018 Hackaday Superconference tells that story and then some. Check out the newly published video, along with more details of the talk, after the break.

Continue reading “How A Microcontroller Hiding In A USB Port Became An FPGA Hiding In The Same”

New AVR-IOT Board Connects To Google

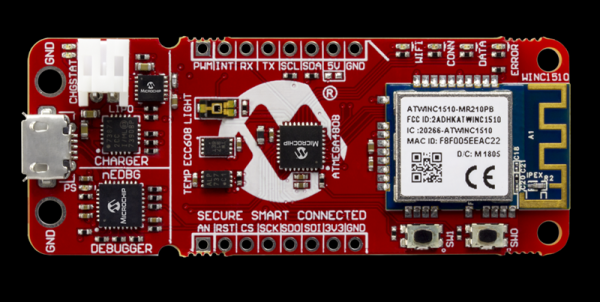
Readers of Hackaday are no strangers to using a microcontroller to push data to WiFi. Even before the ESP8266 there were a variety of ways to do that. Now Microchip is joining the fray with a $29 board called the AVR-IOT WG that contains an 8-bit ATmega4808, a WiFi controller, and hardware-based crypto chip for authenticating with Google Cloud.

The board has a section with a USB port for charging a battery and debugging that looks like it is made to cut away. There are a number of LEDs and buttons along with a light sensor and a temperature sensor. It feels like the goal here was to pack as many Microchip parts onto a single dev board as possible. You’ll find the ATmega4808 as the main controller, an ATWINC1510 WiFi controller (a castellated module reminiscent of the ESP8266), the ATECC608A cryptographic co-processor, MCP73871 LiPo charger, MIC33050 voltage regulator, and an MCP9808 temperature sensor. We can’t find much info about the “nEDBG Programmer/Debugger” chip. If you’ve used it on one of a handful of other dev board, let us know in the comments about off-board programming and other possible hacks.

Naturally, the board works with AVR Studio or MPLAB X IDE (Microchip bought Atmel, remember?). Of course, Atmel START or MPLAB Code Configurator can configure the devices, too. There’s also an AVR-IoT-branded website that lets you use Google cloud to connect your device for development. The headers along the top and bottom edges are compatible with MicroElektronika Click boards which will make anyone with a parts bin full of those happy.

Looks like you can pick up the Microchip boards now from the usual places. From reading what Microchip is saying, they would like to position this as the “IoT Arduino” — something someone without a lot of experience could pick up and use to pipe data into Google cloud. While that’s probably good, it isn’t that hard to use an ESP-device to do the same thing using the Arduino IDE and then you have a 32-bit processor and you can use whatever cloud vendor you want. Sure, it would be a little more work, so maybe that’s where this offering will appeal.

On the plus side, we really liked that there was a battery option with a charger already on board — it seems like that’s something we always have to add anyway. It may be buried in the documentation, but the user’s guide and the technical guide didn’t appear to have an average and maximum current draw specified, so battery life is an open question, although the video says “low power.”

Although it isn’t quite the same thing, we’ve seen ESP8266’s talk to Google servers for interfacing with Google Home. And while it is on the Amazon cloud, we’ve even seen a 6502 up there.

Continue reading “New AVR-IOT Board Connects To Google”

Making Use Of Stellaris/Tiva Real-Time Clock

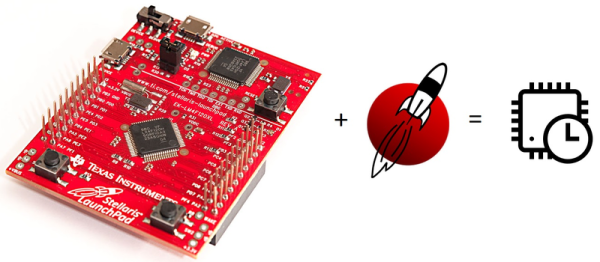
If you’re at all like us, or like [Vadim], you’ve got a stash of development boards in a shoebox on a shelf in your closet. If you’re better organized that we are, it might even be labeled “dev boards”. (Ah well, that’s a project for another day.) Anyway, reach into your box and pull one out, and put it to use. Do something trivial if you need to, but a dev board that’s driving a silly blinker is better than a dev board sitting in the dark.

[Vadim]’s good example to us all is going to serve as the brains for an automated plant watering system. That’s a low-demand application where the microcontroller can spend most of the time sleeping. [Vadim]’s first step, then was to get a real-time clock working with the hibernation mode. There’s working code inline in his blog.

royale-with-cheese-pulp-fiction-2_12-movie-clip-1994-hd-6pkq_ebhxj4mkv-shot0001
“I don’t know, I didn’t go into Burger King.”

If you use Arduino, you’ll feel at home in the Energia ecosystem. But it’s like ordering a Quarter Pounder with Cheese in Paris: Energia is a Royale with Cheese (YouTube) — it’s the little differences. And maybe that’s the point of the exercise; it’s always a good thing to try out something new, even if it’s only minimally different.

So grab that unused dev board off the shelf, struggle through the unfamiliar development environment and/or toolchain, but remember to keep an eye out for the sweet little differences. The more tools that you’re familiar with, the more solutions will spring to mind when you’re hacking on your next project.

The People, Talks, And Swag Of Open Hardware Summit

Friday was the 2016 Open Hardware Summit, a yearly gathering of people who believe in the power of open design. The use of the term “summit” rather than “conference” is telling. This gathering brings together a critical mass of people running hardware companies that adhere to the ideal of “open”, but this isn’t at the exclusion of anyone — all are welcome to attend. Hackaday has built the world’s largest repository of Open Hardware projects. We didn’t just want to be there — We sponsored, sent a team of people, and thoroughly enjoyed ourselves in the process.

Join me after the break for a look at the talks, a walk through the swag bags, and a feel for what this wonderful day held.

Continue reading “The People, Talks, And Swag Of Open Hardware Summit”

The Perfect Storm: Open ARM + FPGA Board

Playing around with FPGAs used to be a daunting prospect. You had to fork out a hundred bucks or so for a development kit, sign the Devil’s bargain to get your hands on a toolchain, and only then can you start learning. In the last few years, a number of forces have converged to bring the FPGA experience within the reach of even the cheapest and most principled open-source hacker.

[Ken Boak] and [Alan Wood] put together a no-nonsense FPGA board with the goal of getting the price under $30. They basically took a Lattice iCE40HX4K, an STMF103 ARM Cortex-M3 microcontroller, some SRAM, and put it all together on a single board.

The Lattice part is a natural choice because the IceStorm project created a full open-source toolchain for it. (Watch [Clifford Wolf]’s presentation). The ARM chip is there to load the bitstream into the FPGA on boot up, and also brings USB connectivity, ADC pins, and other peripherals into the mix. There’s enough RAM on board to get a lot done, and between the ARM and FPGA, there’s more GPIO pins than we can count.

Modeling an open processor core? Sure. High-speed digital signal capture? Why not. It even connects to a Raspberry Pi, so you could use the whole affair as a high-speed peripheral. With so much flexibility, there’s very little that you couldn’t do with this thing. The trick is going to be taming the beast. And that’s where you come in.

The Onion Omega2: The Latest Router Dev Board

A few years ago, the best way to put a device or project online was by hacking a router. With an inconspicuous Linksys WRT54G held onto a project with baling wire, anything can connect to the Internet. A lot has changed in a few years, and now those routers are development boards themselves. The latest of these is the Onion Omega2, a follow-up crowdfunding campaign to the very popular original Omega. Now, this tiny dev board is faster, more capable, and now it’s giving the Raspberry Pi Zero a run for its money.

The original Onion Omega was released last year with specs you would expect from an Internet of Things development board designed upon a chip for a cheap router. The original Onion used an Atheros AR9331 SOC running at 400 MHZ, had 64MB of RAM and 16MB of storage – enough to run a lightweight Linux distro – and also included USB, 802.11b/g/n, and a handful of GPIOs and a single UART. The Omega2 is a vast improvement over the original Omega, featuring a CPU that is 45% faster. The upgraded version of the Omega sports twice as much RAM, twice as much storage, and a MicroSD slot. This enables some Linux distros with a little more oomph behind them, and of course the SD card allows for local storage.

The original Onion Omega was funded through a crowdfunding campaign, with a single Onion Omega and dock available for a pledge of $19. Taking a lesson from the C.H.I.P. and the Pi Zero, the team at Onion have slashed the price. The Omega2 is only five dollars. If you want more RAM, storage, and an SD card socket, that price goes up to $9 USD. That’s amazing, and just goes to show how far hardware designed to service the Internet of Things has come in just a few short years.