Squeezing Every Bit From An ATMega

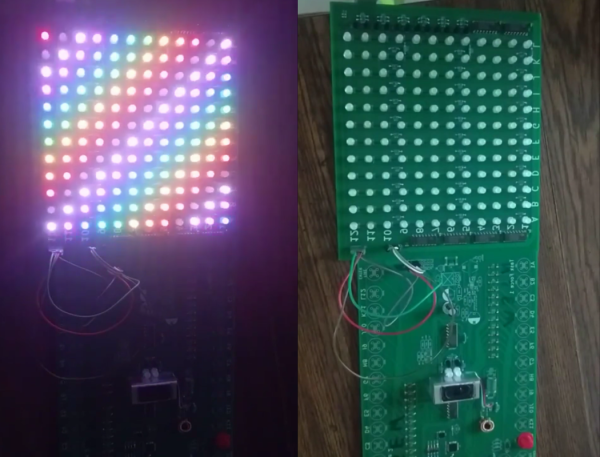
While the ATMega328 is “mega” for a microcontroller, it’s still a fairly limited platform. It has plenty of I/O and working memory for most tasks, but this Battleship game that [thorlancaster328] has put together really stretches the capabilities of this tiny chip. Normally a Battleship game wouldn’t be that complicated, but this one has audio, an LED display, and can also play a fine rendition of Nyan Cat to boot, which really puts the Atmel chip through its paces.

The audio is played through a 512-byte buffer and an interrupt triggers the microcontroller when to fill the buffer while it works on the other processes. The 12×12 LED display is also fed through a shift register triggered by the same interrupt as the audio, and since the build uses so many shift registers the microcontroller can actually output four separate displays (two players, each with a dispaly for shots and one for ships). It will also eventually support a player-vs-computer mode for the battleship game, and also has a mode where it plays Nyan cat just to demonstrate its own capabilities.

We’re pretty impressed with the amount of work this small microcontroller is doing, largely thanks to code optimization from its creator [thorlancaster328]. If there’s enough interest he also says he will provide the source code too. Until then, be sure to check out this other way of pushing a small microcontroller to its limits.

Thanks to [Thinkerer] for the tip!

Templateize Your Timetable With EPaper Templates

To date, e-paper technology has been great for two things, displaying static black and white text and luring hackers with the promise of a display that is easy on the eyes and runs forever. But poor availability of bare panels has made the second (we would say more important) goal slow to materialize. One of the first projects that comes to mind is using such a display to show ambient information like a daily summary weather, train schedules, and calendar appointments. Usually this means rolling your own software stack, but [Christopher Mullins] has put together a shockingly complete toolset for designing and updating such parameterized displays called epaper_templates.

To get it out of the way first, there is no hardware component to epaper_templates. It presupposes you have an ESP32 and a display chosen from a certain list of supported models. A quick search on our favorite import site turned up a wide variety of options for bare panels and prebuilt devices (ESP32 and display, plus other goodies) starting at around $40 USD, so this should be a low threshold to cross.

Once you have the device, epaper_templates provides the magic. [Christopher]’s key insight is that an ambient display is typically composed of groups of semi-static data displayed in a layout that never changes. The only variation is updates to the data which is fully parameterized: temperature is always integer Fahrenheit, train schedules are lists of minutes and hours, etc. Layouts like this aren’t difficult to make, but require the developer to reimplement lots of boilerplate. To make them easy to generate, epaper_templates provides a fully featured web UI to let the user freely customize a layout, then exports it as JSON which the device consumes.

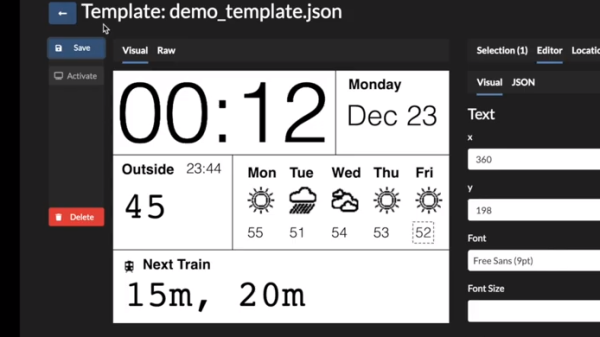
The sample layout configured in the video below

The web UI is shockingly capable, especially for by the standards of the embedded web. (Remember it’s hosted on the ESP32 itself!) The user can place text and configure fonts and styles. Once placed, the text can be set to static strings or tied to variables, and if the string is a timestamp it can be formatted with a standard strftime format string.

To round out the feature set, the user can place images and lines to divide the display. Once the display is described, everything becomes simple to programmatically update. The ESP can be configured to subscribe to certain MQTT topics from which it will receive updates, or if that is too much infrastructure there is a handy REST API which accepts JSON objects containing variables or bitmaps to update on device.

We’re totally blown away by the level of functionality in epaper_templates! Check out the repo for more detail about its capabilities. For a full demo which walks through configuration of a UI with train arrival times, weather, both instant temperature and forecast with icons, and date/time check out the video after the break. Source for the example is here, but be sure to check out examples/ in the repo for more examples.

Continue reading “Templateize Your Timetable With EPaper Templates”

An IMac All-In-One’s New Life

There’s a sleek form factor for desktop computers known as an “all-in-one” that enrobes a computer in a monitor. While the convenience of having all your computing in a neat package has some nice benefits, it comes with an unfortunate downside. Someday the computer inside is going to be old and outdated in comparison to newer machines. While a new OS goes a long way towards breathing life into an old machine, [Thomas] has decided to take the path less travelled and converted an old iMac all-in-one into a discrete monitor.

The iMac in question is the 20″ iMac G5 iSight (A1145) with an LG-Philips LM201W01-STB2 LCD panel. Looking back, [Thomas] would recommend just ordering an LCD driver controller kit from your favourite auction house. But for this particular modification, he decided to do things a little bit more manually and we’re quite glad he did.

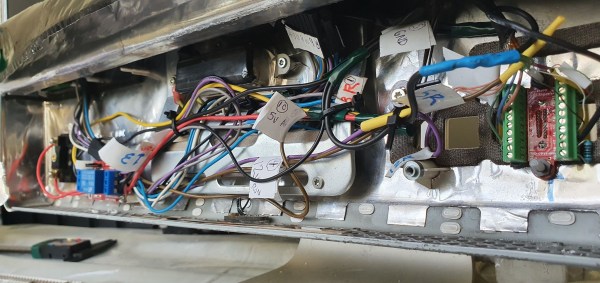
Luckily for [Thomas], the panel supports TMDS (which both DVI and HDMI are compatible with). So the next step was to figure out the signalling wires and proper voltages. After some trouble caused by a mislabeled power line on the iMac PCB silk-screen (12v instead of 3.3v), he had all the wires identified and a plan starting to form. The first step was a circuit to trick the inverter into turning on with the help of a relay. The female HDMI plug with a breakout board was added and sticks out through the old firewire port. The minuscule wires in the display ribbon cable to the monitor were separated and soldered onto with the help of [Thomas’] daughter’s microscope. Resistances were checked as HDMI relies on impedance matched pairs. To finish it off, an old tactile toggle switch offers a way to turn the monitor on and off with a solid thunk.

We love seeing old hardware being repurposed for new things. This project nicely complements the iMac G4 Reborn With Intel NUC Transplant we saw earlier this year, as they both try to preserve the form factor while allowing a new computer to drive the display.

Computer Vision Maps Christmas Lights

There’s a small but dedicated group of folks out there who spend all year planning their Christmas decorations. These aren’t simple lawn ornaments or displays, either, but have evolved into complex lightning performances that require quite a bit of computer control. For some things, hooking up a relay to a microcontroller can get the job done, but [Andy] has turned to computer vision to solve some of the more time-consuming aspects of these displays.

Specifically, [Andy] has a long string of programmable RGB LED lights to wrap around a Christmas tree, but didn’t want to spend time manually mapping out each light’s location. So he used OpenCV to register the locations of the LEDs from three different camera angles, and then used a Python script to calculate their position in the 3D space. This means that he will easily be able to take the LEDs down at the end of the holidays and string them back up next year without having to do the tedious manual mapping ever again.

While [Andy] notes that he may have spent more time writing the software to map out the LEDs than manually doing it himself, but year-after-year it may save him a lot of time and effort, not to mention the benefits of a challenge like writing this software in the first place. If you want to get started on your own display this year, all you really need is some lights and a MIDI controller.

The Art Of Nixies Hack Chat

Join us on Wednesday, October 28th at noon Pacific for The Art of Nixies Hack Chat with Dalibor Farný!

When they were invented in the 1950s, Nixie tubes were a huge leap forward in display technology. In the days before affordable LEDs made seven-segment displays a commodity, there were few alternatives to the charming glow of the clear and legible characters inside Nixies. Sturdy and reliable, the cold-cathode displays found their way into everything from scientific instruments to test equipment, and even some of the earliest computers and the equipment that formed the foundation of the Space Race sported the venerable tubes.

But time marches on, and a display that requires high voltage and special driver circuits isn’t long for a world where LEDs are cheap and easy to design with. Nixies fell from favor through the late 1960s and 1970s, to the point where new tubes were only being made by the Russians, until that supply dried up as well. Rediscovered by hobbyists for use in quirky clocks and other displays, any stock left over from the Nixie’s heyday are quickly being snapped up, putting the tubes on the fast track to unobtainium status.

That’s not to say that you can’t get brand new Nixie tubes, of course. Artisanal manufacturers like Dalibor Farný have taken the Nixie to a whole new level, with big, beautiful tubes that are handcrafted from the best materials. Reviving the somewhat lost art of Nixie manufacturing wasn’t easy, but the tubes that Dalibor makes in a castle in the Czech Republic now find their way into cool clocks and other builds around the world. He’ll join us on the Hack Chat to dive into the art and science of Nixies, and what’s going on with his mysterious “Project H”.

join-hack-chatOur Hack Chats are live community events in the Hackaday.io Hack Chat group messaging. This week we’ll be sitting down on Wednesday, October 28 at 12:00 PM Pacific time. If time zones baffle you as much as us, we have a handy time zone converter.

Click that speech bubble to the right, and you’ll be taken directly to the Hack Chat group on Hackaday.io. You don’t have to wait until Wednesday; join whenever you want and you can see what the community is talking about.

Continue reading “The Art Of Nixies Hack Chat”

STM32 Gets Up Close And Personal With Mandelbrot

The Mandelbrot set is a curious mathematical oddity that, while interesting in its own right, is also a useful tool for benchmarking various types of computers. Its constant computing requirement when zooming in and out on the function, combined with the fact that it can be zoomed indefinitely, means that it takes some quality hardware and software to display it properly. [Thanassis] has made this a pet project of his, running Mandelbrot set visualizations in different ways on many different hardware platforms.

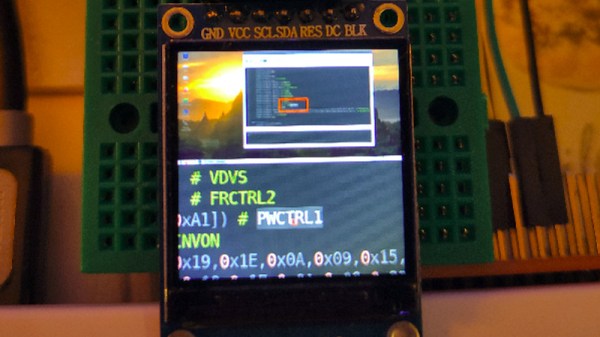
This particular one is based on an STM32 board called the Blue Pill, which [Thanassis] chose because he hadn’t yet done a continuous Mandelbrot zoom on a microcontroller yet. The display is handled by a tiny 16K IPS color screen, and some clever memory tricks had to come into play in order to get smooth video output since the STM has only 20 kB available. The integer multiplication is also tricky on a platform this small while keeping the continuous zoom function, so it’s limited to fixed point multiplication.

Even with the limitations of the platform, he is still able to achieve nearly double-digit FPS rates with this one. If you want to play around with graphics like this on an STM platform, [Thanassis] has released all of the source code on his GitHub page, but if you’d like to see more Mandelbrot manipulation you can check out one of his older projects where he built a similar project on an FPGA.

Continue reading “STM32 Gets Up Close And Personal With Mandelbrot”

Where We’re Calculating, We Don’t Need No Seven Segments!

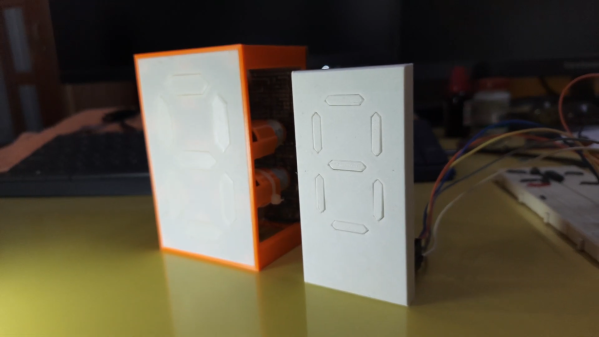
There have been many attempts at electronic numerical display technology over the decades since the first incandescent bulb or neon tube flickered into life at the command of a primordial computer, but the lowest common denominator has remained the humble seven segments. Here it might end, but for [Ken Yap] who has taken inspiration from a 1960s Sharp calculator to re-create a numerical display with only six segments.

This seemingly impossible feat is achieved by having six curved segments arranged as a figure-eight, which can render all the digits after a fashion, but which soon reveals why the extra segment made an appearance. The numbers that are made up of curves look good enough, but the straight lines in the 1, 4, and 7, are compromised by the diagonal, and the zero is curiously small at half the height.  You can read the digits, but it takes getting used to.

What made sense to reduce the complexity of 1960s electronics is only a fascinating curiosity in 2020, but we maybe won’t see these displays appearing too often. You can take a look at it in the video below the break, and if you’re curious about the Sharp calculator which inspired it then you can take a look at its page in the Vintage Calculator Museum.

Continue reading “Where We’re Calculating, We Don’t Need No Seven Segments!”