ESP8266 Adds WiFi Logging To IKEA’s Air Quality Sensor

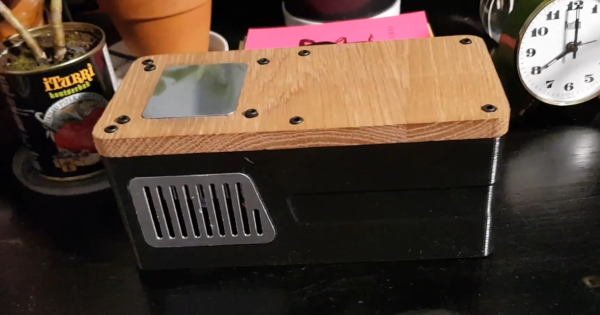
Introduced back in June, the IKEA VINDRIKTNING is a $12 USD sensor that uses colored LEDs to indicate the relative air quality in your home depending on how many particles it sucks up. Looking to improve on this simplistic interface, [Sören Beye] tacked an ESP8266 to the board so it can broadcast sensor readings out over MQTT.

Just three wires link the ESP8266 to the PCB.

While some of us would have been tempted to gut the VINDRIKTNING and attach its particle sensor directly to the ESP8266, the approach [Sören] has used is actually quite elegant. Rather than replacing IKEA’s electronics, the microcontroller is simply listening in on the UART communications between the sensor and the original controller. This not only preserves the stock functionality of the VINDRIKTNING, but simplifies the code as the ESP doesn’t need to do nearly as much.

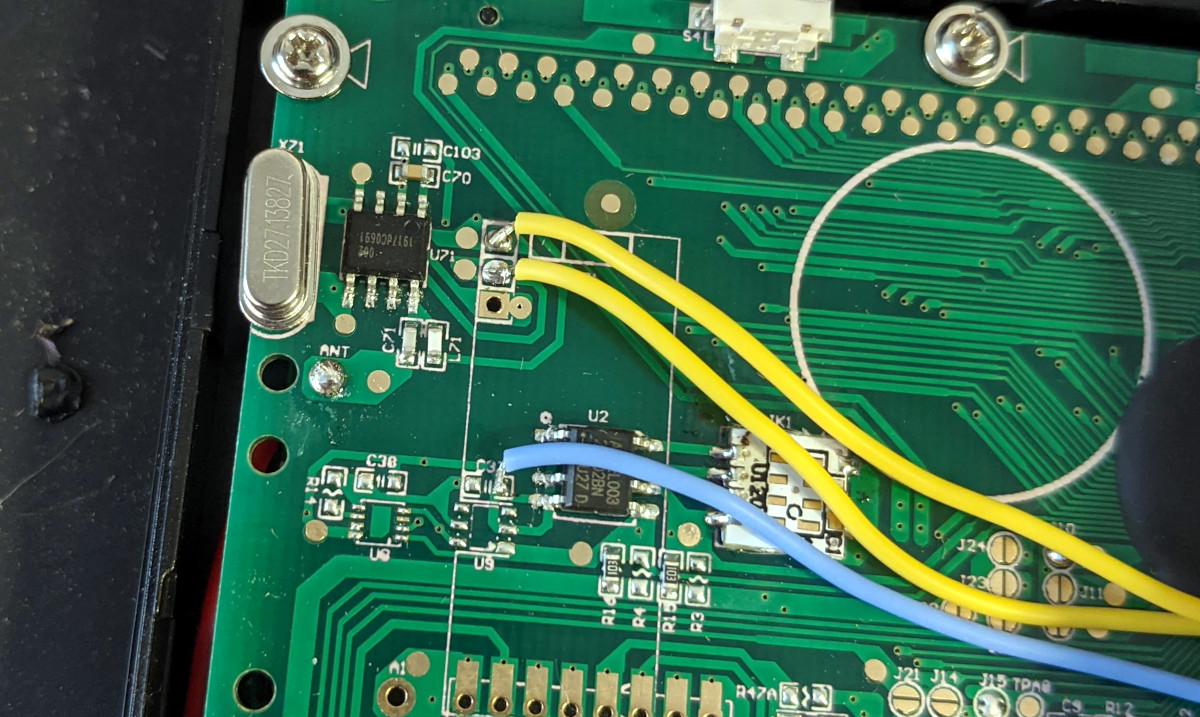
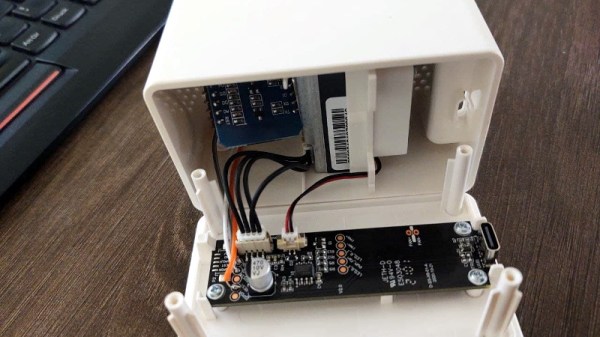
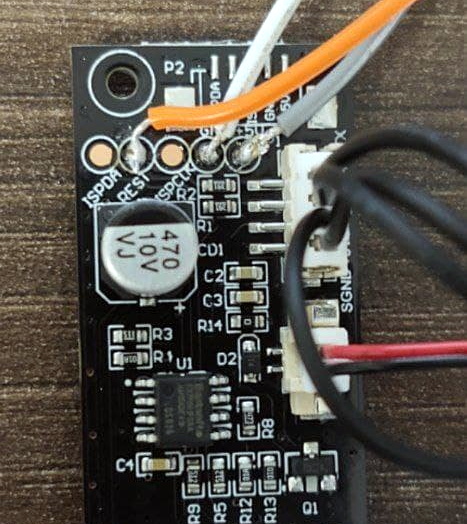
All you need to do if you want to perform this modification is solder a couple wires to convenient test pads on the VINDRIKTNING board, then flash the firmware (or write your own version), and you’re good to go. There’s plenty of room inside the case for the ESP8266, though you may want to tape it down so it doesn’t impact air flow.

While not required, [Sören] also recommends making a small modification to the VINDRIKTNING which makes it a bit quieter. Apparently the 5 V fan inside the sensor is occasionally revved up by the original controller, rather than kept at a continuous level that you can mentally tune out. But by attaching the sensor’s fan to the ESP8266’s 3.3 V pin, it will run continuously at a lower speed.

We’ve seen custom firmware for IKEA products before, but this approach, which keeps the device’s functionality intact regardless of what’s been flashed to the secondary microcontroller, is particularly appealing for those of us who can’t seem to keep the gremlins out of our code.

[Thanks to nexgensri for the tip.]

Using Heaters To Display Time

We’re always fans of interesting clock builds around here, whether it’s a word clock, marble clock, or in this case a clock using a unique display method. Of course, since this is a build by Hackaday’s own [Moritz v. Sivers] the display that was chosen for this build was a custom thermochromic display. These displays use heat-sensitive material to change color, and his latest build leverages that into one of the more colorful clock builds we’ve seen.

The clock’s display is built around a piece of thermochromic film encased in clear acrylic. The way the film operates is based on an LCD display, but using heat to display the segments. For this build, as opposed to his previous builds using larger displays, he needed to refine the method he used for generating the heat required for the color change. For that he swapped out the Peltier devices for surface mount resistors and completely redesigned the drivers and the PCBs around this new method.

Of course, the actual clock mechanism is worth a mention as well. The device uses an ESP8266 board to handle the operation of the clock, and it is able to use its wireless capabilities to get the current time via NTP. All of the files needed to recreate this are available on the project page as well, including code, CAD files, and PCB layouts. It’s always good to have an interesting clock around your home, but if you’re not a fan of electronic clocks like this we can recommend any number of mechanical clocks as well.

Continue reading “Using Heaters To Display Time”

Ham Radio Traffic Logger Using A Bug In Baofeng Electronics

A Baofeng radio is often one of the first purchases a new ham radio operator makes these days due to the decent features and low price tag. They are far from perfect, but with a bit of creative inspiration, it’s possible to make the quirks work in your favor. By taking advantage of a loud pop on the earphone outputs whenever the LCD backlight turns on, [WhiskeyTangoHotel] built a radio traffic counter using an ESP8266.

Whenever there is a transmission on one of the frequencies the radio is tuned to, the backlight turns on. Connecting the audio output to an oscilloscope, [WhiskeyTangoHotel] measured a 5V spike whenever this happens. Using a pair of diodes in series to drop the voltage to a safe level, the ESP8266 detects the voltage spike and updates a Google spreadsheet with the timestamp via IFTTT.

This gave [WhiskeyTangoHotel] empirical data on how much traffic passes through the local VHF repeater, but we wouldn’t blame them if the hack itself was the real motivator.

Of course, this would also be a perfect application for the RTL-SDR, which should allow you to do the above and much more, all in software. Add a bit of AI and you can even extract the call signs. The RTL-SDR is also a good tool for learning about RF modulation.

UV5-R image via PE1RQM

Portable, Digital Scoreboard Goes Anywhere

It’s that time of year in both hemispheres — time to get outside and play before it gets unbearably hot (or cold). No matter what your game, don’t keep score in your head or with piles of rocks — make yourself a portable, fold-able scoreboard like [LordGuilly] did and be on the bleeding edge of display technology. It’s really more roll-able than fold-able, which is awesome because you get to unfurl it like a boss.

All you need is a place to hang it up and you’re good to go. This thing runs on a beefy 10,000 mAH USB power bank, and [LordGuilly] says that it’s easy to read even on really sunny days. As you may have guessed, those are WS2812 strips and they are set into rectangular PVC bars. The bars are set equidistant from each other in a frame made from modified version of cable tracks — plastic chain links for cable management.

Good looks aside, we especially like that there are two controller options here. If you want to assign a dedicated scorekeeper, there’s a handled version that uses an STM32 blue pill and is wired to the display. But if you’re short on people, use the ESP8266 version and update the score with the accompanying app. Check out the demo after the break so you can see it in action.

We’ve seen a few scoreboards over the years, including this beauty that’s meant for indoor games.

Continue reading “Portable, Digital Scoreboard Goes Anywhere”

ESP8266 Adds WiFi To A 433 MHz Weather Station

There’s no shortage of cheap weather stations on the market that pull in data from several wireless sensors running in the 433 to 900 MHz range and present you with a slick little desktop display, but that’s usually where the flow of information stops. Looking to bridge the gap and bring all that local climate data onto the Internet, [Jonathan Diamond] decided to reverse engineer how his weather station worked.

The first phase of this project involved an RTL-SDR receiver, GNURadio, and a sprinkling of Python. [Jonathan] was able to lock onto the signal and piece together the data packets that reported variables such as temperature, wind speed, and rainfall. Each one of these was a small puzzle in itself, and in the end, there’s still a few bits which he hasn’t quite figured out. But he at least had enough to move onto the next step.

Tapping into the radio module.

Now at this point, he could have pulled the data right out of the air with his RTL-SDR. But looking to push his skills to the next level, [Jonathan] decided to open up the base station and isolate its receiver. Since he already decoded the packets on the RF side, he knew exactly what he was looking for with his oscilloscope and logic analyzer. Once he was tapped into the feed coming from the radio, the final step was writing some code for the ESP8266 that could listen on the line, interpret the data packets, and push the resulting variables out over the network.

In this case, [Jonathan] decided to funnel all the data into Weather Underground by way of the Personal Weather Station API. This not only let him view the data through their web interface and smartphone application, but brought their hyperlocal forecasting technology into the mix at no extra charge. If you’re not interested in sharing your info with the public, it would be a trivial matter to change the firmware so the data is published to a local MQTT broker, or whatever else floats your proverbial boat.

If you’re really lucky, your own weather station may already have an ESP8266 onboard and is dumping all its collected data to the serial port. But if not, projects like this one that break down how to reverse engineer a wireless signal can be a great source of inspiration and guidance should you decide to try and crack the code.

Modifying Lights For DIY Ambiance

The ESP32 and ESP8266 spread like wildfire a few years ago due to their small form factor, low price, and wireless capability. They didn’t just take over the DIY scene, though. Plenty of mass market products began to incorporate these tiny chips as well, which means that there are some interesting pre-made devices around that are ripe for modification. In this case, using an off-brand smart light bulb as a base for an semi-proprietary lighting setup.

The lighting in this build is a generic RGB light bulb with the ability to control its color over Wi-Fi. Since it has an ESP8266 chip in it, it can be made to work with Philips Hue lights with some minor modifications, allowing a much wider range of control than otherwise available. For this one, [Vadim] needed to pry open the bulb case to access the chip, then solder wires to it for reprogramming. It needed power during this step which meant plugging the resulting mess of wires back into a lamp socket, but after this step the new programming allows the bulb to be reprogrammed remotely.

After that step is complete, though, the generic bulb is ready for its inclusion into a Hue lighting system. In this case, [Vadim] is using diyHue, a Hue emulator that allows control of the bulbs without needing to use any cloud services, running on a BeagleBone. It’s a fairly comprehensive way of adding many different types and brands of bulbs to one system, and avoids any subscription models or the use of a cloud service, which is always something we can get behind.

Continue reading “Modifying Lights For DIY Ambiance”

Feel What The Temperature Is Like Outside Without Leaving Your Bed

Your smartphone might be able to tell you what the weather is like outside, but you’d have to go outside yourself to really feel it. To do this from the comfort of your own bed, [Sagarrabanana] built a clock that lets you really feel the temperature. Video below with English subtitles.

It is basically a box with a solenoid inside to knock out the time, and a Peltier plate on top. Give the box two knocks, which are detected by a piezo element,  and it will tell you the current time down to 15 minute increments in “bell tower” format. Give it three knocks, and the ESP8266 will fetch the ambient outside temperature from a cloud service and cool or heat the Peltier element to that temperature, using a H-bridge motor driver module. The code and design files are available on GitHub if you want to build your own.

All the components are housed inside an attractive 3D printed box with a machined wood top. Although we think this is a very interesting idea, we can’t help but suspect that it might be counterproductive for getting you out of bed on those cold winter mornings.

While alarm clocks are falling out of favor, they are still a popular build for hackers. We’ve covered one that looks like it came from a fallout shelter, and another with a very cool looking VFD display. Continue reading “Feel What The Temperature Is Like Outside Without Leaving Your Bed”