RTL-SDR Paves Way To Alexa Controlled Blinds

You’d be forgiven for occasionally looking at a project, especially one that involves reverse engineering an unknown communication protocol, and thinking it might be out of your league. We’ve all been there. But as more and more of the devices that we use are becoming wireless black boxes, we’re all going to have to get a bit more comfortable with jumping into the deep end from time to time. Luckily, there are no shortage of success stories out there that we can look at for inspiration.

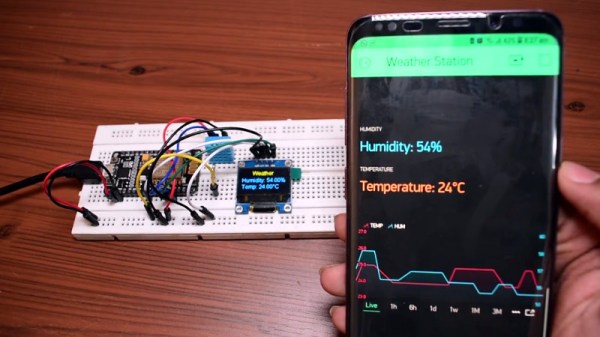
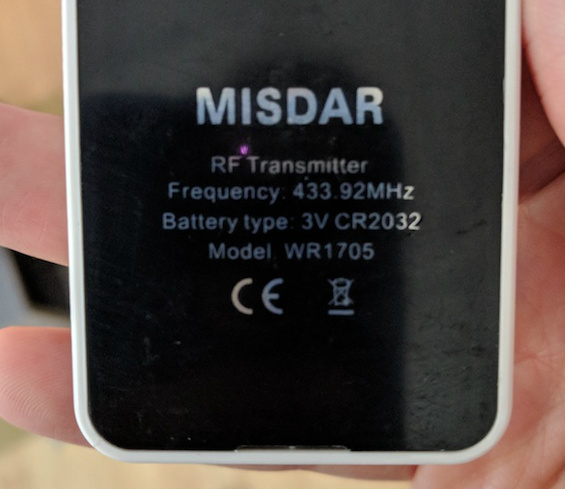
A case in point are the wireless blinds that [Stuart Hinson] decided would be a lot more useful if he could control them with his Amazon Alexa. There’s plenty of documentation on how to get Alexa to do your bidding, so he wasn’t worried about that. The tricky part was commanding the wireless blinds, as all he had to go on was the frequency printed on the back of the remote.

Luckily, in the era of cheap RTL-SDR devices, that’s often all you need. [Stuart] plugged in his receiver and fired up the incredibly handy Universal Radio Hacker. Since he knew the frequency, it was just a matter of tuning in and hitting the button on the remote a couple times to get a good capture. The software then broke it down to the binary sequence the remote was sending out.

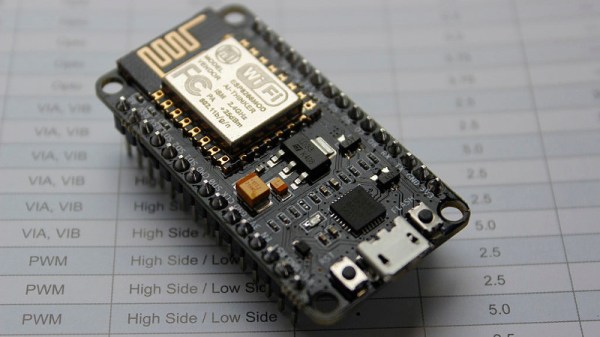
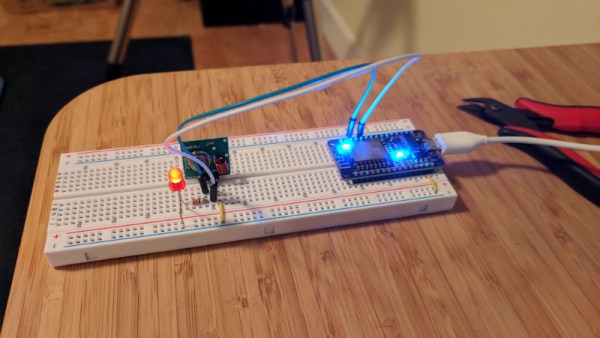
Now here’s where [Stuart] lucked out. The manufacturers took the easy way out and didn’t include any sort of security features, or even bother with acknowledging that the signal had been received. All he needed to do was parrot out the binary sequence with a standard 433MHz transmitter hooked up to an ESP8266, and the blinds took the bait. This does mean that anyone close enough can take control of these particular blinds, but that’s a story for another time.

We took a look at the Universal Radio Hacker a year or so back, and it’s good to see it picking up steam. We’ve also covered the ins and outs of creating your own Alexa skills, if you want to get a jump on that side of the project.

Feeding Dogs Over Twitch Is Latest E-Sport Craze

The modern social-networking fueled Internet loves two things more than anything: pets, and watching other people do stuff. There’s probably a scroll tucked behind a filing cabinet at Vint Cerf’s house that foretells anyone who can harness these two elements will gain control of the Internet Ready Player One style. If so, we’re thinking [Tyler Pearce] is well on his way to ascending the throne.

In an effort to make the Overwatch Twitch streams of his betrothed even more enticing, [Tyler] came up with a way for viewers to feed their dog Larry by dropping a command in the chat. There’s a surprisingly complex dance of software and hardware to make this reliable and visually appealing, but it’s worth it as showmanship is important in the brave new world of competitive e-sports. We’re assuming that’s what it says in the issue of ESPN Magazine with the Fortnite player on the cover, but nobody at Hackaday would qualify for a subscription to it so we don’t really know for sure.

A server running on the computer provides a slick administrative dashboard for the treat system, including a running log of who fed Larry and when. There’s also a number of checks in place to prevent too many treats being dispensed in a short time period, and to keep an individual from spamming the system.

On the hardware side, he’s using two NodeMCU ESP8266 microcontollers connected to a local MQTT broker: one to handle the lighting and one to run the 3D printed auger that actually pushes the food out. The printed auger is powered by a standard hobby servo, and even includes an IR sensor to automatically stop spinning when it detects a treat has been dispensed. [Tyler] reports the auger works quite well, though does have a tendency to jam up if overfilled.

We’ve seen all manner of automated pet feeders over the years, even ones with their own email accounts. So it was probably only a matter of time until they came to Twitch. If you can install Linux with it, why not use it to feed your dog? Or somebody else’s, as the case may be.

Create Your Own ESP8266 Shields

The ESP8266 has become incredibly popular in a relatively short time, and it’s no wonder. Cheap as dirt, impressively powerful, Arduino-compatible, and best of all, includes Wi-Fi right out of the box. But for all its capability and popularity, it’s still lagging behind the Arduino in at least one respect. Namely, the vast collection of add-on “Shields” which plug into the Arduino to add everything from breadboards to GPS receivers.

Until such time as the free market decides to pick up the pace and start making standardized shields for the various ESP8266 development boards, it looks as if hackers are going to have to pick up the slack. [Rui Santos] has put together a very detailed step-by-step guide on the creation of a simple shield for the popular Wemos D1 Mini board, which should give you plenty of inspiration for spinning up your own custom add-on modules.

Presented as a written tutorial as well as a two part video, this guide covers everything from developing and testing your circuit on a breadboard to designing your PCB in KiCad and sending it off for fabrication. The end result is a professional looking PCB that matches the footprint of the stock D1 Mini and adds a DS18B20 temperature sensor, PIR motion detector, photoresistor, and some screw down terminals.

[Rui] goes on to show how you can utilize the new sensors shield via a web interface hosted on the ESP8266, and even wraps the whole thing up in a 3D printed enclosure. All worthwhile skills to check out if you’re looking to produce more cohesive finished products.

If you’re looking for a similar project for the ESP32, [Rui] has you covered there as well. You may also be interested in the series of ESP8266 tutorials we recently highlighted.

Continue reading “Create Your Own ESP8266 Shields”

ESP8266 Powered Tank With Voice Control

The high availability of (relatively) low cost modular components has made building hardware easier than ever. Depending on what you want to do, the hardware side of a project might be the hacker equivalent of building with LEGO. In fact, we wouldn’t be surprised if it literally involved building with LEGO. In any event, easy and quick hardware builds leave more time for developing creative software to run the show. The end result is that we’re starting to see very complex systems broken down into easy-to-replicate DIY builds that would have been nearly impossible just a few years ago.

[igorfonseca83] writes in to share with us his modular tank platform that uses the ESP8266 and a handful of software hacks to allow for voice control from the user’s mobile device. Presented as a step-by-step guide on Hackaday.io, this project is perfect for getting started in Internet-controlled robotics. Whether you just want to experiment with Google Assistant integration or use this as a blank slate to bootstrap a remotely controlled rover, this project has a lot to offer.

The chassis itself is a commercially available kit, and [igorfonseca83] uses a L298N dual channel H-bridge module to control its two geared motors. A Wemos D1 serves as the brains of the operation, and three 18650 3.7V batteries provide the juice to keep everything running. There’s plenty of expansion capability to add sensors and other gear, but for this project getting it rolling was the only concern.

Software wise, there are a number of pieces that work together to provide the Google Assistant control demonstrated in the video after the break. It starts by interfacing the ESP8266 board Adafruit.IO, which connects to IFTTT, and then finally Google Assistant. By setting up a few two variable phrases in IFTTT that get triggered by voice commands in Google Assistant, you can push commands back down to the ESP8266 through Adafruit.IO. It’s a somewhat convoluted setup, admittedly, but the fact that involves very little programming makes it an interesting solution for anyone who doesn’t want to get bogged down with all the minutiae of developing your own Internet control stack.

[igorfonseca83] is no stranger to building remotely controlled rovers. Last year we covered another of his creations which was commanded through a web browser and carried an Android phone to stream video of its adventures.

Continue reading “ESP8266 Powered Tank With Voice Control”

Speech recognition to control a faucet

Talk To The Faucet

Your hands are filthy from working on your latest project and you need to run the water to wash them. But you don’t want to get the taps filthy too. Wouldn’t it be nice if you could just tell them to turn on hot, or cold? Or if the water’s too cold, you could tell them to make it warmer. [Vije Miller] did just that, he added servo motors to his kitchen tap and enlisted an AI to interpret his voice commands.

Look closely at the photo and you can guess that he started with a single-lever type of tap, the kind which can be worked with an elbow, so this project was probably just for fun and judging by his video below, he does have a sense of humor. But the idea is practical for dual taps with rotating knobs. He did realize, however, that in future versions he should move the servo motor openings from the top plate to the bottom instead, to avoid any water getting in. A NodeMCU ESP8266 ESP-12E board serves for communicating with the speech recognition side but other than the name, JacobAI, he’s keeping the speech part to himself. We secretly suspect that he has a friend named Jacob.

However, we can think of a number of options for it such as DeepSpeech and Wit.ai which we covered when talking about natural language phone bots, and the ubiquitous Alexa as used here with another NodeMCU for turning on Christmas tree lights.

Continue reading “Talk To The Faucet”

Demystifying The ESP8266 With A Series Of Tutorials

If your interest has been piqued by the inexpensive wireless-enabled goodness of the ESP8266 microcontroller, but you have been intimidated by the slightly Wild-West nature of the ecosystem that surrounds it, help is at hand. [Alexander] is creating a series of ESP8266 tutorials designed to demystify the component and lead even the most timid would-be developer to a successful first piece of code.

If you cast your mind back to 2014 when the ESP8266 first emerged, it caused great excitement but had almost no information surrounding it. You could buy it on a selection of modules, but there were no English instructions and no tools to speak of. A community of software and hardware hackers set to work, resulting in a variety of routes into development including the required add-ons to use the ever-popular Arduino framework. Four years later we have a mature and reliable platform, with a selection of higher-quality and well supported boards to choose from alongside that original selection.

The tutorials cover the Arduino and the ESP, as well as Lua and the official SDK. They are written for a complete newcomer, but the style is accessible enough that anyone requiring a quick intro to each platform should be able to gain something.

Our community never ceases to amaze us with the quality of the work that emerges from it. We’ve seen plenty of very high quality projects over the years, and it’s especially pleasing to see someone such as [Alexander] giving something back in this way. We look forward to future installments in this series, and you should keep an eye out for them.

Simple ESP8266 Weather Station Using Blynk

Today’s hacker finds themself in a very interesting moment in time. The availability of powerful microcontrollers and standardized sensor modules is such that assembling the hardware for something like an Internet-connected environmental monitor is about as complex as building with LEGO. Hardware has become elementary in many cases, leaving software as the weak link. It’s easy to build the sensor node to collect the data, but how do you display it in a useful and appealing way?

This simple indoor temperature and humidity sensor put together by [Shyam Ravi] shows one possible solution to the problem using Blynk. In the video after the break, he first walks you through wiring the demonstration hardware, and then moves on to creating the Blynk interface. While it might not be the ideal solution for all applications, it does show you how quickly you can go from a handful of components on the bench to displaying useful data.

In addition to the NodeMCU board, [Shyam] adds a DHT11 sensor and SSD1306 OLED display. He’s provided a wiring diagram in the repository along with the Arduino code for the ESP8266, but the hardware side of this demonstration really isn’t that important. You could omit the OLED or switch over to something like a BME280 sensor if you wanted to. The real trick is in the software.

For readers who haven’t played with it before, Blynk is a service that allows you to create GUIs to interact with microcontrollers from anywhere in the world. The code provided by [Shyam] reads the humidity and temperature data from the DHT11 sensor, and “writes” it to the Blynk service. From within the application, you can then visualize that data in a number of ways using the simple drag-and-drop interface.

We’ve seen Blynk and ESP8266 used to control everything from mood lighting to clearance-rack robotic toys. It’s a powerful combination, and something to keep in mind next time you need to knock something together in short order.

Continue reading “Simple ESP8266 Weather Station Using Blynk”