LAMEBOY Is Handheld Gaming On The ESP8266

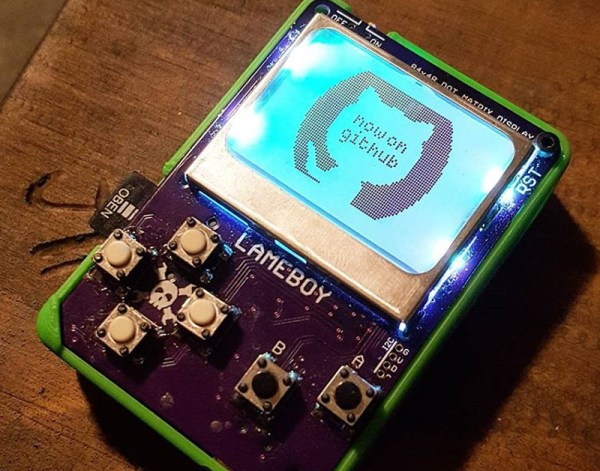
We’ve had our eye on [davedarko’s] LAMEBOY project for a while now, a handheld setup in roughly the same form factor as the classic Nintendo Game Boy. It’s remarkable how approachable portable electronic design has become, and that’s really what makes this interesting. The design is beautiful, and the closer you look, the more respect you have for what [dave] is doing.

Right now his proof of concept has a 3D printed enclosure whose face is the printed circuit board. We love how the lower left corner of the PCB slips under a pocket in the case, which makes it possible to use just one screw to secure the two together in the upper right.

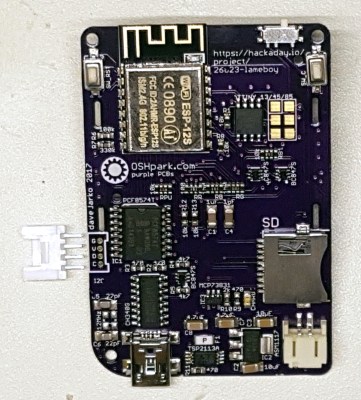
The LAMEBOY is built around an ESP8266 module. Anyone who has used one knows this chip contains a fair amount of horsepower, but very little I/O. [Dave] has a lot going on with an LCD screen, six user buttons, a USB to I/O chip, and an SD card slot. He took two approaches to solve this dilemma. First he grabbed a PCF8574 port expander, and second he’s offloaded the color control of the screen backlights to an ATtiny85 (running a BlinkM clone).

Below you can see some early game tests on the perfboard prototype. We haven’t seen game play on the most recent prototype (there is a screen color test video in his latest project log) but it sounds as though [dave] plans to make use of the Gamebuino framework. This should mean that there will be no shortage of cool ROMs to load.

Continue reading “LAMEBOY Is Handheld Gaming On The ESP8266”

An Introduction To Solid State Relays

When we think of relays, we tend to think of those big mechanical things that make a satisfying ‘click’ when activated. As nice as they are for relay-based computers, there are times when you don’t want to deal with noise or the unreliability of moving parts. This is where solid-state relays (SSRs) are worth considering. They switch faster, silently, without bouncing or arcing, last longer, and don’t contain a big inductor.

Source Fotek SSR Specifications Sheet

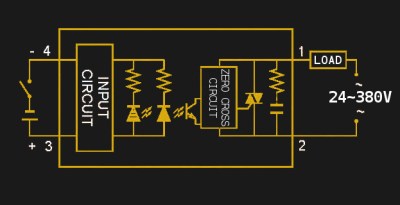
An SSR consists of two or three standard components packed into a module (you can even build one yourself). The first component is an optocoupler which isolates your control circuit from the mains power that you are controlling. Second, a triac, silicon controlled rectifier, or MOSFET that switches the mains power using the output from the optocoupler. Finally, there is usually (but not always) a ‘zero-crossing detection circuit’. This causes the relay to wait until the current it is controlling reaches zero before shutting off. Most SSRs will similarly wait until the mains voltage crosses zero volts before switching on.

If a mechanical relay turns on or off near the peak voltage when supplying AC, there is a sudden drop or rise in current. If you have an inductive load such as an electric motor, this can cause a large transient voltage spike when you turn off the relay, as the magnetic field surrounding the inductive load collapses. Switching a relay during a peak in the mains voltage also causes an electric arc between the relay terminals, wearing them down and contributing to the mechanical failure of the relay.

Continue reading “An Introduction To Solid State Relays”

Hackaday Prize Entry: Inexpensive Emergency Button

I’ve fallen and I can’t get up. We all remember it, and we all know what product we’re talking about. Now, with cheap microcontrollers, ubiquitous WiFi, and wearable electronics, there must be a simpler solution. [Jean Paradedel]’s emergency button project is designed to replace those wearable emergency buttons, which usually include an expensive call center plan.

[Jean]’s button is based off an ESP8266 module, which sends an email to a care provider if a button is pressed. The whole thing is powered by a CR2032 watch battery and the device’s case was 3D printed. The interface is simple — it’s just a wearable button, after all — and the form factor is small enough to be completely unobtrusive.

[Jean] reflashed the ESP8266 board with a simple sketch that runs the project. First, a button-press connects the device to WiFi and then blinks an LED so you know it’s connected. When the emergency button is pressed, an email is sent out letting a caregiver know that there’s a problem.

Check out the video below for a demo of this cheap emergency button in action.

Continue reading “Hackaday Prize Entry: Inexpensive Emergency Button”

Datalogger Uses ESP32 And ESP8266 Low Power Modes

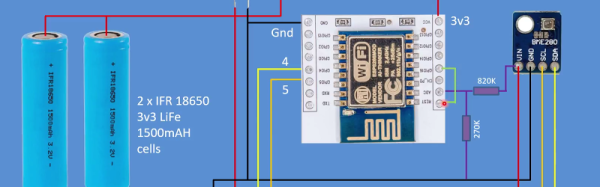
[G6EJD] wanted to design a low power datalogger and decided to look at the power consumption of an ESP32 versus an ESP8266. You can see the video results below.

Of course, anytime someone does a power test, you have to wonder if there were any tricks or changes that would have made a big difference. However, the relative data is interesting (even though you could posit situations where even those results would be misleading). You should watch the videos, but the bottom line was a 3000 mAh battery provided 315 days of run time for the ESP8266 and 213 days with the ESP32.

Continue reading “Datalogger Uses ESP32 And ESP8266 Low Power Modes”

DIY Wireless Sprinkler System? Don’t Mind If I Do.

What to do once you have a sprinkler system installed on your property: buy a sprinkler control system or make your own? The latter, obviously.

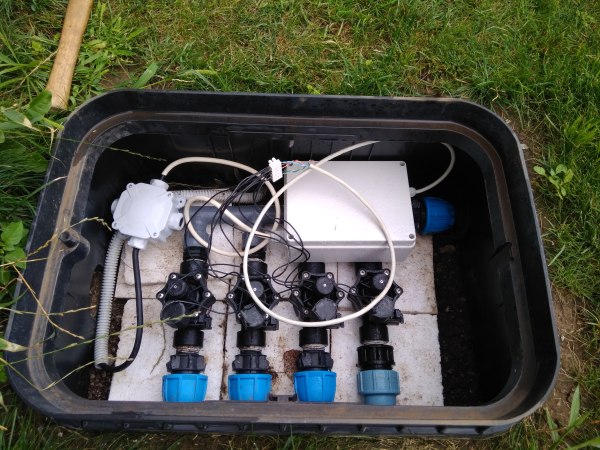
[danaman] was determined to hack together a cheap, IoT-enabled system but it wasn’t easy — taking the better part of a year to get working. Instead of starting right from scratch, he used the open-source Sustainable Irrigation Platform(SIP) control software — a Python sprinkler scheduler with some features [danman] was looking for(eg: it won’t activate if there’s rain in the forecast). Since he wasn’t running it with a Raspberry Pi as recommended, [danman] wrote a Python plugin that runs on his home server as a daemon which listens to TCP port 20000 for connections and then updates the relevant relays. Ok, software done; on to the relay controller box!

Continue reading “DIY Wireless Sprinkler System? Don’t Mind If I Do.”

Hackaday Prize Entry: Elderly Autonomous Fall Detection

For his Hackaday Prize entry, [having11] is building a simple and cheap fall detection notification button that can be worn by senior citizens, young kids, or others affected by medical conditions. [having11] did some fact-finding, and it appears that falls are one of the leading causes of injury for seniors, according to data available from the Centres for Disease Control and Prevention (CDC).

This device will sense a fall and send a text message or email to a recipient caregiver, loved one, or friend. The notification can also be manually triggered using a pushbutton. There’s a 5-second delay before it actually sends the alert, allowing a false trigger to be canceled. On receiving the alert, the recipient can decide how to proceed and if the situation requires a call to emergency services.

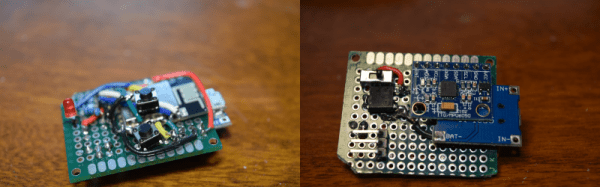
The device uses an ESP8266, a MPU6050 MEMS gyro-accelerometer combo, and MyDevices Cayenne IoT service. The Cayenne IoT service is free for Makers and non-commercial use at the moment. The only other components needed are a few discretes and a small LiPo battery, keeping the cost of the device under $10. The whole assembly is housed in a 3D-printed enclosure. The next steps would probably be to make it more compact and design a housing that can be worn as an arm or chest band or on a waist belt. An important requirement of such monitoring devices is being able to notify when/before it is unable to fulfill its primary requirements. Towards that end, maybe adding a low battery and low WiFi signal strength indicators would be nice.

If you have more suggestions on making this better, chime in with your comments below.

Continue reading “Hackaday Prize Entry: Elderly Autonomous Fall Detection”

Dumb STB Gets Smart

[Vincent Deconinck] gave a fresh lease of life to an old set top box by adding a few Euro’s worth of hardware and some software smarts. The device in question is an old VOOcorder – a Cisco set-top box provided by VOO, his cable service provider in Belgium.

The VOOcorder doesn’t have any WiFi hardware or browser / app based interfaces. It’s a simple device controlled either via an IR remote or front panel buttons. [Vincent] added an ESP8266 and hooked it up to the IR receiver on the set-top box. He also set it up as an SPI slave to the front panel VFD display controller and connected it to the debug serial interface of the VOOcorder as well. The software, on the other hand, required a lot more work consisting of code running on the ESP itself, several HTML pages and JavaScript code for the browser front end, and a few scripts running in the background.

The result was bidirectional interactivity from within a browser, allowing him to send commands and receive status information as well as providing a user-friendly search interface. Further, his browser interface was integrated with information from the service providers website letting him do scheduling and recording of programs. The stuff that interested us is how he sniffed out the IR signals, figured out the SPI protocol used by the front panel controller, and implemented SPI-slave mode for the ESP8266. [Vincent] was surprised that such a cheap device could handle three distinct web servers while parsing two message streams without a hitch.

It’s a great hack showing us how to use super cheap electronics to upgrade and modernize old hardware. Check out the two videos after the break – showing a demo of the hack in action, and a walk through of the hardware modifications.

Continue reading “Dumb STB Gets Smart”