Hackaday Prize Entry: Thingspeak IoT Heart Rate Monitor

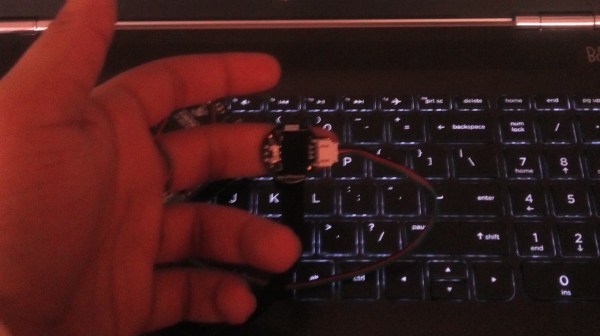
[Naman Chauhan]’s 2017 Hackaday Prize entry consists of a heartbeat detection and monitoring system that centers around everyone’s favorite WiFi board, the ESP8266. The monitor is hooked up to the patient’s finger, keeping track of his or her vitals and publishing the data on the cloud.

By using Thingspeak to manage the data, [Naman] leverages the platform’s data visualization and analytical features. Also, by making the data accessible on the cloud, he offers an intriguing opportunity to help friends and relatives to monitor the data. If you think about it, if you had a loved one in the hospital, wouldn’t having all of his or her chart available on your phone be great?

Don’t Miss The Bus: A One-Day Build

Sometimes the most satisfying hacks are those that spring from a situation where resources are limited, either by choice or by chance. Constraints tend to stir the creative juices.

Serial Hackaday poster [limpkin] limited himself to a one-day build with what he had on hand for this bus-route countdown timer. Full points for actually building something useful, and extra credit for making something to keep his wife from being late for work.

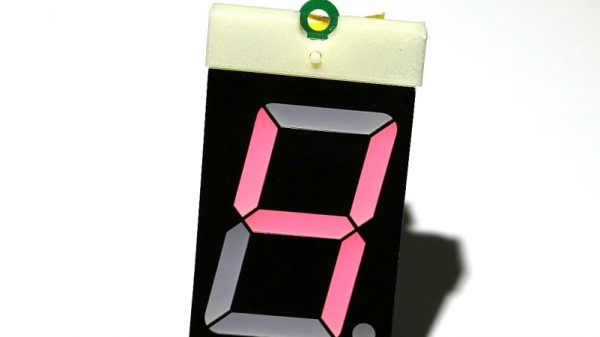
The principle is simple: scrape a web page to find out how much time is left before either of two busses leaves his wife’s stop, and display the number of minutes left on a huge LED display. The parts bin gave up everything needed, including an ESP8266, a boost converter, a charge controller, and the display and driver. We’re skeptical that the PCB was fabricated the same day; looks like [limpkin] is only counting the design and coding time in his 10-hour build. Still, it’s a testament to what’s possible with a deep inventory and the skills to put it to use.

Check out some of [limpkin]’s other hacks, like this Formula-E race car PCB or his adventures in laundry larceny. Oh, and he also used to write for Hackaday.

Super squirter automatic water gun

Motion Activated Super-Squirter Stands Guard

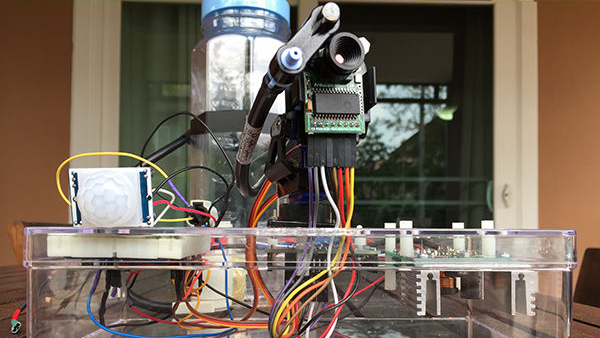
Thieves beware. If you prowl around [Matthew Gaber]’s place, you get soaked by his motion activated super-squirter. Even if he’s not at home, he can aim and fire it remotely using an iPhone app. And for the record, a camera saves photos of your wetted-self to an SD card.

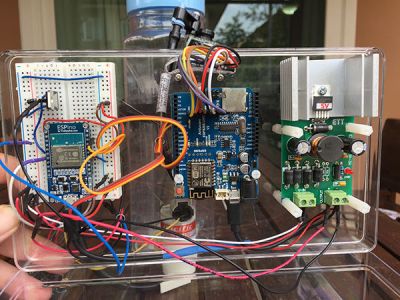
ESPino, ArduCAM UNO and voltage converter boards

The whole security system is handled by three subsystems for target acquisition, photo documentation, and communications. The first subsystem is centered around an ESPino which utilizes a PIR sensor to detect motion. It then turns on a windscreen washer pump and uses pan and tilt servos to squirt water in a pattern toward the victim.

The target acquisition hardware also sends a message to the second subsystem, an ArduCAM ESP8266 UNO board. It takes a burst of photos using an ArduCAM Mini Camera mounted beside the squirter outlet. The UNO can also serve up a webpage with a collection of the photos.

The final subsystem is an iPhone app which talks to both the ESPino and the UNO board. It can remotely control the squirter and provide a video feed of what the camera sees.

One detail of the build we really enjoyed is the vacuum relief valve he fabricated himself. It prevents siphoning through the pump when it’s not on. Don’t miss a demo of the squirter in action after the break.

Continue reading “Motion Activated Super-Squirter Stands Guard”

Drag Your Office Aircon Into The 21st Century With Wi-Fi Control

We’ll all have worked in offices that have air-conditioning, but a little too much of it. It’s wonderful on a baking-hot day to walk into the blessèd cool of an air-conditioned office, but after an hour or two of the icy blast you’re shivering away in your summer clothing and you skin has dried out to a crisp. Meanwhile on the other side of the building [Ted] from Marketing has cranked up the whole system to its extreme because he’s got a high metabolism and an office in the full force of the midday sun.

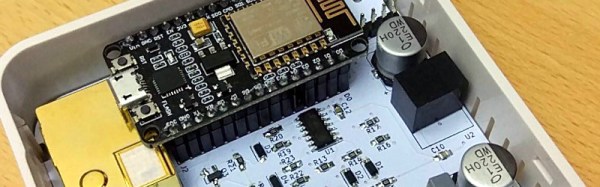
Wouldn’t it be nice if individual air-conditioning units could be easily controlled. To that end, [Maya Posch] has made a rather nicely designed board that takes a NodeMCU board with its ESP8266 processor, and uses four of its outputs as PWM to produce 0-10 volt analogue outputs via filters and op-amps to control individual units. In addition there is an onboard CO2 sensor and a temperature sensor, with provision for an external temperature sensor. The whole fits very neatly into a standard electrical outlet enclosure.

Software wise, the system uses the Sming framework providing an MQTT  communication with a backend server that allows the users to control their aircon experience. This is very much a work in progress, so the software has yet to be put up. (Hint, [Maya], hint!) The whole project though is an extremely tidy build, in fact a thing of beauty to a standard you’d expect from a high-quality commercial product. It’s this that tipped the balance into our featuring it before the software is released, it’s one to keep an eye on, because quality like this doesn’t come every day.

This isn’t the first aircon control we’ve brought you, take a look at this one controlled through Slack.

7-Segment Digits Slide Stylishly On This OLED Clock

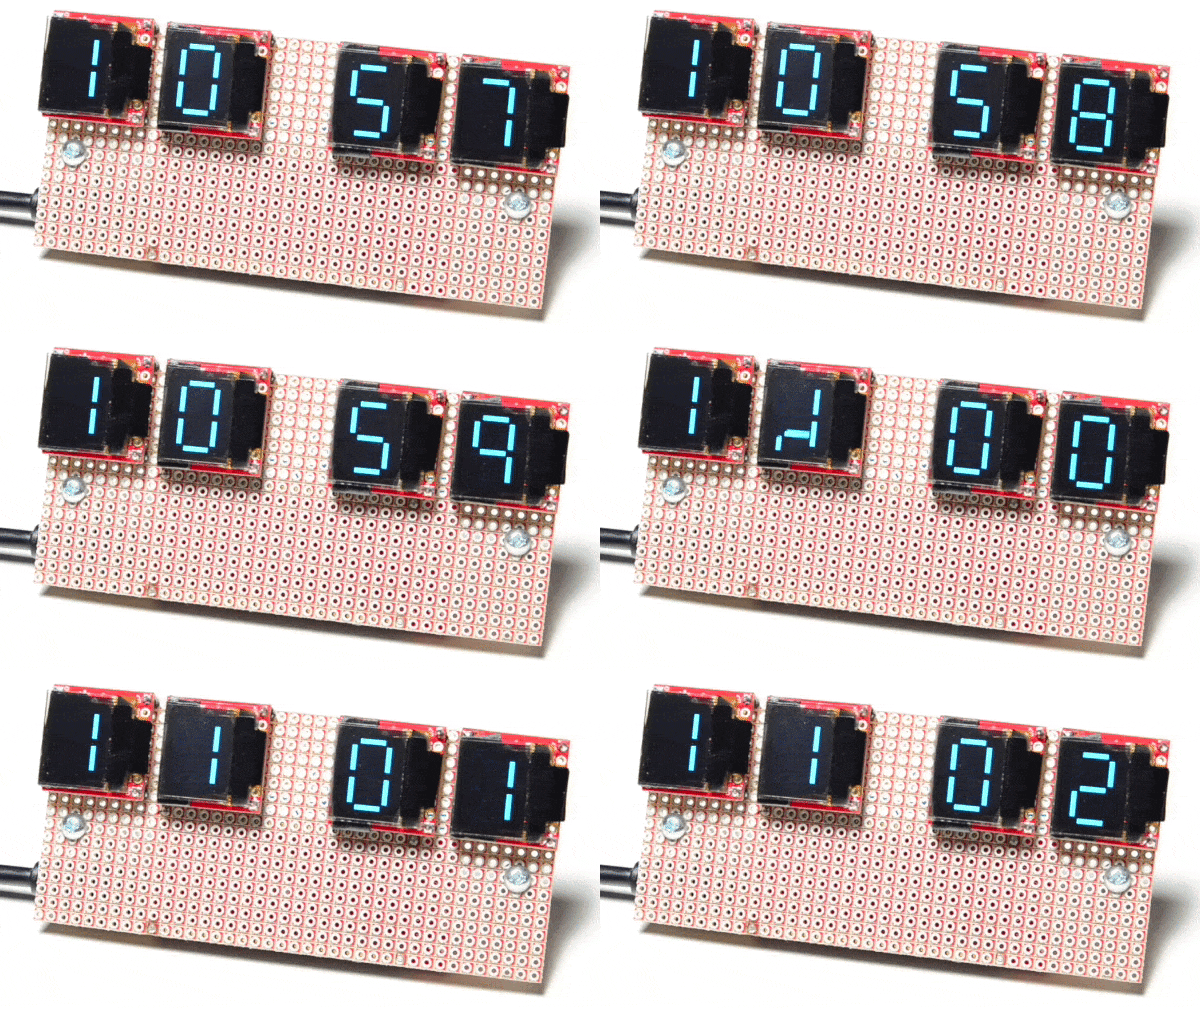
Over at Sparkfun, [Alex] shared an OLED clock project that’s currently in progress but has a couple interesting twists. The first is the use of a small OLED screen for each digit, to which [Alex] added a stylistic touch. Digits transition by having segments slide vertically in a smooth animated motion. It’s an attractive effect, and the code is available on his github repository for anyone who wants to try it out.

[Alex] also found that by using an ESP32 microcontroller and synchronizing the clock via NTP over WiFi, the added cost of implementing a real-time clock in hardware becomes unnecessary. Without an RTC, time would drift by a few seconds every day and require a reset. At the moment the clock requires the SSID and password to be hardcoded, but [Alex] would prefer to allow this to be configured via a web page and could use some help. If you have implemented a web server on the ESP32, [Alex] would like to know how you handled multiple pages. “I’ve been scratching my head throughout the build on how to get this done,” he writes. “With the ESP8266, there’s on(const String &uri, handler function), but that seems to have been removed on the ESP32.” If you can point [Alex] in the right direction, be sure to pipe up.

OLED displays and clocks often go together, as we have seen with projects like the DIY OLED Smart Watch, but it’s nice to see someone using the OLED’s strengths to add some visual flair to an otherwise plain display.

Custom Lightbulb Firmware

The Internet of Things is developing at a rapid pace, as hobbyists and companies rush to develop the latest and greatest home automation gear. One area of particular interest to some is lighting – yes, even the humble lightbulb now comes with a brain and is ripe for the hacking.

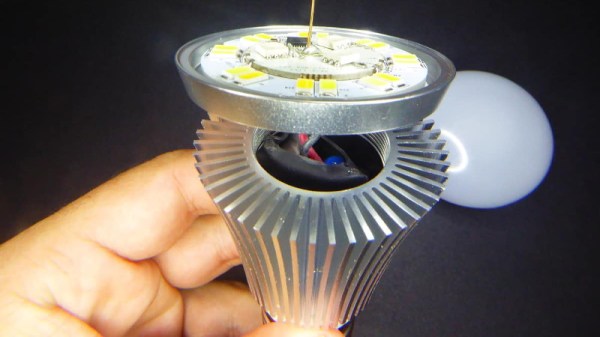
[Tinkerman] starts by doing a full disassembly of the Sonoff B1 lightbulb. It’s a popular device, and available for less than $20 on eBay. Rated at 6 watts, the bulb has a heatsink that is seemingly far larger than necessary. Inside is the usual AC/DC converter, LED driver and an ESP8285 running the show. While this is a slightly different part to the usual ESP8266, it can be programmed in the same way by selecting the correct programming mode.

This is where it gets interesting – [Tinkerman] flashes the device with a custom firmware known as ESPurna. This firmware enables greater control over the function of the bulb, from colour choice, to speaking to the bulb over MQTT.

[Tinkerman] does a great job of walking through the exact steps needed to disassemble and reprogram the bulb, and touches upon the added flexibility given by the custom firmware. We love to see projects like this one, that give greater control over IoT devices and enable users to better integrate them with other systems.

Trouble Flashing Your ESP8266? Meet DIO And QIO

[Pete] was building a hot tub controller, using a WEMOS board based on the venerable ESP8266. After assembly, the board was plugged into USB and [Pete] hit the flash button. No dice. Investigation with some terminal software indicated a checksum error.

Assuming the board was dead, [Pete] grabbed another — and suffered the same problem.  The WEMOS boards wouldn’t program, but other boards had no issues. Sensing that something may be amiss, further research was in order. A forum post turned up discussing different programming modes for the ESP8266.

It turns out that there are different types of flash used with the ESP8266, and the correct programming mode must be selected for a given hardware setup. These modes are known as DIO and QIO, meaning “dual IO” and “quad IO” respectively. This refers to the number of IO line used to talk to the flash memory. There are also further modes, known as DOUT and QOUT. It’s important to identify the modes supported by the flash chip on board, by looking at the datasheet. Obviously this can be difficult on some pre-built modules, so experimentation is the key here.

With the wrong mode selected, writes to the flash will fail, and reading back will turn up a checksum error. It’s a simple matter of changing a line in the make file and trying different modes, to see which one works. This forum post has a more in-depth coverage of the issue. 

By choosing different flash memory parts and selecting the DIO or DOUT modes, it’s actually possible to free up more GPIO pins as well. This knowledge is handy when optimizing ESP8266 designs for memory speed or maximum IO flexibility. It’s a good lesson that it always pays to look at the datasheet to get the best out of your parts.