Ever heard of Aerochrome? It’s a unique type of color infrared film, originally created for the US military and designed for surveillance planes. Photos taken with Aerochrome film show trees and other vegetation in vivid reds and pinks, creating images that aren’t quite like anything else.
Sadly, Aerochrome hasn’t been made for over a decade. What’s an enterprising hacker with a fascination for this unobtainable film to do? [Joshua] resolved to recreate it as best he could, and the results look great!
Aerochrome isn’t quite the same as normal film. It is sensitive to infrared, and photos taken with it yield a kind of false color image that presents infrared as red, visible reds as greens, and greens are shown as blue. The result is a vaguely dreamy looking photo like the one you see in the header image, above. Healthy vegetation is vividly highlighted, and everything else? Well, it actually comes out pretty normal-looking, all things considered.
Why does this happen? It’s because healthy, leafy green plants strongly absorb visible light for photosynthesis, while also strongly reflecting near-infrared. This is the same principle behind the normalized difference vegetation index (NDVI), a method used since the 70s to measure live green vegetation, often from satellite imagery.
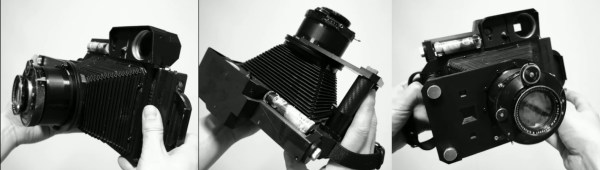
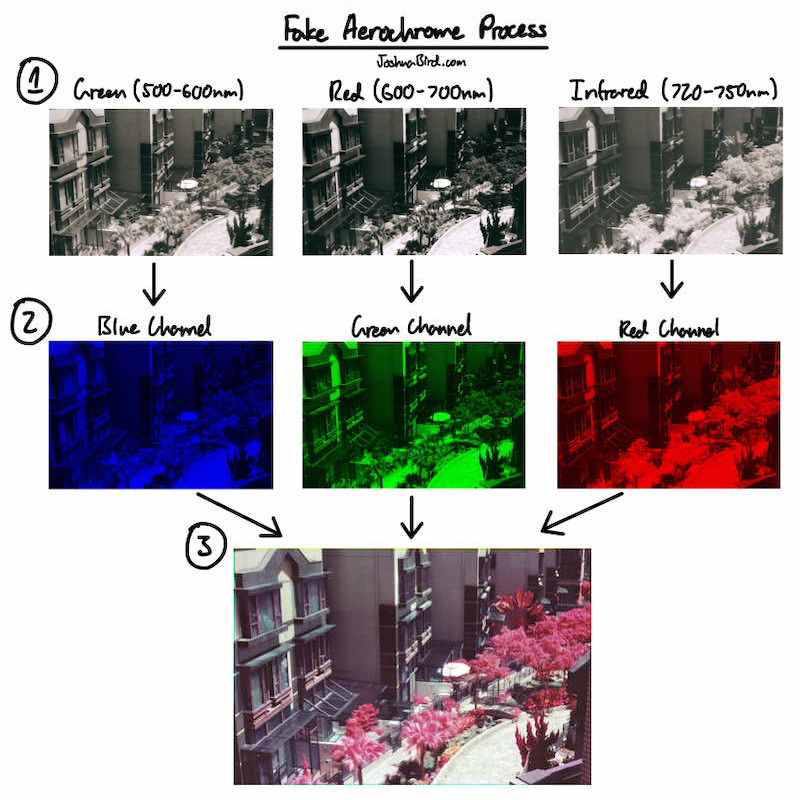
Aerochrome may be out of production, but black and white infrared film is still available. [Joshua] found that he could re-create the effect of Aerochrome with an adaptation of trichrome photography: the process of taking three identical black and white photos, each using a different color filter. When combined, the three photos (acting as three separate color channels) produce a color image.
To reproduce Aerochrome, [Joshua] takes three monochromatic photos with his infrared film, each with a different color filter chosen to match the spectral sensitivities of the original product. The result is a pretty striking reproduction of Aerochrome!
But this method does have some shortcomings. [Joshua] found it annoying to fiddle with filters between trying to take three identical photos, and the film and filters aren’t really an exact match for the spectral sensitivities of original Aerochrome. He also found it difficult to nail the right exposure; since most light meters are measuring visible light and not infrared, the exposure settings were way off. But the results look pretty authentic, so he’s counting it as a success.
We loved [Joshua]’s DIY wigglecam, and we’re delighted to see the work he put into re-creating an authentic Aerochrome. Fantastic work.